Bring on the Bordeaux! – A Home Wine Making Experience (3)
It’s all in the yeast
We waited for our must to come up to a temperature of about 60 degrees and added our yeast starter, opti red, and tannin ft rouge. Below are our reasons for these additions.
Yeast occurs naturally on the skins of all wine grapes. If they are left alone, these yeasts will ferment the juice into wine. Some winemakers let the “wild” yeast ferment the juice. We however, use cultured yeasts. This is because we received grapes from multiple vineyards and the different strains of wild yeast will fight for the sugar or their “food”. This can cause the wine to not fully ferment and result in a stuck fermentation because of all the competition between yeasts.
The yeast we chose was FX10. We chose FX10 because it is a vigorous fermenter. It enhances the mouth feel to be big mid-palate with major fruit concentration. The wine will have notes of intense fruits while maintaing a soft, silky mouth feel.
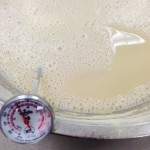
To kick off pitching our cultured yeast we heated up a bowl of distilled water to 110 degrees. Dissolved a tablespoon of sugar in the water (the sugar helps the yeast go from a “freeze dried state” to a “living, wet state”). Added 72 grams of GoFerm. We let the GoFerm sit alone until the temperature was 104 degrees. Then we added the FX10 yeast. The whole process takes about 15 minutes. The bubbles in the photo below are proof that the yeast is awake and working.
Before we mixed our yeast starter in with our must, we added our opti red and tannin ft rouge (pictured below). The opti red helps extract more color from the skins. The tannin helps create a better mouth feel and more complexity in the wine. All you need to do to add this is dilute them in distilled water and mix into the must.
Below is a photo of us adding the yeast starter to the must. We took juice from the must and mixed into the yeast starter first. We did not just dump it in. In our opinion, it is better to try to make it all “one organism” instead of dumping into the must right away. It makes for a smoother start to fermentation. Once the additives and yeast were added we punched down the cap.
Now we monitor the must’s temperature, brix level, and smell. If there are any off odors we want to make sure to deal with them right away.
Thanks again for stopping by. Next time we will get into DAP and when to add oak additives.
Cheers ~ CM & FJ
Bring On The Bordeaux! – A Home Winemaking Experience (2)
So before we start going into how our wine is doing, we wanted to outline some winemaking terms. Here’s a mini wine vocabulary lesson.
Degrees Brix: Expresses the percentage of sugar by weight. This scale is on a Triple Scale Hydrometer. Measuring the Brix by using a hydrometer will help you determine the level of alcohol you wish to produce in your wine.
pH: This is the potential Hydrogen ion. The pH scale spans from 0, representing extreme acid, to 14, representing an extreme base or alkai. For winemaking purposes only the 0-7 scale is considered and wine should between 3-4. The more intense the wine acid is, (the lower the number) the less free sulfite is needed to afford proper protection and hence wine stability.
Total Acidity: This measurement refers to the amount of acid that is in your wine in grams/liter of percent of volume. Ideally, your TA should be between 0.65%-0.85% for white wine and 0.60%-0.80% for red wines. If the acid is too low your wine is susceptible to bacteria and spoilage. If it is too high your wine will taste too tart.
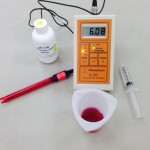
We took the must out of the cooler on 10/28 and waited for the must to heat up. Once the must started to heat up we took our measurements. The Brix were 25.5, TA was 5.985, and pH was 3.88. My pH is a little on the higher side. My TA is pretty good for a dry red and my Brix are at a great level to make a 12.5% alcohol per volume wine.
Some tips for taking your pH and TA measurements. I would suggest purchasing some type of all in one SO2, pH, and TA testing equipment. To test TA on your own can be very complicated and not very accurate. I would suggest looking into a Vinmetrica kit. They do all of the tests and it’s easy and accurate.
Also, try not to get distracted and mix up your solutions like I did. It took me 30 minutes to get the correct TA reading because I was mixing in the wrong solution. #airheadmove
Thanks again stopping by and checking out our winemaking process. The next post will concentrate on yeast, yeast nutrient, and other additives that help the wine during fermentation.
Cheers ~ CM & FJ
Bring On The Bordeaux! – A Home Winemaking Experience
This year we are making Bordeaux Blends. One blend is made up of 68% Cabernet Sauvignon from Oakville, 14% Petite Verdot from Atlas Peak, and 18% Merlot from Caneros, Napa Valley. This blend costs more than my first our first cars so we are praying we don’t screw them up. Lol
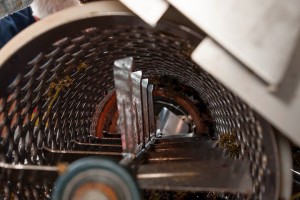
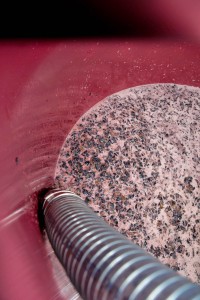
We crushed the grapes on 10/22. It was a deep, dark, and beautiful color purple.
There is more information to come! Stop by for the next post updating our wine making process!
Next we will be discussing Degrees Brix, Total Acidity, and pH Levels
Until next time….
Cheers ~ CM & FJ
Images via D. Pelletier


Recent Comments