


A Legacy in Every Bottle: The Alves Family Story

At Musto Wine Grape Company, we love sharing the stories behind the winemakers who turn grapes into lasting family traditions. One of those stories belongs to Justin Timpano and his father-in-law Al Alves, whose winemaking roots trace back more than 60 years to the small Portuguese village of Carvalheiro. What began with Al’s grandfather crushing grapes by hand in a stone bowl has grown into a multi-generational passion carried from Portugal to Connecticut.
Justin, tell us the story of your wife’s (Melissa’s) family and how they first got into winemaking:
My wife’s father Al and Uncle Angelo are from a small village in Portugal called Carvalheiro. It’s about an hour and a half’s drive northeast of Lisbon. It’s a beautiful area where they still own the house they grew up in, acres of farmland and hundreds of cork trees. Wine making has been a part of the Alves family for over 60 years. It started with Al and Angelo’s grandfather making wine by crushing grapes in a stone bowl by hand. Al and Angelo, along with their brother Nelson carried the tradition to states and typically made a red field blend they would bottle or keg and drink during Sporting (soccer) games and family parties. I remember the first time I saw the process at Melissa’s grandmothers house in Hartford, big blue drums, manual crusher and a homemade wood punch down. Their wine was so good and the process looked like so much fun so I asked to join them about 12 years ago and have been making wine ever since. I now make the family wine and am really proud to carry on their tradition.

Al, Angelo and I this summer at the local store in Carvalheiro having a 50 cent glass of wine

Al walking next to the family cork trees

How did you and the family both start making wine together?
I had been making wine for 5 or 6 years when Mike (my brother in law) and I went to Jonathan Edwards Winery one afternoon with our family. Mike at that point didn’t have a lot of exposure to red wine. After a few glasses of their 2017 red zinfandel, Mike was interested in joining and I wanted to do what Al, Angelo and Nelson did and make wine making a family tradition. Mike has fallen in love with the process and now hosts a podcast called Vino Volley, a show about soccer and wine. Neither of us are Portuguese but we both love Portugal and our wine is inspired by reds we have tasted from vacations and the Portuguese style field blends made by the family for generations.

How have you’ve gotten more family and friends involved over time?
I feel like every home wine maker who has friends and family that drinks and enjoys their wine somehow ends up growing their group. At one point, we had 8 or 9 guys making wine at my house until we all had kids and decided to break up the band. My good friends Kevin Lawton and Milton Quaresma now have their own setups at their houses and continue to make great wine. Kevin makes high end Cabs and Milton is on to Italian reds. We all still regularly get together and bring our favorite wines to share. I think and hope wine will keep us connected as our kids grow. This year we are expanding our team again with my Dad, Jim, making a rosé and cousins Danny and Bruno joining in on our red blend.

Below are pictures of Kevin and his family making thier high end cabernet at home!


For Justin and Al, winemaking is more than a hobby—it’s a thread that connects generations, cultures, and memories. From a small stone bowl in Portugal to a family cellar in Connecticut, every crush, every bottle, and every shared glass is a tribute to the love, laughter, and legacy that started it all. It’s stories like theirs that remind us why we do what we do at Musto Wine Grape Company—because behind every great wine is a family, a friendship, and a tradition worth preserving.
🍷 Want to start your own winemaking story?
Musto Wine Grape Company is here to help you every step of the way, from grapes and juices to equipment, education, and support. Visit www.juicegrape.com or stop by to get started.
The Guerriero Family Legacy: From Grapes to Glass


Tell us about your winery/winemaking/vineyard history and/or story
For over six decades, the Guerriero Family has been packing and shipping premium
California juice grapes. Our family started packing and shipping juice grapes in the Lodi region of the San Joaquin Valley in 1953 and eventually expanded to the Central Valley. This legacy began with Tony Guerriero, who turned a Bronx produce truck into a cross-country wholesale operation—and it continues today with third and fourth generation family members, Joe and his sons Joey and Tony Guerriero, and his grandchildren Dominic and Giovanna Guerriero. Many of our distributors today are the children or grandchildren of buyers our father and grandfather once served. This is not just business—it’s generational trust. In 2018, Cry Baby Wine was founded as a tribute to a dream that spanned three generations. Joe Guerriero brought to life what his grandfather and father had long envisioned: a locally hand-crafted, family-owned winery offering award-winning wines for every palate.
Across the U.S. and Canada, customers look for “the baby who is crying”—our Cry Baby label. It has become our signature, known for quality, flavor, and family pride. Many home winemakers swear by our grapes and wines, and that loyalty is earned with every bottle. Our experience in juice grapes runs deep. From pruning to harvest, we partner with some of California’s most respected farmers to ensure premium grape quality. We personally supervise vineyard selection and care, harvest timing, packing and shipping, and cold chain management. Our grapes are picked at peak maturity, forced air cooled to 32°F and shipped with the utmost care to preserve freshness and integrity.
What excites you about working with Barbera D’Asti in the Central Valley, and how does this region’s climate and terroir influence the grape compared to its traditional Italian roots?
What excites us about working with Barbera in the Lodi region of the San Joaquin Valley is how beautifully it bridges old-world character with new-world energy. In its native Asti, Barbera is prized for its high acidity, red-cherry brightness, and food-friendly elegance. Here in the Lodi region of the San Joaquin Valley, our warm days and fertile soils give the grape a riper profile—lush blackberry and plum alongside that signature tangy cherry core—while the natural acidity keeps everything lively and balanced. The result is a Barbera that’s both approachable and expressive, carrying a sense of place while honoring its Italian heritage. That contrast and harmony are what make it such a rewarding grape to work with.
What flavor profiles and structural elements (acidity, fruit notes, tannins) stand out most in Central Valley Barbera D’Asti?
San Joaquin Valley Barbera d’Asti–styled wines showcase ripe red and black fruit, lively acidity, smooth tannins, and a juicy, food-friendly structure, a California-sun expression of a naturally bright and approachable grape.
Are there qualities that make Barbera D’Asti especially approachable—or tricky—for home winemakers and smaller wineries?
Barbera is actually one of the most approachable grapes for smaller wineries and even home winemakers because of its naturally high acidity, juicy fruit, and soft tannins. It doesn’t require aggressive tannin management or years of barrel age to taste balanced—it can be bright, smooth, and food-friendly fairly early on. The tricky part is that the same acidity that makes it refreshing can feel sharp if the grapes aren’t fully ripe, and its lighter skin means you need to be thoughtful about color and oak use. But with a little care, Barbera rewards you with wines that are both expressive and inviting.
What techniques or approaches do you recommend to bring out the best in Barbera from the Central Valley? (e.g., managing acidity, oak vs. stainless, blending choices)
To bring out the best in San Joaquin Valley Barbera, we focus first on balance in the vineyard, picking when acidity is right, but fruit has developed full flavor. In the cellar, stainless steel fermentation keeps the fresh cherry and raspberry notes alive, while a touch of neutral or lightly toasted oak can add roundness without overwhelming its natural brightness. We also keep maceration gentle to avoid harsh tannins, since Barbera’s strength is its acidity and fruit, not heavy structure. Some producers blend in a small number of darker varietals like Syrah or Petite Sirah to boost color and body, but even on its own, Barbera really shines when you let its lively character lead the way.
Are there any misconceptions or common mistakes you see when people work with Barbera D’Asti that you’d like to clear up?
One common mistake with Barbera is treating it like a high-tannin grape. Winemakers sometimes over-extract, trying to pull out more structure, but that just makes it rough. Another is leaning too heavily on new oak, which can bury the fruit and throw the acidity off balance. And perhaps the biggest misconception is thinking its high acidity is a flaw—it’s actually Barbera’s greatest strength, the reason it’s so vibrant and food-friendly. In the San Joaquin Valley, that balance of ripe California fruit with naturally bright acidity is exactly what makes Barbera so rewarding when handled with a light touch.
If you’re looking for a wine that offers the best of both worlds—old-world elegance with a California twist—Barbera d’Asti is it. With its vibrant fruit, smooth texture, and food-friendly acidity, it’s a grape that feels right at home on the dinner table or shared among friends. Whether you’re a seasoned winemaker searching for a reliable varietal to craft, or simply a wine lover ready to explore something new, Barbera d’Asti delivers balance, character, and a taste of tradition with every sip. Don’t miss the chance to bring a little Italian heritage and California sunshine into your glass—Barbera is waiting for you. Call 860-278-7703 or email sales@juicegrape.com
New Product Spotlight: Effergran


Introducing Effergran, the effervescent granulated potassium metabisulfite that’s your wine’s best friend during aging! This powerhouse product is a potent antioxidant and antimicrobial agent, designed to protect your wine by rapidly releasing SO2, minimizing oxidation, and ensuring a stable aging process.
Adding Effergran to your wine is not just effective—it’s a bit of a show! Imagine the satisfying fizz of an Alka-Seltzer tablet in water, but for your wine. As soon as Effergran hits the surface, it bubbles and dissolves quickly, effortlessly distributing SO2 throughout your wine. No pump overs, no hassle—just a seamless, thorough integration that keeps your wine in top condition.
Elevate your winemaking process with Effergran, where efficiency meets a touch of fun, all while maintaining the highest standards of professionalism. Cheers to better aging and exceptional wines!
Where to start when Adjusting and Balancing Must

There are two main steps to Adjusting and Balancing Must, which consist of adjusting your Brix and adjusting your pH/TA. We’ll cover what they are, what they mean, and how to do both.
Where to start when Adjusting and Balancing Must
Firstly, you’ll need your starting numbers. You’ll have to measure your Brix, pH, and TA. To measure your Brix, you can use a Triple Scale Hydrometer. To measure your pH and TA, you’ll need a titration setup or an acid test kit, and some mathematical skills. If I lost you at math skills, don’t fret – Musto Wine Grape Company offers a wide variety of testing including pH and TA testing!
What are Brix, pH, and TA?
Brix is a measurement of the sugar content within your must. This indicates the degree of the grapes’ ripeness at harvest. The higher the Brix, the higher the alcohol content in the finished wine. To get an alcohol conversion level, simply multiply your Brix by .55. pH is the measurement of the ripeness in relation to acidity. A low pH wine is crisp and tart, while higher pH wines are more prone to bacteria growth and spoilage (3.9 pH and higher). Wine generally falls between 3 or 4 on the pH scale, with 3 – 3.4 being the average for white wines and about 3.3 – 3.6 for reds. Finally, TA is measuring acidity by volume. TA stands for Total Acidity. Usually, the higher the pH the lower the TA and vise-versa. This is not always the case though, and you may need to make adjustments to your must. Hold tight, how to do that is next!
How to Adjust and Balance Must
If you need to lower your TA, we recommend using Potassium Bicarbonate. Adding Potassium Bicarbonate to your must will reduce acidity. Make sure to add slowly, as it foams significantly. It is also recommended to add to water first, then add the mixture to your must. Under typical conditions and normal use, Potassium Bicarbonate neutralizes Tartaric Acid. It’s best used when the TA is high and pH is low, due to the fact it causes an increase in pH. It also adds potassium to the must and that requires cold stabilization. Potassium Bicarbonate can contribute to tartrate instability in wine, which is also why cold stabilization is recommended. It is also good to note that the addition of Potassium Bicarbonate will cause a reaction in the wine which will vary from wine to wine and the pH will not shift in a predictable manner. Bench trials should always be done first when attempting to adjust pH.
To lower pH, the most effective method is to add Tartaric Acid. If both TA and pH are too high, tackle the pH. The pH is more critical to the wine chemistry. This addition also requires bench testing to find the best addition.
To raise the brix, we can add table sugar to the must, be sure to dilute the sugar first with hot spring water before adding it to the must or juice. There are good formulas available to calculate sugar required based on the brix you are trying to achieve.
To lower the brix, we will add spring water to the must to “dilute” the high sugar content in the must or juice. Just beware there is a limit on how much water you can add to a must or juice before you reduce the wine quality. There are also good formulas for this adjustment too.
For exact measurements and instructions, follow the directions on the manufacturer’s packaging, contact a winemaker at Musto Wine Grape Company for assistance, or download our Full Class offering at WinemakingInstructions.com.
We’re here to help when you need it
As stated above, Musto Wine Grape offers a variety of products as well as services including testing and support. Email winemaker@juicegrape.com or call (877) 812 – 1137 to speak with someone who can assist you.
What is Cold Soaking?

Cold soaking, also known as pre-fermentation maceration, is a winemaking technique that is widely used in the production of red wines. It involves holding crushed red grapes at a low temperature and takes place before fermentation.
Why should I be cold soaking?
Cold soaking red grapes such as Pinot Noir, Cabernet Sauvignon, Merlot, and more has many benefits. The aim of a cold soak is to extract more aromas, aroma intensity, and color from the skins of the grapes. In red wines, it makes for a more intensely fruity and deeper-colored wine; but it also makes for a fuller wine with increased palate weight. For example, in Pinot Noir, cold-soaking extracts the softer, more supple tannins to help produce a silky mouthfeel. It also helps emphasize the lush fruit notes like dark cherry and plum. Yum!
But wait; there’s more: Firstly, time in a cold soak, even a brief one, lets a winemaker get a much better handle on the fruit at hand, enough time to get a tank thoroughly mixed, time for any raisins in the fruit to reveal their sugars, time to get more trustworthy readings on basic wine chemistry than the numbers grabbed in the rush of fruit delivery. And second, extracting some goodies early in the cycle leaves open the option of pressing slightly early and working off the last few Brix in barrel, again minimizing the influence of nasty seed tannin.
How do I do it?
It is important to maintain a chilled temperature because if the must gets too warm it can begin fermenting. To properly cold soak, you need to maintain a temperature of about 35-45 degrees Fahrenheit. This could be difficult for home winemakers without a chiller system. Try using dry ice or ice tubes ser in the wine to the wine as cold as you can. Remember, the point of the low temperature is to be sure the yeast cannot get started.
This is usually done for about 5 days, though the length of time varies according to the winemaker’s goals and the grape variety. You should add enzymes to help the extraction move along, and sulfur dioxide to inhibit unwanted microbial activity. Using inert gas to prevent oxidation is also a great idea. Inert gases, known as carbon dioxide, nitrogen, and argon are necessary for winemaking. They are used to supplant air in places where air could come into contact with the wine.
Need help with cold soaking your grapes?
Musto Wine Grape Company is here to help. Give us a call at (877) 812-1137 to speak with one of Musto’s Crush Crew members. We’re here to provide you with the best quality wine grapes, juices, and equipment, as well as the support to ensure you are successful in making the wine of your dreams!
EC-1118 Wine Yeast: Product Spotlight

What makes EC-1118 so great?
EC-1118. It’s an excellent strain to be used in a wide variety of wines. This includes red and white, including sparkling, fruit wines, late harvest wines and cider. It has a strong competitive character that will inhibit wild yeasts, and restart stuck fermentation due to it’s great alcohol and sulfate tolerance. Being a very neutral yeast, it will have very little effect on the varietal character of the grape. It ferments fully, and flocculates well, producing compact lees. It has extremely low production of foam, volatile acid and hydrogen sulfide (H2S) and it ferments well over a wide range of temperatures (50 to 86 degrees Fahrenheit), making it one of the most favorable and popular wine yeasts.
Considering EC-1118 for your next wine batch? Click here to be directed to our store to purchase online, or call us at (877) 812 – 1137 to place an order with one of our associates. We can also provide a step-by-step instructional for re-hydrating your yeast and adding it to your wine. Whether you’re a newbie home winemaker or a pro, we’re here to help!
Pairing Wine with Salmon

What kind of wine should you pair with your salmon, and why?
It mainly comes down to how you prepare the salmon that really determines what wine to pair with it. Salmon is a fatty fish, so it needs a stronger wine to stand up to it. It has rich fats, making a bitter and acidic wine a good general match. Salmon itself is not acidic, but those rich fats work well in place of acidity, and if you add a citrus glaze it would make the acidity in the wine harmonize better. Salmon is naturally mild but also vibrant, its actually able to work well with many different kinds of flavors.
Deciding on a wine to go with your Salmon can be complex because of all the different options in the types of salmon and how it’s prepared, so we decided to include various types of combinations because everyone has a different taste and preference!
Pairing Wine with Salmon and how it varies with various preparation methods
It’s not usual to pair a sweet wine with salmon, though a sweet glaze can call for a semi-dry wine. Reach for a rose or even a semi-dry Riesling, as both have enough lift to help enhance the sweet glaze but also pair the sweeter elements to the glazed salmon.
Reds, whites and even a rose can work as long as they are low in tannins and higher in acidity. A fuller white wine works well with pan fried salmon which becomes heavier and firmed when prepared this way.
Heavier salmon dishes like smoked salmon or ones with creamy and buttery sauces can call for a sparkling wine. Sparkling wines have the ability to lift up those heavier flavors and textures. For smoked or grilled salmon, try a prosecco. Because the acidity will pull the rich flavors of the salmon, it will also lift the heavier smokey flavors too. For a cream sauced salmon dish, grab some Pinot Grigio. This is a dry wine with a smooth finish and has the perfect amount of structure to complement but also add a textured layer to the creamy dish.
For baked or poached salmon, a classic dry wine with medium body and high acidity like a Cabernet Sauvignon from Sonoma would be an excellent pick. This is a medium bodied red wine with heavier levels of acidity but also a smooth, fruity finish making it a great option. Also, wine aged in barrels can have a real punch of flavor which would further enrich the already rich, natural fats and fresh flavors of the salmon.
Want to make your own wine to go with your next pairing?
Musto Wine Grape Company is here to help. Give us a call at (877) 812-1137 to speak with one of our Crush Crew members to get you on track to making the wine of your dreams!
Air Fryer Buffalo Cauliflower Bites

Air Fryer Buffalo Cauliflower Bites
If you’re obsessed with wings like I am, but are looking for a healthier alternative, try these air fryer buffalo cauliflower bites! Cauliflower has a similar texture to potatoes, but without all the carbs. There are a few way you can prepare these, but I’ve been obsessed with my air fryer lately so that’s what I’ll be using for this recipe.
What you’ll need:
About 5 cups of cauliflower, chopped into florets
Buffalo Sauce – Frank’s Mild Buffalo sauce is my all time favorite!
Unsalted butter
How you’ll do it:
Spray the cooking basket in the air fryer with some non stick cooking spray
Add the cauliflower and cook at 375 degrees for 15 minutes. Toss the cauliflower and add back in for about 5 minutes if they aren’t crispy yet. (Try cooking the cauliflower in smaller batches if they come out soggy – I’ve noticed if you over pack the air fryer they tend to not crisp evenly.)
Add cold butter to the warmed buffalo sauce and add to a large bowl, and pour the sauce mixture on stop and toss to fully coat.
Serve with blue cheese dressing for dipping and carrots and celery sticks to serve on the side.
The impossible pairing:
Yes, you can pair a wine (actually, quite a few!) to go with your buffalo dishes. A slightly sweet white wine will compliment the buffalo sauce the best. Reach for a Champagne, Moscato D’Asti or a Riesling. The fruity flavors and the low level of tannins really works with the buttery spice and they also help with the heat!
Wine Barrel Care and Maintenance

Winemaking is an investment in most winemakers’ eyes. One of your most tedious but worthwhile investments will be a wine barrel. They are expensive to produce and challenging to maintain, but the impact it can have on the quality of your wine makes it worthwhile. This article will cover the anatomy of the barrel, how to clean it, and the maintenance you should familiarize yourself with if you plan on owning one.
Inspecting your barrel
The first thing you should do as soon as you receive your new (or used) wine barrel is to inspect it. You should start by visually examining the barrel’s exterior. Keep an eye out for broken chimes, dented or displaced heads, and misaligned staves. Also look for scrapes, gouges, and any torn or burred hoops. Next, you’ll need to inspect the inside of the barrel. The inside should be completely dry and free of mold. The area where the head meets the staves can be a breeding ground for mold, which usually occurs from a combination of standing water and exposure to starch used in the construction of the barrel. Lastly, observe the aroma of the barrel. The barrel should smell clean, fresh, oaky, and/or toasty. Other than sulfur, there should be no chemical odors and certainly no aroma of spoilage.
Prepping your barrel for wine
This will include one last inspection of your barrel, which is testing your barrel for leakage first. You need to rehydrate your barrel, or “swell” it to prepare it for wine, but it’ll kill two birds with one stone allowing you to inspect for any possible leaks. There are two ways to swell your barrel, the first option being the hot water/quick soak method. The second option is a coldwater/high volume soak. The only main difference is the speed of which the soaking gets done.
Hot water/quick soaking consists of filling the barrel with 3-5 gallons of filtered, chlorine-free, hot water. The ideal temperature for this would be about 180 degrees Fahrenheit. Use caution when using water hotter than this, or using high-temperature steam as this can degrade and damage the barrel. Once you’ve filled your barrel, place your stopper in the bunghole. Rotate the barrel from side to side, completely wetting the barrel’s interior. Stand the barrel upright on its side (one head facing down, the other up) and let stand for about 4 hours to rehydrate the head. Repeat with the opposite side for an additional 4 hours. During these processes, make sure to continuously check for any leakage. If there are no leaks, turn the barrel so it’s bunghole is facing toward and allow to drain and dry completely.
Coldwater/high volume soaking calls for filling he barreling completely with filtered, chlorine-free, cold water. Once you’ve filled the barrel completely, place your stopper in the bunghole and let the barrel stand for about 24 and 48 hours. Once no leaks are present, empty the barrel and allow it to drain and dry completely.
If your barrel continues to leak after multiple swelling attempts
If after either of these methods are complete the barrels still exhibit leaks, repeat the swelling process as it’s possible it just needed more time to swell. There are some additional methods of swelling you can attempt that are more aggressive but can possibly help seal any leaks.
The submerging method:
We have found that sometimes soaking the interior and exterior of the barrel simultaneously can help to get it swelled. Start by placing the barrel upright on one head in a large container. Fermentation tubs work great for this. Next, fill the barrel halfway until water is seeping from the bunghole, then fill the container it’s in up to the same bunghole. Let the barrel sit overnight, then remove all water from the barrel and container, flip the barrel onto its other head and repeat the process. Once emptied, use the cold water method and check for any leaks.
The hoop tightening method:
The hoops on a barrel can become loose when it becomes dry. Using a hoop driver, or if no hoop driver is available, a cold chisel to hammer the hoops toward the center of the barrel. Workaround the barrel, hammering firmly at around one-quarter increments of the circumference. It may be necessary to remove the hoop nails to allow the hoop to slide tighter onto the barrel.
The Barrel Sealing Wax method:
Beeswax can be used to seal small leaks. The first step is to mark any leaks with a pencil or chalk. To properly apply sealing wax, first make sure the barrel is dry. Next, gently sand leaking areas with rough sandpaper. Knead a small piece of beeswax in your hand and work the wax into the area using a putty knife. Beeswax will not change the flavor of your wine and is completely safe to use.
After several attempts, if your barrel continues to leak, it is important to call your sales rep immediately. Empty the barrel, allow it to drain, and completely dry. Next, you have to treat each barrel with 10-20 grams of sulfur sticks (or the equivalent gas form) and re-insert the stopper. This will ensure that you are still maintaining the integrity of the interior of the barrel.
Storing your barrels
Ideally, barrels should always have wine in them. If you are in between winemaking projects though, or you’re waiting for harvest, there are a few guidelines you should follow when storing your barrels. If you are storing a new barrel, store in a cool, humid environment. Some new barrels arrive with their plastic film still on them – if yours does, keep that film on if you plan to store them for a significant amount of time. The process of storing a used barrel requires a bit more work.
If you are ready to empty your barrel, empty it and wash the barrel out with hot water until all of the deposits and tartaric crystals have been dissolved and emptied. Repeat if necessary. If you have access to larger volumes of hot water, fill the barrel completely and let sit overnight. Once emptied, rinse the barrel with cold water and let it dry with the bunghole facing down. Allow to completely dry, and then burn sulfur sticks or discs in the barrel and place stopper in the bunghole. This burning treatment should be repeated every six weeks or so until you are ready to use the barrel again. Finally, store your barrels in a cool, humid environment.
Other tips and tricks for maintaining your barrel
Never leave water in a barrel for more than two days. If the swelling process takes longer, empty, and refill the barrel with fresh water to avoid mold and spoilage micro-organism growth.
A full barrel is a happy barrel! If possible, try to refill your barrel immediately after it has been emptied and cleaned. This way you will never have to re-swell it and there is much less opportunity for bacteria and other spoilage organisms to get into the barrel.
Never use chlorine in or around a barrel, or any winemaking equipment for that matter. TCA, also known as cork taint, can infect much more than just corks. A barrel is a vulnerable place for TCA to be absorbed into due to the spores, molds, and natural phenolics of the wood.
When in doubt, throw it out – or repurpose your barrel for something other than winemaking. If you suspect that there are spoilage organisms in your barrel even after you have tried ozone/steam/proxycarb, (you can find info on these here) err on the side of caution and retire it. You can ruin any future wine you put into such a barrel and it can possibly infect the rest of your winemaking equipment if they are stored near them. Barrels can be repurposed into planters, furniture, and more!
Where can I purchase wine barrels?
Musto Wine Grape Company carries a few categories of wine barrels including new and used American and French wine barrels! Email sales@juicegrape.com or call (877) 812 – 1137 to speak with one of our Musto Crush Crew members to get your order placed, or if you need any assistance in using, maintaining, or storing your barrel. We also offer ozoning treatments if you are dealing with a problem barrel. We are here to provide everything you need to make the wine of your dreams, including the customer support to ensure your success!
Potassium Metabisulfite: Product Spotlight

What is Potassium Metabisulfite?
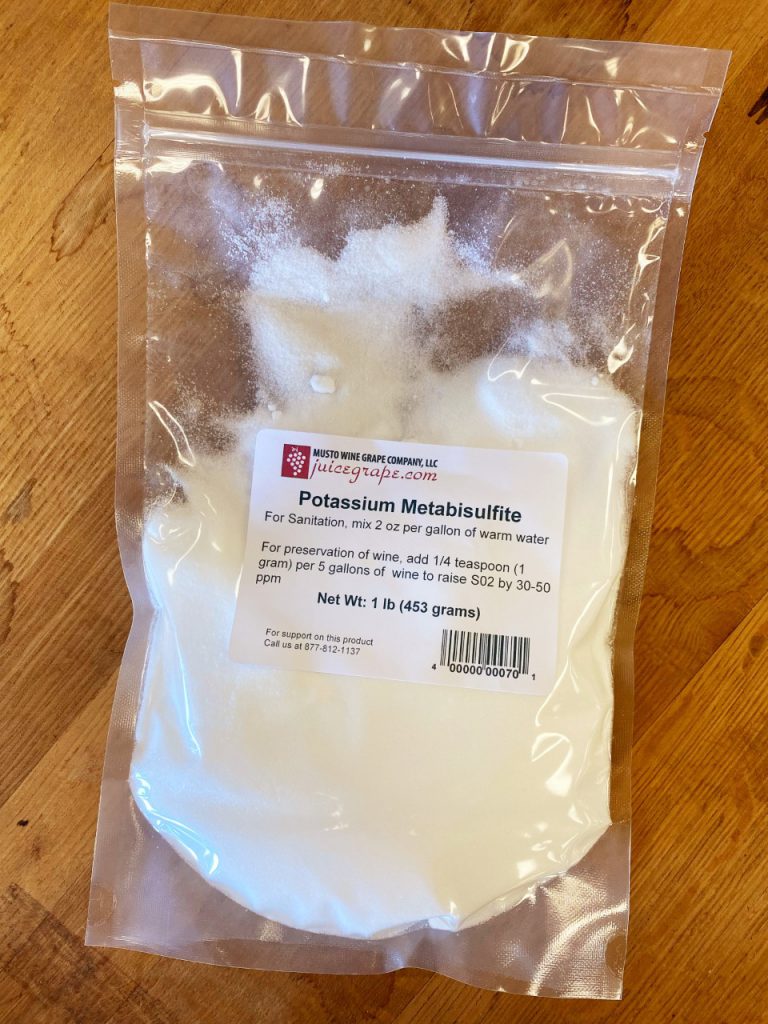
Potassium Metabisulfite is an antioxidant and sanitizer, and has several uses in winemaking. After crushing and de-stemming, it is used to help kill off any spoilage bacteria and natural yeast that may be present on the grapes or equipment. It also helps to preserve wine, specifically protecting it against oxidization.
Throughout the entire winemaking process, it’s important to measure your SO2 levels and adjust as needed to improve and lengthen the preservation of your wine. The exact amount needed to be effective is entirely determined by the pH of the wine. Also, free SO2 levels fall faster in a wooden barrel versus in glass or stainless steel tanks, so make sure you manage your SO2 levels very closely.
How do I use it?
If you are adding Potassium Metabisulfite to your must, the proper amount is ¼ teaspoon per 5 gallons of must. If you are making an SO2 sanitizing solution, add 8 teaspoons for every 1 gallon of water. Place into a spray bottle for quick and easy use. After cleaning your equipment and again before use, spray the solution generously and shake off/let any extra solution drip dry.
Potassium Metabisulfite has a shelf life of about one year if you are using it to add to your wine. If you have some that is over a year old, no worries! It still functions as a sanitizer, just make sure you separate and label each to avoid any mix ups.
Where can I get it?
You can find and purchase Potassium Metabisulfite here. Need assistance in using SO2, whether adding to your wine or sanitizing your equipment? Give us a call at (877) 812 – 1137 to speak with a sales associate who can help you!
Follow us on Instagram here and like us on Facebook here. For Virtual Winemaking Classes click here.
Recent Comments