


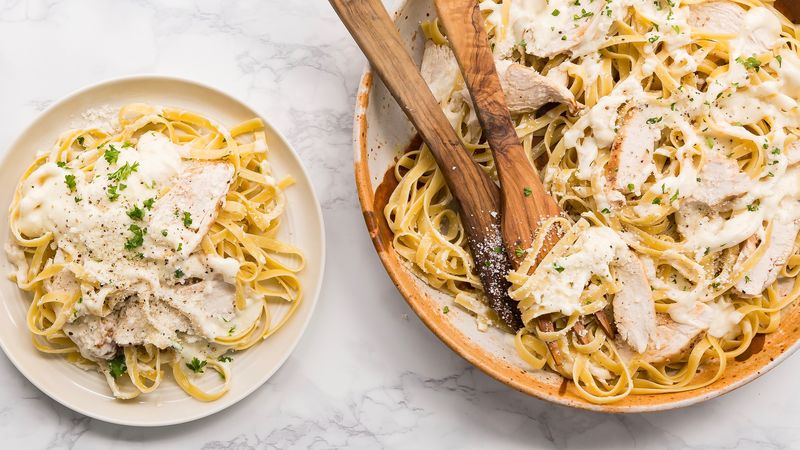
Frank’s Chicken Fettuccine Alfredo


GRILLED CHICKEN FETTUCCINE ALFREDO
For the chicken marinade
- ¼ cup extra virgin olive oil
- 2 tablespoons white balsamic vinegar or fresh lemon juice
- 2 table spoons fresh chopped herbs (basil, oregano, thyme, parsley)
- 1 large garlic clove, minced
- ¼ teaspoon salt
- ½ teaspoon fresh ground black pepper
- ¼ teaspoon crushed red pepper flakes
- 2 boneless, skinless chicken breasts
- Vegetable oil for oiling the grill plate
For the fettuccine and Alfredo sauce
- 8 ounces fettuccine pasta
- 1 cup heavy cream
- 1 cup whole milk, or half and half
- 3 tablespoons unsalted butter
- ½ teaspoon salt
- 1 teaspoon fresh ground black pepper
- 1 cup fresh grated parmesan cheese
- 2 tablespoons fresh chopped parsley, for garnish
Instructions
To prepare the marinated chicken:
- Mix all the marinade ingredients together (olive oil, vinegar, herbs, garlic, salt and pepper) in a gallon-size zipper-lock plastic bag. Add the chicken breasts and turn to coat. Refrigerate, turning a few times, for at least 3 hours up to 24 hours.
To grill the chicken (can be made ahead):
- Preheat gas grill on high with the lid closed for 15 minutes or until very hot. Clean the grill grate with a brush. Using tongs and paper towels soaked in vegetable oil, wipe the grates with the oil to prevent sticking.
- Turn the heat to medium and grill the chicken for about 6-8 minutes, then turn and continue cooking for another 5 minutes or until clear juices are visible and the chicken is cooked through.
- Tent the chicken with foil and allow it to rest for 15 minutes. Slice and keep warm while preparing the Alfredo sauce. The chicken can also be made ahead of time and refrigerated until needed. If refrigerated, bring the chicken to room temperature for 30-minutes before adding to the sauce. There is no need to rewarm as it will be added to the hot noodles and sauce in the end.
To prepare the sauce:
- Heat a large pot of water on the stove to cook the fettuccine while preparing the Alfredo sauce
- Pour 1 cup of milk, ½ cup of heavy cream and the butter in a medium sauce pan. Cook over medium heat until the mixture simmers. Reduce the heat to medium –low and simmer gently until the mixture is reduce to about ¾ cup, about 20 minutes. Off heat, stir in the remaining ½ cup of cream, salt and pepper.
- Meanwhile, add the pasta to the boiling water and cook until done (according to package instructions.) Reserve ¼ cup of the pasta cooking water then drain the pasta. Return the fettuccine back to the large pot and add 2 tablespoons of the reserved pasta water. Toss to coat and cover to keep warm.
- Return the cream mixture to simmer over medium-high heat, and then reduce to low and add the parmesan cheese. Cook over low heat until the parmesan is melted, about 2 minutes. Add the remaining 2 tablespoons of pasta water to the Alfredo sauce and pour over the cooked fettuccine. Toss the pasta and Alfredo sauce using tongs to mix. The sauce may seem a little thin but will thicken as it cools.
- Divide the fettuccine between 4 warm bowls and top with ½ a sliced chicken breast on each serving. Serve immediately garnished with chopped parsley leaves, fresh ground pepper and more parmesan if desired.
Notes
Alfredo sauce does not heat well in the microwave. If reheating Alfredo sauce on its own, allow for it to come to room temperature and then add hot pasta or vegetables to the sauce. That should warm it enough. If necessary, you can reheat in the microwave on low power. Do not overheat.
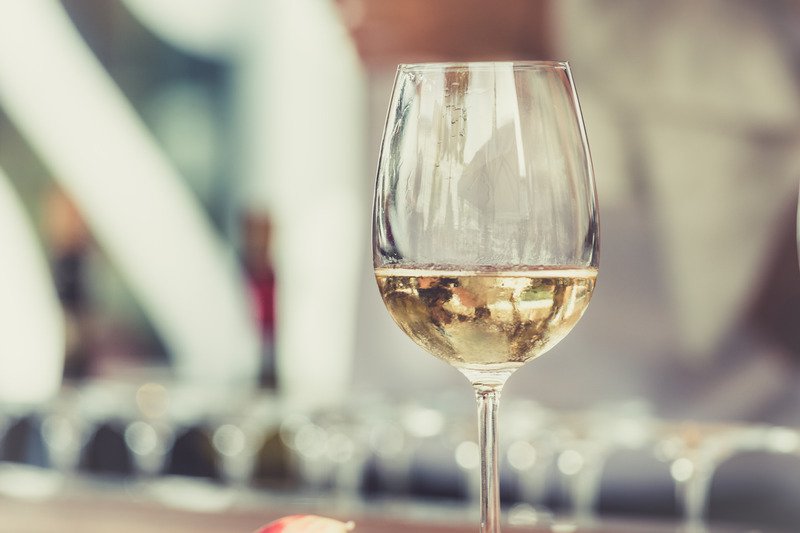
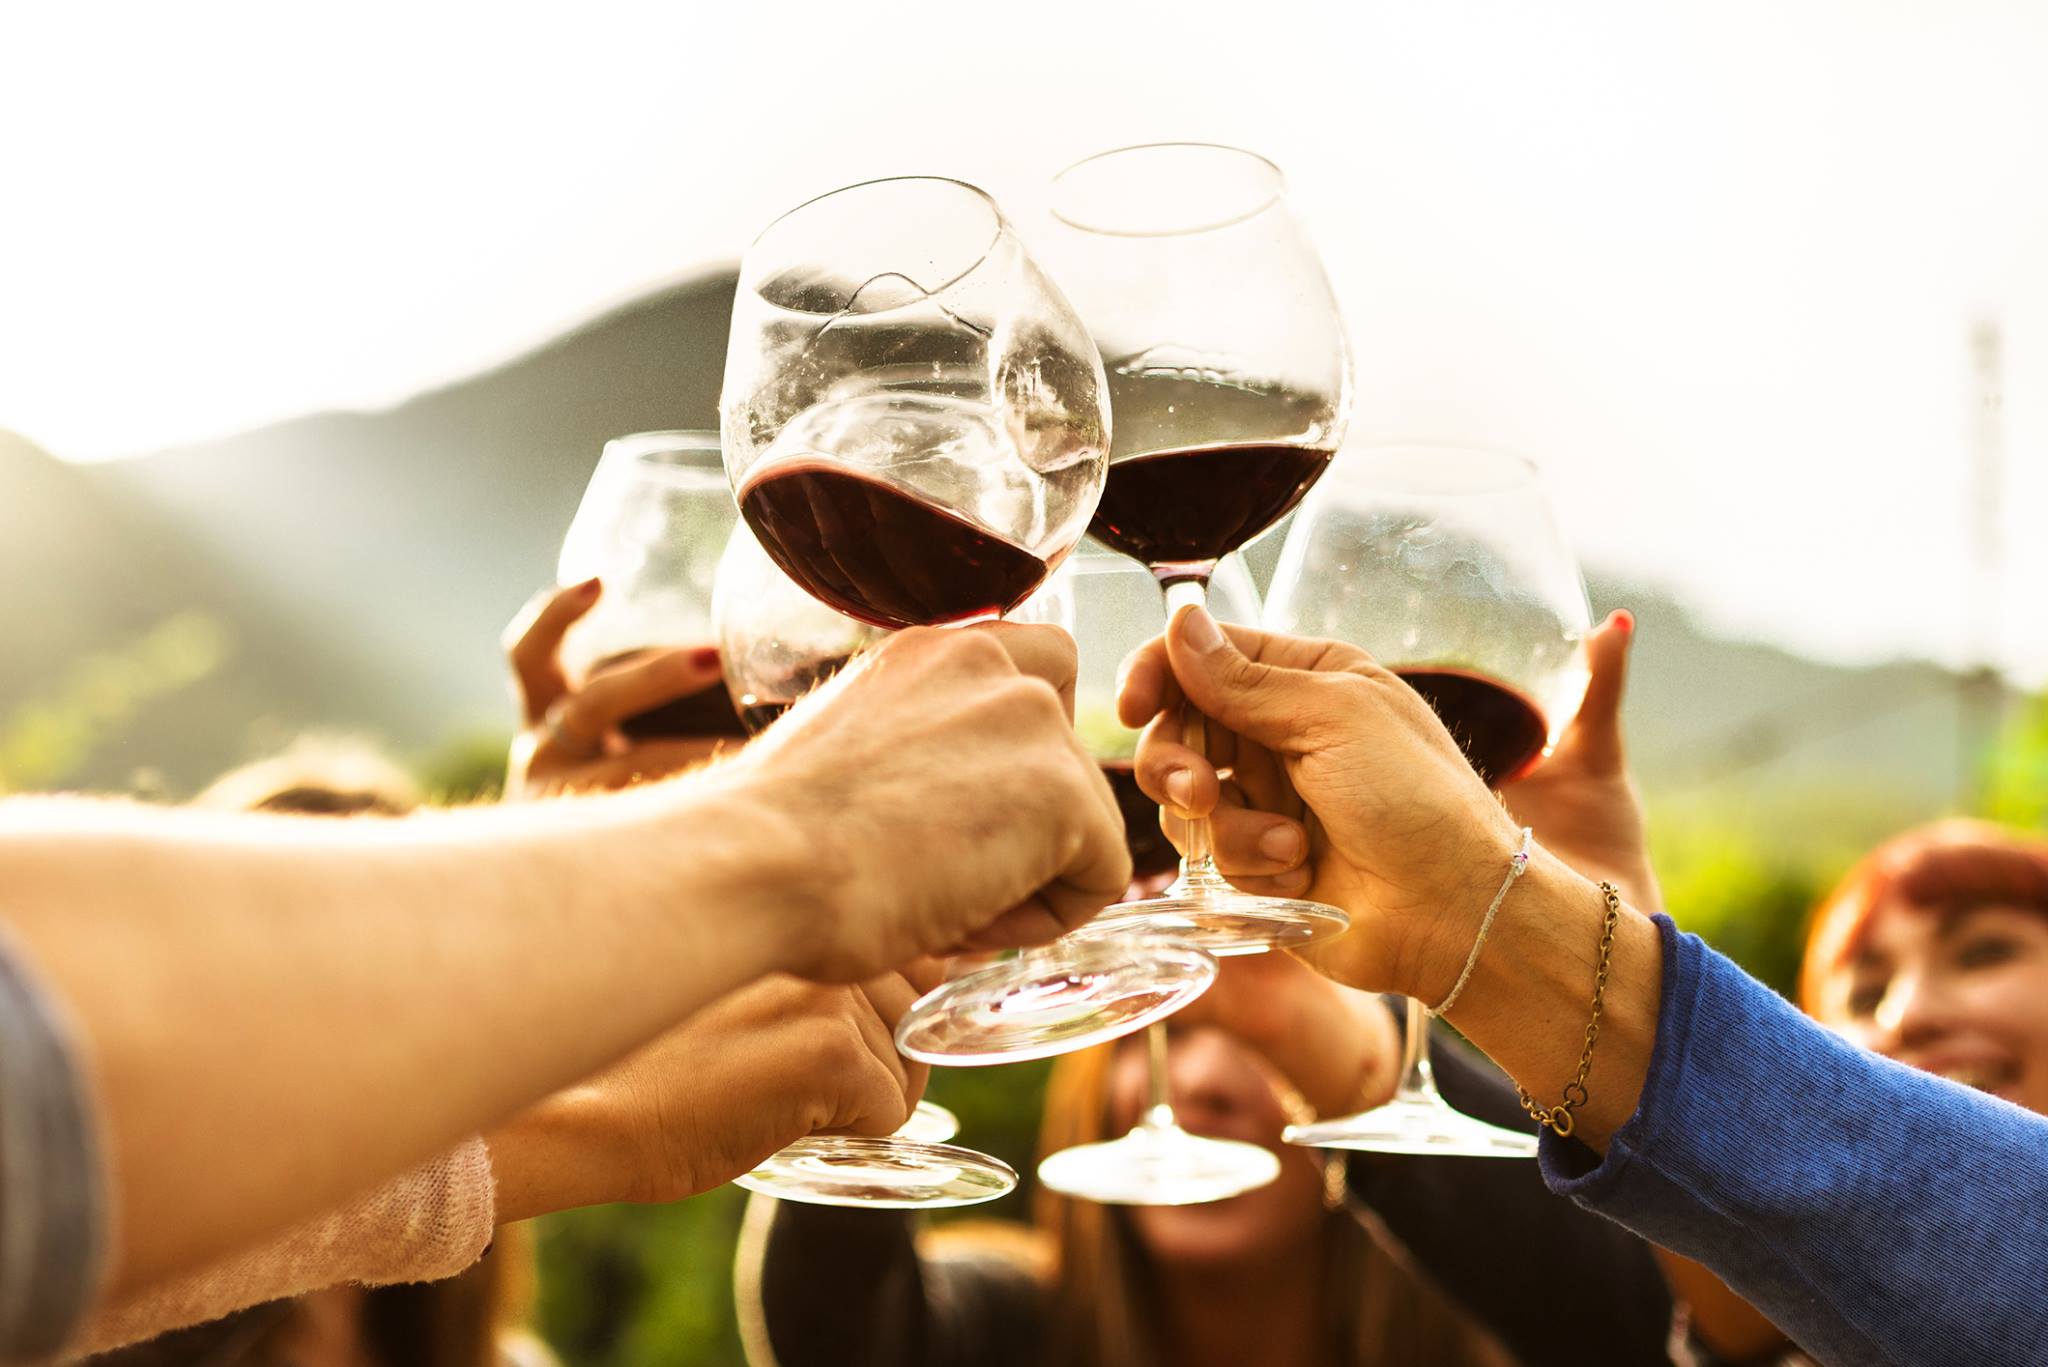
Wines that pair well with Chicken Alfredo
What you eat impacts the flavor of the wine you are drinking with it, and some wines might even overpower the food you are eating. When pairing your wine with your food, it’s important to balance the flavors of each. Chicken Alfredo is a heavy, creamy and cheesy dish, so you’ll want a heavy, full bodied wine to match.
Pinot Grigio
Pinot grigio from Italy’s Friuli region tends to be acidic and crisp with a pronounced minerality, which pairs well with the creamy, buttery Alfredo sauce. Lanza Pinot Grigio from Suisun Valley California is light and refreshing, with notes of floral, fresh lemon and pear. Its great mouth feel makes it food friendly, and since pinot grigio has a decent amount of acid, it can stand up to the savory personality of the Alfredo sauce without it losing its refreshing flavor.
Barbera
There is no rule book that states you have to pair a white wine with your creamy chicken Alfredo. Red wine definitely has its place next to this dish, and an Italian Barbera is the perfect wine to step outside the box. Since parmesan cheese is prominent in the Alfredo sauce, it can be rather strong on the pallet and Barbera has the high acid content to compliment this savory, cheesy dish.
Chardonnay
As long as it hasn’t been aged in oak, Chardonnay will pair nicely with Chicken Alfredo. Creamy pasta dishes and oaked wine just do not mix. A chardonnay with more restraint is a much better choice. Most Chardonnays have a buttery characteristic which goes perfectly with the buttery flavor of the Alfredo sauce. A great choice would be an unoaked Chardonnay from the Burgundy region of France. For a tasty restrained Chardonnay, try some Mettler Ranch Chardonnay from Lodi or the Wooden Valley Winery Chardonnay from Suisun Valley.
Viognier
An appealing wine partner for chicken Alfredo is a dry Viognier. It tends to be bone dry and high in alcohol, which allows the wine to hold its own when paired with a strong Alfredo based dish. Violet, apricot and spice are a few characteristics of Viognier’s flavors that give it its full body feel. California produces a delicious Viognier, but some of the best comes from the Northern Rhone region of France.
Making your own wine to pair with your homemade
Chicken Fettuccine Alfredo
Musto Wine Grape Company, LLC is New England’s largest supplier of home winemaking products and services. Come visit us at 101 Reserve Road in Hartford, Connecticut to shop for all your wine grape, juice and equipment needs! Select your grapes from our fine variety, and we will help you every step of the way – from crush to bottle. Never made wine before? No problem! Sign up for our Winemaker’s Bootcamp, where you can learn all the ins and outs to winemaking. Call us at (860) 278 – 7703 or email us at sales@juicegrape.com to get started. We look forward to hearing from you!
How to Improve Color and Mouthfeel When Making Red Wine

No Wimpy Wines!
How to Improve Color and Mouthfeel when Making Red Wine
A more common complaint amongst home winemakers is that their red wine lacks the depth of color and full body and mouthfeel that they would prefer. Everyone loves a wine that has a heavier mouthfeel, giving the sensation of whole milk or cream on the palette. While it is not always an indicator of quality, many folks associate deeply pigmented red wines with being higher quality. Both color and mouthfeel can be easily managed or enhanced at fermentation through the following factors:
Physical Manipulation:
When selecting the grapes for your batch of wine, it is important to know what kind of wine characteristics that they generate naturally and how that matches up with your personal indicators of quality. If you favor very deeply pigmented wines, perhaps the integration of a very dark grape into your blend will help to boost color, right from the crush. Even a 10% addition of a deeply colored grape such as Petite Verdot, Petite Sirah, or Chambourcin can enhance the overall color of your batch and not detract from the primary varietal’s unique flavor character.
Cold soaking the grapes is another way to physically manipulate the grapes to achieve better color extraction. After crush, grapes can be lightly sulfited, and then allowed to cold soak, provided that they are kept around 40°F. Keeping the must around 40°F is important to inhibit yeast or bacterial growth in the must. There are many ways to keep the grapes this cold, including putting them in a refrigerator, using dry ice, using frozen sanitized jugs of water, or creating a small chilling closet with air conditioning and temporary walls. The extended cold soak will allow the condensed grape skin tannins to leach out and help lock in color by binding to color pigment molecules (anthocyanins). The addition of pectic enzymes during the cold soak will also aid in the color securing process.
Nutrient Additions:
The additions of various supplemental nutrients will affect the color and mouthfeel positively. Booster Rouge and Opti-Red are supplemental nutrients for red wine fermentation that help to increase mid palette mouthfeel and enhance color stability. Opti-Red is high in polysaccharides that will help to lock in color pigments and create a more intense color. Booster Rouge is a yeast derivative nutrient that helps to contribute mid-palette volume and firmer structure to wines. Both of these nutrients also help with creating a smoother tannic profile to red wines.
Tannin Additions:
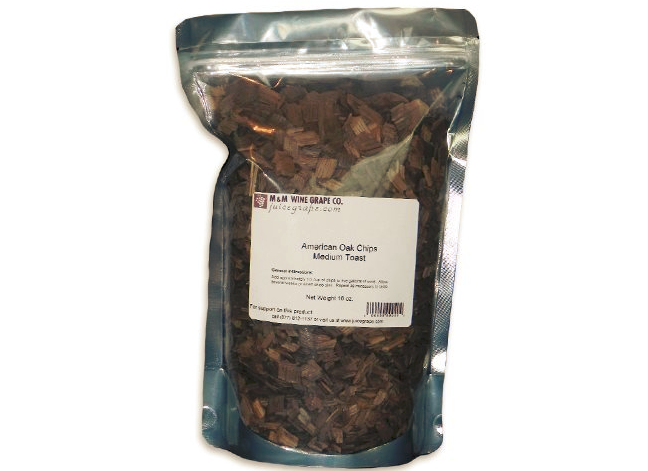
The addition of tannins at crush to the grape must will help to contribute to the overall mouthfeel of red wines, but more specifically to the mid-palette volume of the wine. Products such as FT Rouge or Oak Dust can be added to the must at the beginning of fermentation to act as sacrificial tannins for the yeast to consume throughout their metabolic process. Rather than have the yeast consume the grape tannins, they will consume the oak tannins, leaving the preferred grape skin tannins. This will help to increase the overall preferred tannin content of the wine, increasing the overall mouthfeel and perceived palette volume. FT Rouge is also very effective at locking in color pigments, working synergistically with the previously listed nutrients.
Every wine we make has the opportunity to be the best vintage yet. Following these tips may help you to improve your wines potential for greatness!
Setting up your stainless steel tank

Once the home winemaker has mastered the art of getting just the right amount of wine into dozens of different sized carboys, they may be wondering if there is an easier way to ferment and bulk age their wine. Enter the stainless steel tank!
While getting a stainless tank may seem like a big next step, it’s likely one of the best decisions you will make, assuming production levels are high enough. If you’re a home winemaker who has a couple carboys sitting in the cellar, your goal probably isn’t a larger tank. But if you’re making anything more than that, it may just make your life that much easier (and fun!)
A variety of sizes
Stainless steel tanks come in many sizes, from 100 liters (26 gallons) to 10,000 liters or more! Unless you’re looking to start their own large scale commercial winery, you’ll likely start your search in the 100L+ range.
Variable capacity or fixed volume
Part of the beauty of stainless tanks is that unlike carboys, demijohns, and barrels, they are oftentimes variable capacity. What does this mean? It means you don’t have to worry about constantly topping up, blending other wines into your batch to allow it to reach the neck of the vessel, the threat of oxidation, or employing inert gas to keep the head space at the top of the vessel blanketed. Some winemakers prefer fixed capacity tanks, but again, the downside is that you really need to stay on top of keeping them full the entire time you’re bulk aging.
Time to set up your stainless steel tank
Setting up your tank is very simple to do. The basic setup will include a stand, valves, tasting valve, and maybe a thermometer and a thermowell. The tank may come with a stand or leveling feet which elevate it from the ground. Even the most simplistic, small tank may come with these, though some will only be basic enough that they get placed directly onto the floor or a pallet. The smallest tanks will not have a manway, since you can easily reach in from the top for cleaning or extracting the juice or must post fermentation. Some will have a valve on the bottom and some will not.
What else might I need to set up on my tank?
-
A manway
-
1 or more valves
-
Sight gauge (plastic tube on side of tank indicating volume in tank)
-
Racking port and drainage port (higher and lower ports, respectively)
-
Gaskets and clamps (most common are 1.5″ / 2″ / 2.5″)
-
Gasket and pump (for variable capacity tank)
Musto Wine Grape is happy to offer a wide range of Marchisio stainless steel tanks, from 100L capacity onward. Come see us and we will be happy to speak with you in detail about what tank is the best for you!
Winemaker Lab Skills Class – October 9th

Musto’s Winemaker Lab Skills Class will be held on Wednesday October 9th at 7:00PM.
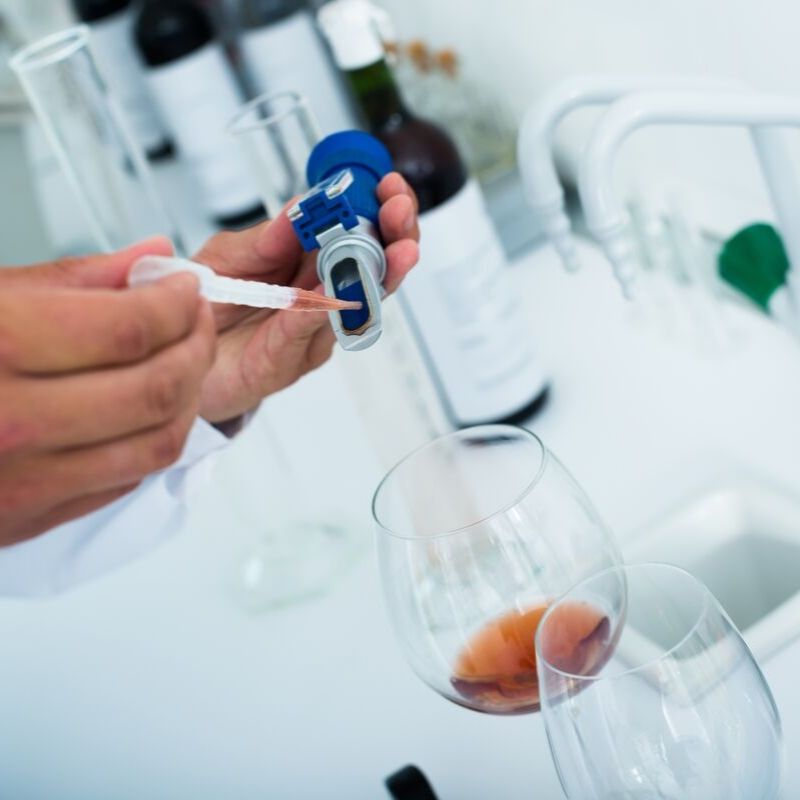
Want clarification on TA, pH, and Adjusting Your Wine?
Then this is the class for you!
Professor Frank Renaldi will go over the following lab skills every winemaker needs. It can be difficult to feel comfortable testing your wine. However, Frank has some easy tricks and tips of how to test and adjust your wine.
Class Outline:
- Equipment & Supplies
- Volume Measurements
- Sugar, Content, & Adjustments
- Acidity, Content, & Adjustments
- pH
- Sulfites, Need, & Adjustments
- Blending
- MLF
- Sugar Addition
Sign up today and start sharpening your Winemaker Lab Skills!
Sign up via the website HERE or give us a call at 877-812-1137 to sign up over the phone. We look forward to seeing you in class. Cheers!
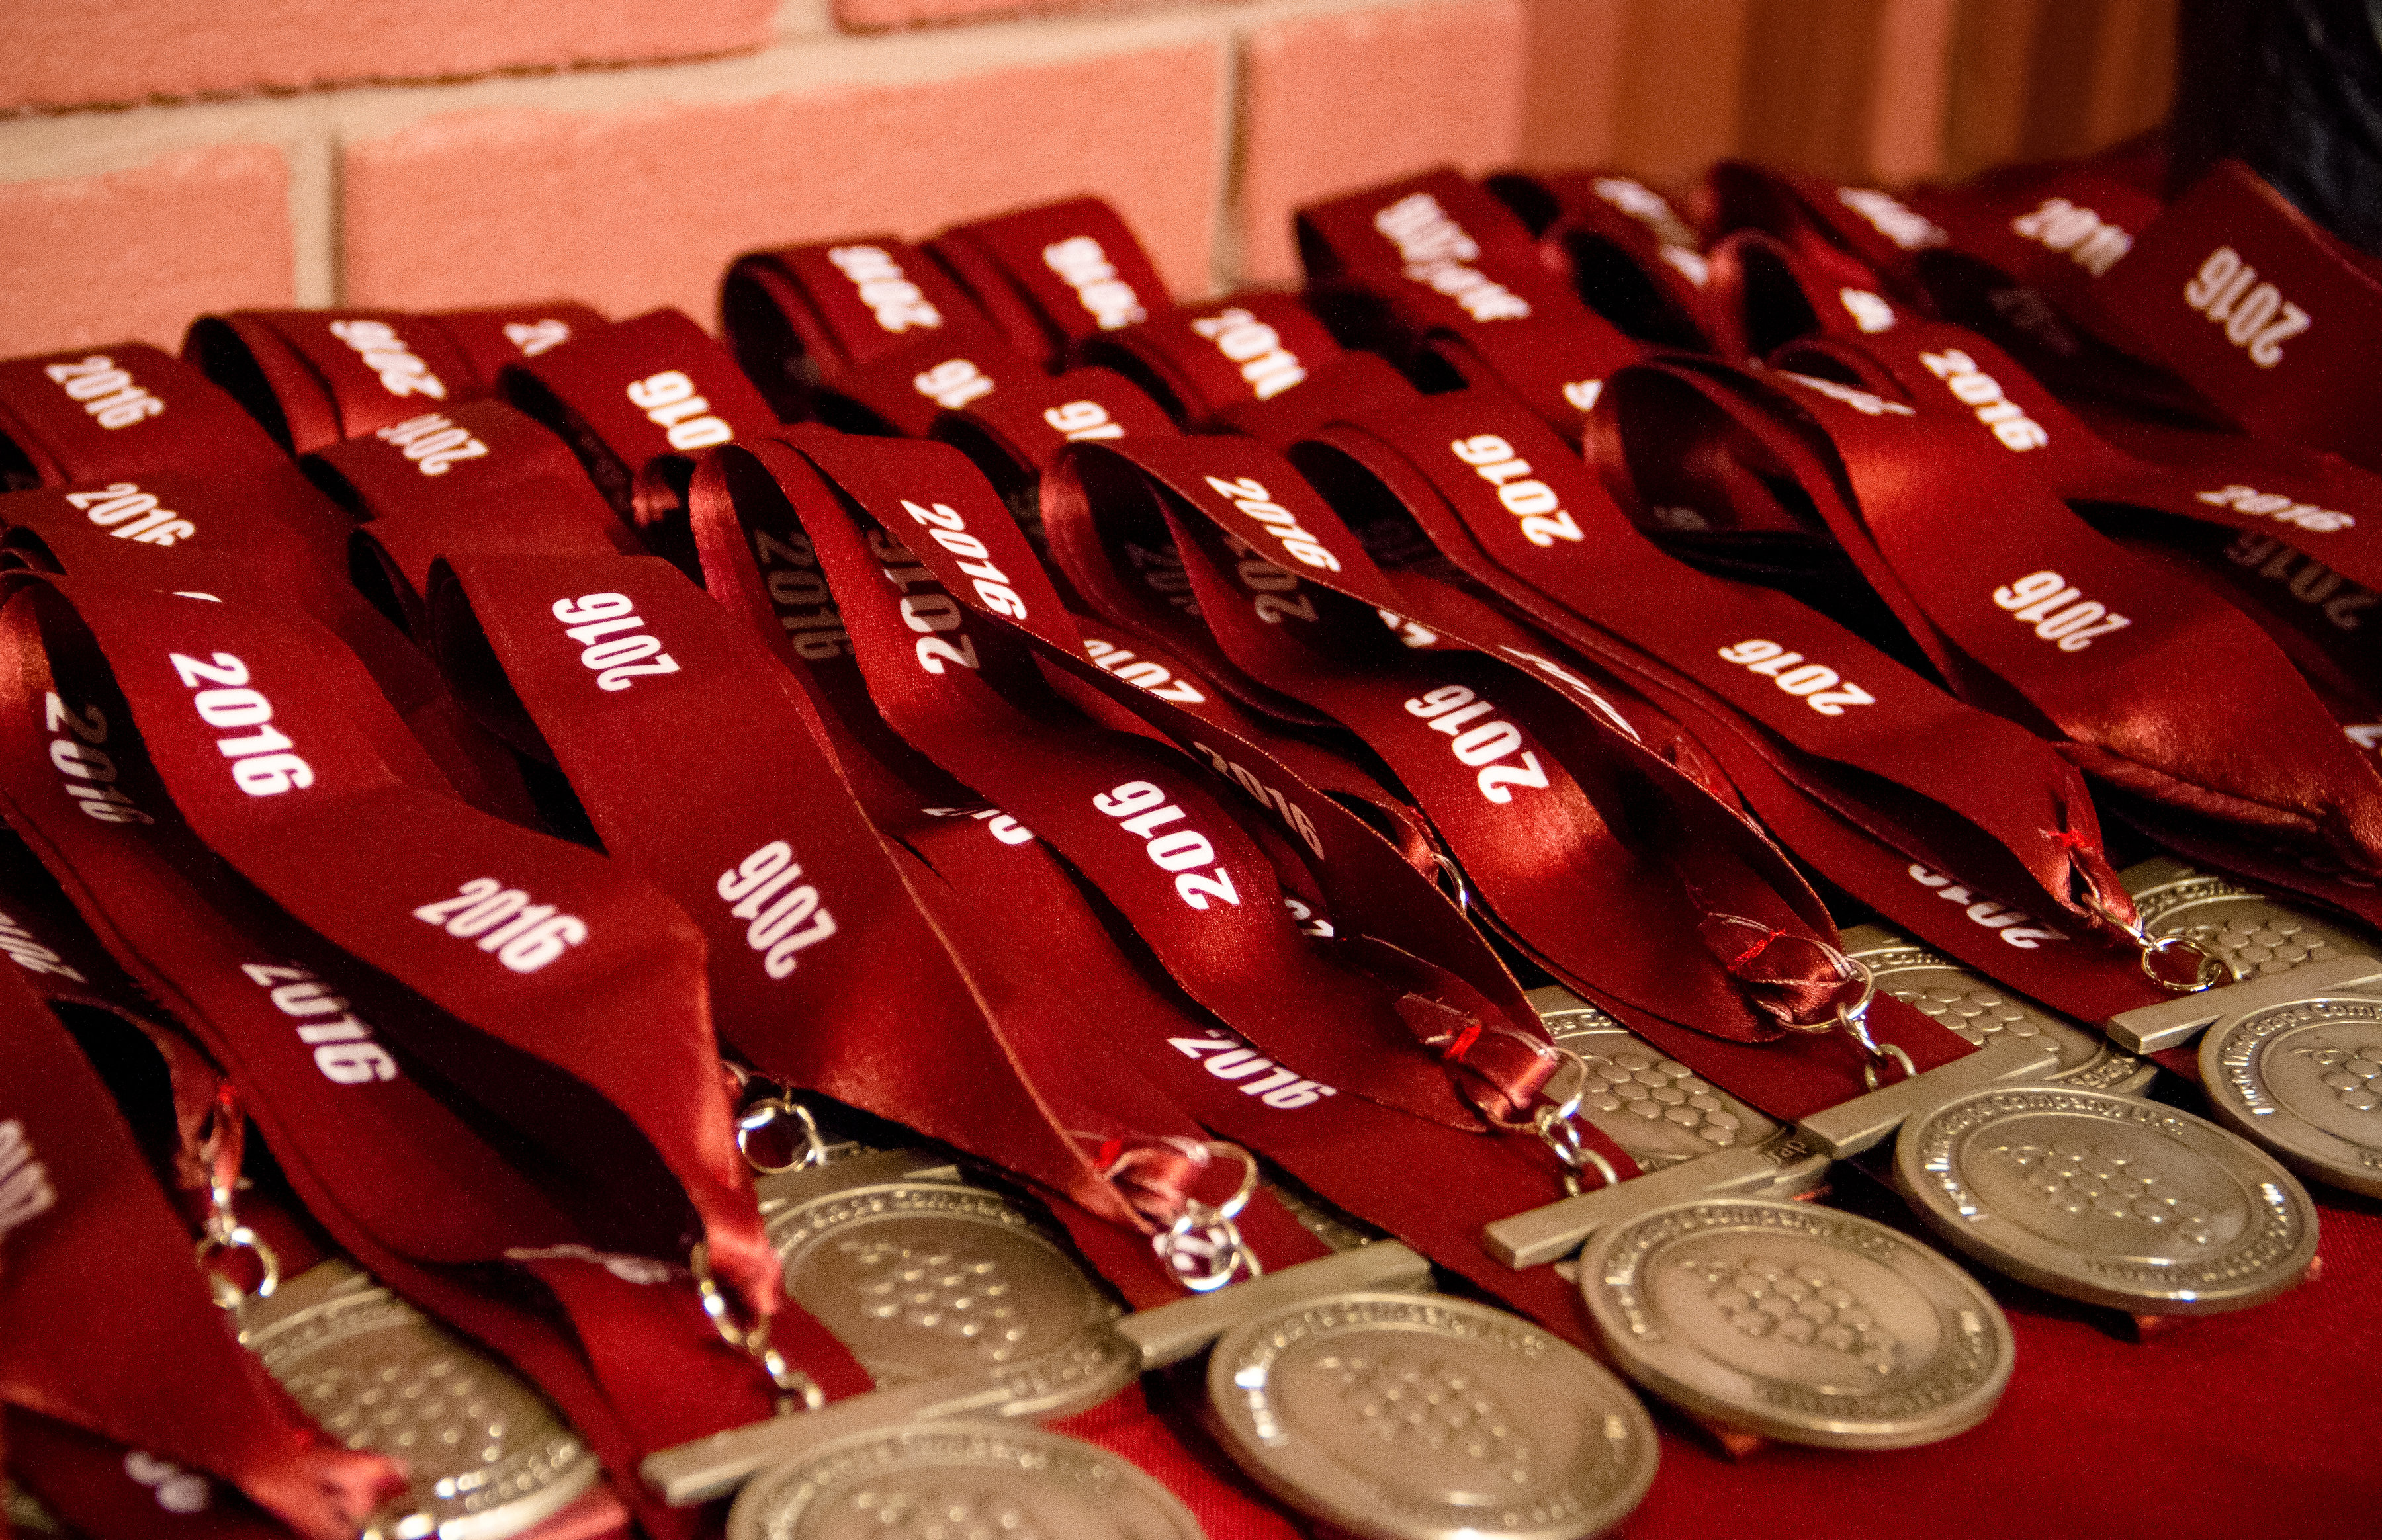
Our Growers and thier wineries are winning awards!

We want to give a BIG Congratulations to our Growers for winning multiple prestigious awards at the San Francisco Chronicle International Wine Competition!!
Our Lodi Growers:
2016 Zinderella Old Vine Zinfandel – GOLD Medal
2017 Albarino from Mettler Ranch – SILVER Medal
2016 Zinfandel from Mettler Ranch – SILVER Medal
2016 Petite Sirah from Mettler Ranch – GOLD Medal
2016 Cabernet from Mettler Ranch – SILVER Medal

Our Suisun Valley, Lanza Musto Vineyards Growers:
2018 Wooden Valley Sauvignon Blanc – GOLD Medal
2016 Wooden Valley Zinfandel – GOLD Medal
2017 Wooden Valley Malbec – GOLD Medal
2016 Lanza Family Petite Sirah – DOUBLE GOLD Medal
2016 Lanza Family Cabernet – GOLD Medal

Click the link below to see the full list of winners. Great wine starts in the vineyard!
Link: http://winejudging.com/medal-winners/
Timing your malolactic fermentation

You’ve decided you want your wine to undergo MLF. But when should it happen?
There are a couple different schools of thought on this. You can either add the bacteria so it happens simultaneously with alcoholic fermentation (“co-inoculation”) or after it has completed (“sequential inoculation”).
What’s the purpose of MLF?
The process of converting harsh malic acid into the softer lactic acid is easy to do and can alter the wine significantly. It changes not just the amount and type of acid present, but how the wine is perceived overall. While this conversion can happen on its own without your intervention, it is highly recommended that you inoculate with a chosen malolactic bacteria in order to best ensure everything remains healthy and in balance from start to finish.
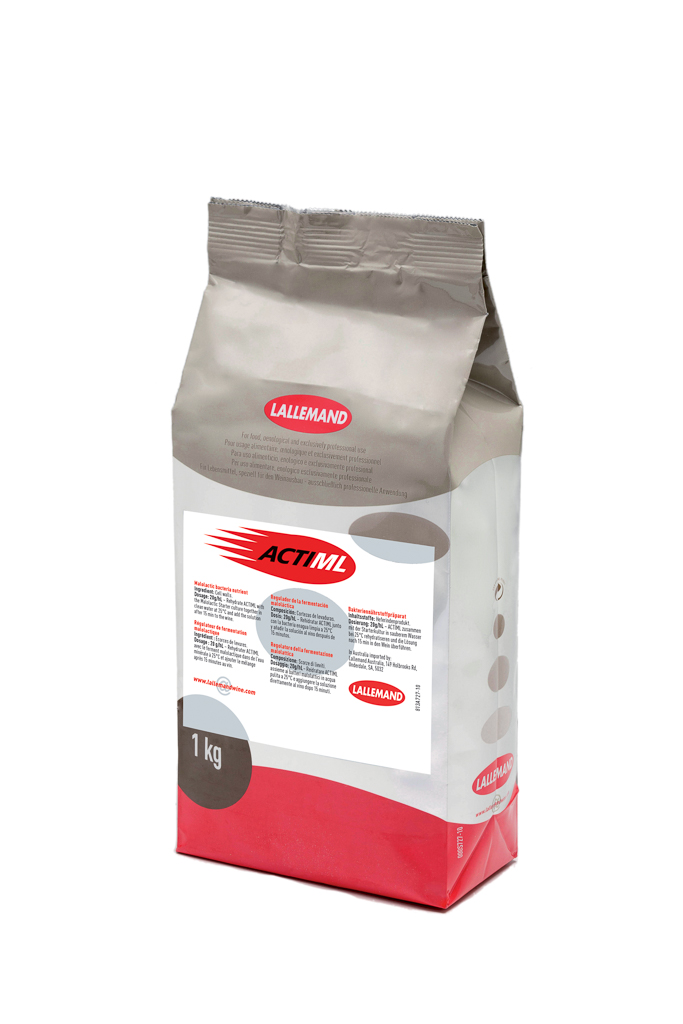
Whether you choose to co-inoculate or do it sequentially is completely up to you – both are acceptable! Either way, you just want to be sure that your juice/must is balanced and undergoing (or underwent) a healthy fermentation, to better guarantee the health of the subsequent MLF. The preparation of the malolactic bacteria will be the same regardless of when it gets added. Some require a rehydration period and some can be added directly to the wine. Some are liquid and some are in freeze-dried form. Acti-ML nutrient and Opti-Malo are a helpful additives to use to help the conversion reach completion without any issues. Think of Acti-ML and Opti-Malo as the equilivent of Go-Ferm and Fermaid K, but for malolactic bacteria.

Why should I do co-inoculation?
- MLF generally completes more quickly with this method due to:
- higher temperatures thanks to alcoholic fermentation being underway
- lower alcohol levels at the onset of MLF
- higher nutrient levels
- You won’t need to use an external heat source
- SO2 can be added earlier on in the wine’s life since MLF is completing sooner
Are there any benefits to waiting until after alcoholic fermentation has finished?
- Some believe that ML bacteria and yeasts will be fighting for the same nutrient sources, adding a potential layer of stress
- Ability to focus on one conversion at a time
I’m deciding to wait to add ML bacteria because that’s what I’ve always done.
OK, that’s fine too! If you’re choosing this route, then wait until the Brix has dropped to about 5.
Are there any downsides to waiting to add ML bacteria?
- The wine is unprotected from SO2 for a longer period of time since you can’t add SO2 until MLF is complete.
- You will likely need to use external heat sources to keep the wine warm enough to finish MLF in a timely manner. This means more labor and energy expense.
- Higher alcohol levels can slow the speed of ML conversion or even stop it completely.
Overall, the benefits of co-inoculation seem to outweigh any benefits of the sequential method. Of course, if you have a preference and it works for you, that’s all that matters. As long as your fermentation and ML conversion are happy and healthy, you’re good to go!
What else can I do for a good MLF?
A chosen ML bacteria + proper temperature + good nutrition + not overadding SO2 = a recipe for healthy MLF. Whether you co-inoculate or add toward the end of AF is up to you and your preferences. Regardless of which option you choose, using paper chromatography to track the process is always recommended.
Are you used to sticking to one method and want to give the other a shot? Stop in and ask a Musto Wine Grape Company employee for some help making the switch over!
My wine is sweet and I don’t want it to be

I made a sweet wine… but that wasn’t my intention!
When a wine that was supposed to be dry ends up sweet by accident, you may find yourself wondering a few things:
A) Why did this happen?
B) Where did I go wrong?
C) What can I do now?
First, let’s get back to basics.
For a wine to have residual sugar (RS) remaining, it must have not completely finished alcoholic fermentation. The only exception to this is if you backsweetened it purposely after it finished fermenting.
Potential root causes
My wine stopped fermenting before I wanted it to
Sometimes a fermentation will not complete despite your best efforts. Check your process – did you do all of the following?
- Start between 22-26 Brix. If it was above or below these numbers, did you make any adjustments?
- Added SO2 pre- chosen yeast add to kill off unwanted wild yeast
- Added a specified yeast strain and followed proper rehydration procedure
- Maintained temperatures so they did not drop too low or get too high
- Added correct amount of yeast nutrient at correct points in time
I accidentally chapitalized more than I meant to
This is a bit trickier to maneuver. Whether you added too much sugar pre-fermentation (to increase eventual alcohol level) or post-fermentation (to backsweeten), you may be stuck with more sugar than your chosen yeast is capable of converting. You could try to restart the fermentation after it initially slows down, but this could potentially increase the ABV way too much depending on how much you added.
You can try to follow a fermentation restart protocol. Or, you can decide to SO2 and add potassium sorbate to the wine and keep it sweet, or you could do bench trials adding acid and possibly tannin to see if you can create a newfound balance within the now sweet wine. *Important note: do not add potassium sorbate to the wine if it has gone through MLF*
I didn’t pitch yeast, I just let it spontaneously ferment
Without choosing a designated yeast that you can be certain will ferment your juice or must to dryness, you risk the possibility of wild yeast starting to ferment but not being able to finish, leading to a stuck fermentation.
I don’t want it to remain sweet. What can I do now?
- If you’re open to doing so, follow a stuck fermentation protocol to restart the ferment. See our blog post for a detailed protocol.
- Blend out the sweet wine with dry wine(s).
- Add acid to strike a balance within the wine – it may still technically be sweet, but by adding acid and/or tannin you may be able to create an enjoyable wine that doesn’t seem as cloyingly sweet as it may without additional acid or tannin.
Touriga Nacional


Touriga Nacional is a thick-skinned grape, considered one of Portugal’s premier grapes.
The grapes are rich in color and tannins, giving excellent structure and ageing capacity. Intense flavors, ranging from floral to fruity – ripe blackcurrants, raspberries – with complex hints of herbs and licorice create a party on your palate. If you’re looking for a new interesting wine to make this year, Touriga Nacional is a great contender.
Look for it on Musto Wine Grape’s dock in early September.
Keep track of wine grape and juice arrivals via MWG’s Harvest Tracker
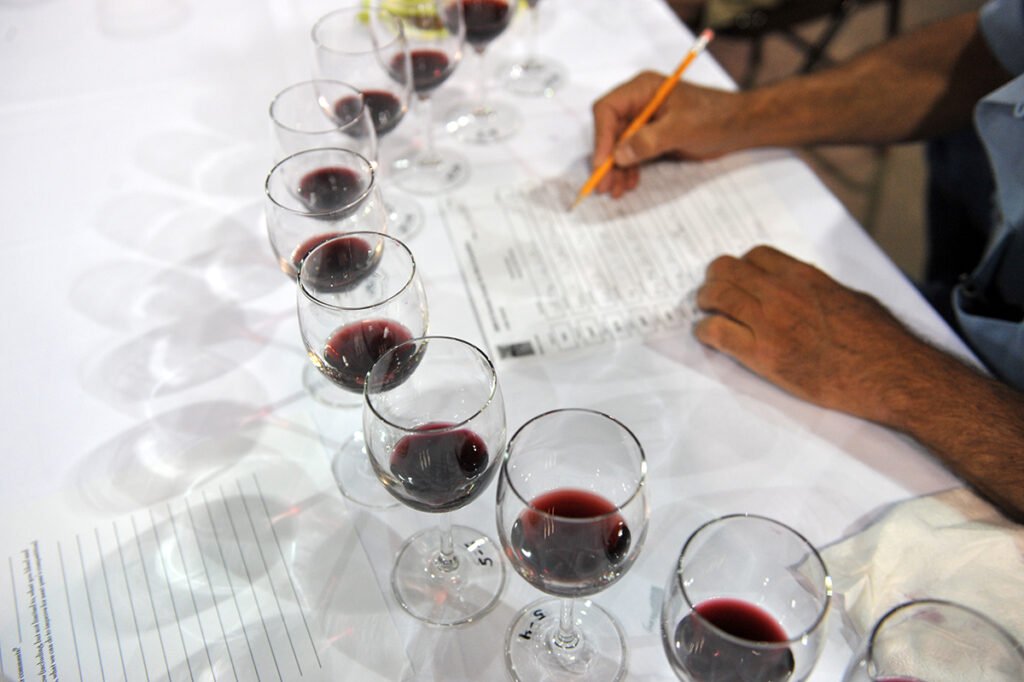
2019 Amateur and Commercial Winemaking Competition

It’s that time of year again!
Musto’s 2019 Amateur and Commercial Wine Competition is just around the corner. Every year, home and commercial winemakers get the chance to show off their wines in a blind tasting judged by knowledgeable, seasoned wine judges in a series of blind tastings.
Click HERE to download all of your paperwork!
It’s hard work, but someone’s gotta do it!
Who can enter?
This wine competition is open to any amateur winemaker, commercial winemaker or winery. Wine entry must be made by a winemaker, not purchased and re-bottled and used as an amateur wine maker entry. Judge may not judge a wine they have submitted.
How do I enter?
Send Musto Wine Grape your bottled wine by the deadline of November 16th at 12PM.
What can I submit?
A wine entry is a still bottle of wine and submitted for entry in a 750ml wine bottle. Ice wines or late harvest wines may be submitted in a 375ml wine bottle, however if 375ml please send 2 – 375ml bottles. Sparkling wines must be submitted in a champagne style bottle with the proper closure. All bottle entries must be free of any labeling or identifying markings. However, each must be marked with category number, winemaker(s) name, wine ingredients, percentages & vintage.

What is the judging process?
Judging of wines will be performed on a 20 point award system. Each wine will be judged on its own merits and not compared to any others in its category. Gold, Silver and Bronze medals will be awarded within each category and based on the 20 point system. The Best of Show award(s) will be those wine entries that are superior within a given category. All award decisions made by the judges and/or sponsors, are final.
We’re doing something different this year!
This year, in order to allow winemakers a more thorough and individualized analysis of their submitted wines, Musto Wine Grape Company staff will be personally judging and performing sensory analyses on each bottle. This year’s competition format will allow for more time, thought, and comments to go into each individual’s submission, yielding a more comprehensive understanding of each wine. Because of this, entries will be capped at 300 bottles.
What are the categories?
Wine entries made from grapes and juice based wines will be judged and awarded in their own category. Wine entries made from kits and fresh processed and concentrated juices will be judged and awarded in a kit category.
Is there a deadline?
There sure is – have your wines sent to Musto Wine Grape, 101 Reserve Rd, Hartford CT 06114, by November 16th at 12PM.
Is there a fee?
Entry fee for a single wine entry will be $11.00 and $9.00 each for 2 or more entries submitted at the same time. Make checks payable to Musto Wine Grape Company in U.S. dollars only.
Can I send in a labeled bottle?
No. All bottle entries must be free of any labeling or identifying markings. However, each must be marked with Category number, winemaker(s) name, wine ingredients and percentages & vintage.
How can I get it to you?
All shipments are the entrant’s responsibility therefore packaging must be able to withstand considerable handling and shipping costs are the entrant’s responsibility. COD’s or postage due will be rejected. If an entry bottle is received damaged, we will make every effort to contact the entrant and notify them of the damage. Check with your shipper as to requirements for shipping wine, we suggest shipping via FedEx.
When are results announced?
There is an awards ceremony held every year to reveal this year’s results, which will be held in Spring 2020 (exact date TBA) and of course you can also see the results announced on Musto’s website, www.juicegrape.com. All entrants will receive a copy of the judging worksheet and a copy of the winning results.
Enter the contest and you could go home with the gold in this year’s winemaking competition!
So what do I do now?
Send us your wine ASAP! Since entries will be capped at 300, we won’t be able to accept any after this. Look out for an announcement on Facebook and our website that lets you know when we have received our maximum entries.
Don’t make these mistakes this harvest season!

Avoid these all too common mistakes this harvest!
With all the planning, excitement, energy, and potential money you’ve put into preparing for harvest time, the last thing you want to do is make a silly mistake that may put the quality of your wine in jeopardy. The following is a list of pitfalls to be aware of. Heed these words to the wise and save yourself a headache in the future.
1) Inadequate space for your volume
Overflowing, bubbling, fermenting wines can make an absolute mess. You want to fill any vessel no more than 3/4 full pre-fermentation unless you’re both physically and emotionally prepared for the cleanup. You will also needlessly lose volume, yeast, and nutrient, in addition to your mind. Multiple tanks or carboys of various sizes will be your saving grace here.
2) Not cleaning properly
Clean, sanitize, repeat.
The importance of proper cleanliness and sanitation practices from the get go cannot be stressed enough. B-brite, One Step, soda ash, and Proxycarb are all cleaning agents. Potassium metabisulfite + citric acid is a sanitizing solution.
You want to clean and then sanitize, not sanitize and then clean. Don’t let anything with residue of fruit, juice, or must sit out for longer than necessary. That means that before you finish up for the day, your work space should be nice and clean and ready for the next day. Otherwise you will attract fruit flies, which can lead to VA issues in the wine. (Not to mention they’re a pain and difficult to get rid of anyway.)
3) Underestimating the need for nutrients
Adding yeast nutrients may seem like an optional add on, but why wouldn’t you want to ensure that your yeast have all of the nutrients that they need to be happy and healthy and get your juice to become the wine of your dreams? Some yeast strains almost require the addition of them to work well. There’s no harm in using them, but there can definitely be harm in choosing not to.
Lack of nutrients can lead to stressed yeast which can produce off odors (H2S, the smell of rotten eggs or cabbage) that are very difficult to get rid of.
4) Skipping steps/guesstimating
Eyeballing an SO2 add, rounding up on Brix levels, or having a “eh, it’s more or less correct” attitude when making wine can really complicate your life down the road. Sure, some people see winemaking as only art and some see it as only science; but the wise see it as the perfect blend of both.
- do not generalize
- do not come to conclusions without taking all variables into account
- do not guestimate unless you know for a fact that a “more or less” mindset is applicable in a given circumstance
5) Forgetting that there’s a difference between US and metric system
Freshen up on your middle school math conversions so you can quickly maneuver between gallons and liters and ounces and grams. Some labels include g/L and lb/gallon. Double (or triple) check your math to be sure you’re consistent and working with the same unit of measurement. These early stage additions very much set the tone for the wine throughout its whole life so you want to get it started on the right foot. Online calculators like WineMaker Mag’s sulfite calculator and winebusiness.com’s conversions caulculator can be really useful because you can toggle back and forth between these systems depending on what you are most accustomed to.
Recent Comments