


Wine Barrel Care and Maintenance

Winemaking is an investment in most winemakers’ eyes. One of your most tedious but worthwhile investments will be a wine barrel. They are expensive to produce and challenging to maintain, but the impact it can have on the quality of your wine makes it worthwhile. This article will cover the anatomy of the barrel, how to clean it, and the maintenance you should familiarize yourself with if you plan on owning one.
Inspecting your barrel
The first thing you should do as soon as you receive your new (or used) wine barrel is to inspect it. You should start by visually examining the barrel’s exterior. Keep an eye out for broken chimes, dented or displaced heads, and misaligned staves. Also look for scrapes, gouges, and any torn or burred hoops. Next, you’ll need to inspect the inside of the barrel. The inside should be completely dry and free of mold. The area where the head meets the staves can be a breeding ground for mold, which usually occurs from a combination of standing water and exposure to starch used in the construction of the barrel. Lastly, observe the aroma of the barrel. The barrel should smell clean, fresh, oaky, and/or toasty. Other than sulfur, there should be no chemical odors and certainly no aroma of spoilage.
Prepping your barrel for wine
This will include one last inspection of your barrel, which is testing your barrel for leakage first. You need to rehydrate your barrel, or “swell” it to prepare it for wine, but it’ll kill two birds with one stone allowing you to inspect for any possible leaks. There are two ways to swell your barrel, the first option being the hot water/quick soak method. The second option is a coldwater/high volume soak. The only main difference is the speed of which the soaking gets done.
Hot water/quick soaking consists of filling the barrel with 3-5 gallons of filtered, chlorine-free, hot water. The ideal temperature for this would be about 180 degrees Fahrenheit. Use caution when using water hotter than this, or using high-temperature steam as this can degrade and damage the barrel. Once you’ve filled your barrel, place your stopper in the bunghole. Rotate the barrel from side to side, completely wetting the barrel’s interior. Stand the barrel upright on its side (one head facing down, the other up) and let stand for about 4 hours to rehydrate the head. Repeat with the opposite side for an additional 4 hours. During these processes, make sure to continuously check for any leakage. If there are no leaks, turn the barrel so it’s bunghole is facing toward and allow to drain and dry completely.
Coldwater/high volume soaking calls for filling he barreling completely with filtered, chlorine-free, cold water. Once you’ve filled the barrel completely, place your stopper in the bunghole and let the barrel stand for about 24 and 48 hours. Once no leaks are present, empty the barrel and allow it to drain and dry completely.
If your barrel continues to leak after multiple swelling attempts
If after either of these methods are complete the barrels still exhibit leaks, repeat the swelling process as it’s possible it just needed more time to swell. There are some additional methods of swelling you can attempt that are more aggressive but can possibly help seal any leaks.
The submerging method:
We have found that sometimes soaking the interior and exterior of the barrel simultaneously can help to get it swelled. Start by placing the barrel upright on one head in a large container. Fermentation tubs work great for this. Next, fill the barrel halfway until water is seeping from the bunghole, then fill the container it’s in up to the same bunghole. Let the barrel sit overnight, then remove all water from the barrel and container, flip the barrel onto its other head and repeat the process. Once emptied, use the cold water method and check for any leaks.
The hoop tightening method:
The hoops on a barrel can become loose when it becomes dry. Using a hoop driver, or if no hoop driver is available, a cold chisel to hammer the hoops toward the center of the barrel. Workaround the barrel, hammering firmly at around one-quarter increments of the circumference. It may be necessary to remove the hoop nails to allow the hoop to slide tighter onto the barrel.
The Barrel Sealing Wax method:
Beeswax can be used to seal small leaks. The first step is to mark any leaks with a pencil or chalk. To properly apply sealing wax, first make sure the barrel is dry. Next, gently sand leaking areas with rough sandpaper. Knead a small piece of beeswax in your hand and work the wax into the area using a putty knife. Beeswax will not change the flavor of your wine and is completely safe to use.
After several attempts, if your barrel continues to leak, it is important to call your sales rep immediately. Empty the barrel, allow it to drain, and completely dry. Next, you have to treat each barrel with 10-20 grams of sulfur sticks (or the equivalent gas form) and re-insert the stopper. This will ensure that you are still maintaining the integrity of the interior of the barrel.
Storing your barrels
Ideally, barrels should always have wine in them. If you are in between winemaking projects though, or you’re waiting for harvest, there are a few guidelines you should follow when storing your barrels. If you are storing a new barrel, store in a cool, humid environment. Some new barrels arrive with their plastic film still on them – if yours does, keep that film on if you plan to store them for a significant amount of time. The process of storing a used barrel requires a bit more work.
If you are ready to empty your barrel, empty it and wash the barrel out with hot water until all of the deposits and tartaric crystals have been dissolved and emptied. Repeat if necessary. If you have access to larger volumes of hot water, fill the barrel completely and let sit overnight. Once emptied, rinse the barrel with cold water and let it dry with the bunghole facing down. Allow to completely dry, and then burn sulfur sticks or discs in the barrel and place stopper in the bunghole. This burning treatment should be repeated every six weeks or so until you are ready to use the barrel again. Finally, store your barrels in a cool, humid environment.
Other tips and tricks for maintaining your barrel
Never leave water in a barrel for more than two days. If the swelling process takes longer, empty, and refill the barrel with fresh water to avoid mold and spoilage micro-organism growth.
A full barrel is a happy barrel! If possible, try to refill your barrel immediately after it has been emptied and cleaned. This way you will never have to re-swell it and there is much less opportunity for bacteria and other spoilage organisms to get into the barrel.
Never use chlorine in or around a barrel, or any winemaking equipment for that matter. TCA, also known as cork taint, can infect much more than just corks. A barrel is a vulnerable place for TCA to be absorbed into due to the spores, molds, and natural phenolics of the wood.
When in doubt, throw it out – or repurpose your barrel for something other than winemaking. If you suspect that there are spoilage organisms in your barrel even after you have tried ozone/steam/proxycarb, (you can find info on these here) err on the side of caution and retire it. You can ruin any future wine you put into such a barrel and it can possibly infect the rest of your winemaking equipment if they are stored near them. Barrels can be repurposed into planters, furniture, and more!
Where can I purchase wine barrels?
Musto Wine Grape Company carries a few categories of wine barrels including new and used American and French wine barrels! Email sales@juicegrape.com or call (877) 812 – 1137 to speak with one of our Musto Crush Crew members to get your order placed, or if you need any assistance in using, maintaining, or storing your barrel. We also offer ozoning treatments if you are dealing with a problem barrel. We are here to provide everything you need to make the wine of your dreams, including the customer support to ensure your success!
Potassium Metabisulfite: Product Spotlight

What is Potassium Metabisulfite?
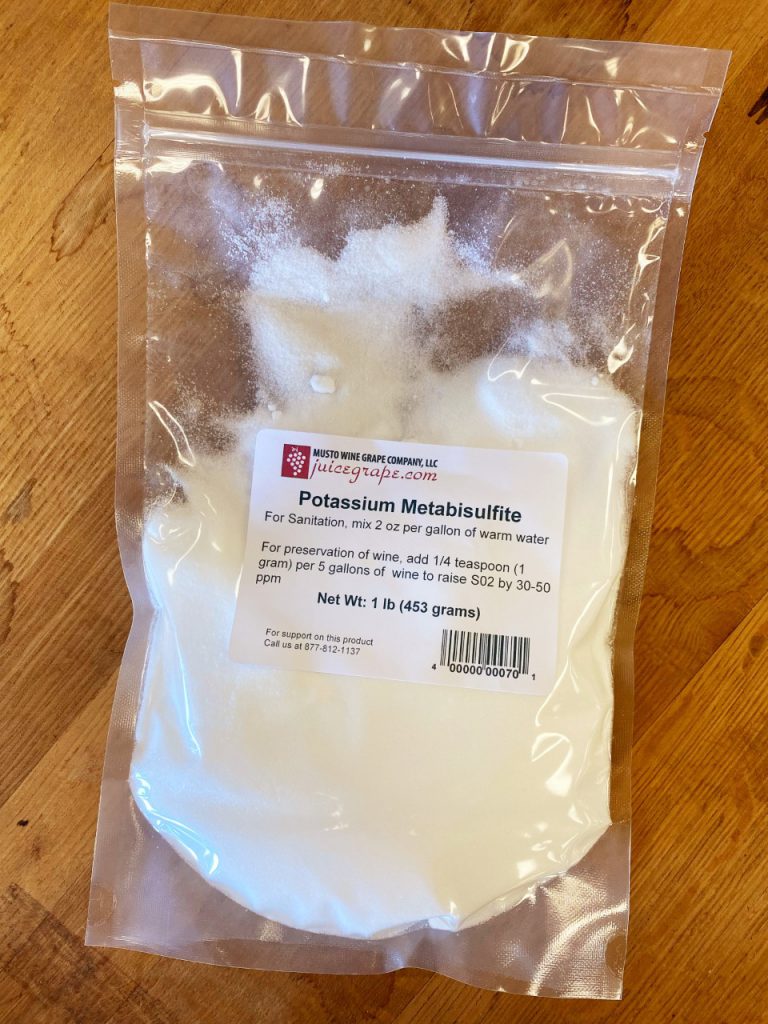
Potassium Metabisulfite is an antioxidant and sanitizer, and has several uses in winemaking. After crushing and de-stemming, it is used to help kill off any spoilage bacteria and natural yeast that may be present on the grapes or equipment. It also helps to preserve wine, specifically protecting it against oxidization.
Throughout the entire winemaking process, it’s important to measure your SO2 levels and adjust as needed to improve and lengthen the preservation of your wine. The exact amount needed to be effective is entirely determined by the pH of the wine. Also, free SO2 levels fall faster in a wooden barrel versus in glass or stainless steel tanks, so make sure you manage your SO2 levels very closely.
How do I use it?
If you are adding Potassium Metabisulfite to your must, the proper amount is ¼ teaspoon per 5 gallons of must. If you are making an SO2 sanitizing solution, add 8 teaspoons for every 1 gallon of water. Place into a spray bottle for quick and easy use. After cleaning your equipment and again before use, spray the solution generously and shake off/let any extra solution drip dry.
Potassium Metabisulfite has a shelf life of about one year if you are using it to add to your wine. If you have some that is over a year old, no worries! It still functions as a sanitizer, just make sure you separate and label each to avoid any mix ups.
Where can I get it?
You can find and purchase Potassium Metabisulfite here. Need assistance in using SO2, whether adding to your wine or sanitizing your equipment? Give us a call at (877) 812 – 1137 to speak with a sales associate who can help you!
Follow us on Instagram here and like us on Facebook here. For Virtual Winemaking Classes click here.
Fall Foods to Pair with White Wine

As the air gets crisper, the leaves start changing color and you add layers to your wardrobe, you start to think of your seasonal favorites such as pumpkin EVERYTHING, apples and apple pie, turkey, roasted veggies and sweet potatoes.
But when it comes to pairing your wine with those delicious autumnal treats, where to begin?
Here are a few things to keep in mind when deciding which white wine to try with your fall favorites.
You might automatically think red wines when you think fall, but there are many white wines to choose from that really complement some great hearty dishes.
Choose Chardonnay or Viognier to have with your meats like chicken or turkey and a nice rich soup or bisque. Viognier also pairs well with butternut squash or carrot dishes. These wines also pair well with pumpkin flavors too such as pumpkin pie. Are you preparing some pumpkin bread? Choose a bubbly Moscato to pair with this fall treat.
And don’t forget the sweet potato fries! Pair them with that Chardonnay again; make it a un-oaked Chardonnay, so it doesn’t overwhelm the sweetness of those crispy treats!
Consider a Gewürztraminer or Vouvray when selecting an apple dish. The Gewürztraminer will be a nice addition to a plate of apple slices and add some cheese, while if you are looking to find a wine to have with a slice of apple pie, then you might prefer to pair with the sweeter Vouvray. Or if you are having an apple cobbler or baked apples, try serving it with a Riesling.
And you either love them or hate them, but Brussels sprouts are fresh in the fall and if prepared with just a bit of char, they pair really nicely with a good crisp Sauvignon Blanc.
No matter what fits your fall fancy when it comes to foods you enjoy as the days get shorter and the skies get darker earlier, but there is sure to be a wine to pair with it. Hopefully these pairings will give you ideas of what wine to purchase to complement your own autumnal specialties.
Written by Michelle Griffis aka the Nutmeg Nose for MWG
Source 1
Source 2
Source 3
Source 4
What size wine press do I need?

When deciding on what size press you need, ask yourself the following questions.
- How much do I have to press?
- How much can I press at once with the given size of the wine press?
- How long will each press cycle take?
As with the crushing/destemming part of winemaking (and pretty much every other part of winemaking for that matter), the setup and cleanup will represent a significant portion of the day, so you don’t want to plan on spending 8 hours presssing unless you feel like working a 12 hour day. In general you want to be able to get through the entire lot of wine or grapes in about 5 hours.
Keep in mind that when you’re pressing must it will be between 30% and 35% solids. As you fill the press most of the liquid will flow right through and out referred to as free run wine/juice. So the volume of the press is going to correspond to the volume of solids that need to be pressed. For example, if you have 100 gal of fermented must to press, that only corresponds to about 35 gals worth of solids. To press 35 gals of solids through the 40L bladder press (10.6 gal) you would need to run about 3 press cycles in order to get the job done. If you can run a full press cycle on the 40L bladder press in about 45 minutes – which, as it happens, you can – then this press will totally do the trick.
Now seems like a good time to define what we mean by “press cycle.” A full press cycle consists of filling the press, pressing, emptying the press and cleaning and sanitizing it for the next run. Now that you understand the press cycle, its time to figure out which press is right for you.
Keep in mind that times for running press cycles do vary based on the your equipment set up, amount of helpers you have, practice, preparation, and level of expertise. The two most time consuming parts of the process are 1) filling the press, and 2) actually pressing. With the bladder press this essentially consists of waiting for the bladder to fill…
Whole Grape To Must
It can vary but for most reds, we can expect that a ton of fresh grapes (2,000 lbs) will yield about 210-240 gallons of must which in turn yields about 120-130 gallons of finished wine. The variation comes from cluster size, stem size and ratio, amount of shatter, open vs. closed clusters, berry size, skin thickness, number of seeds, press pressure, etc.
Cage Size To Cage In Liters To Cage In Gallons
| Cage Size | Cage in Liters | Cage in Gallons |
|---|---|---|
| 15 | 5 | 1.3 |
| 20 | 10 | 2.6 |
| 25 | 20 | 5.28 |
| 30 | 30 | 7.92 |
| 35 | 50 | 13.20 |
| 40 | 70 | 18.5 |
| 45 | 85 | 22.45 |
| 50 | 130 | 34.34 |
| 55 | 170 | 44.90 |
| 60 | 220 | 58 |
| 70 | 330 | 87 |
| 80 | 550 | 145 |
Using these estimates:
2,000 lbs of whole grape times .1125 = 225 lbs of must and juice times .35 = 78.75 lbs of solid must
So for example, a 70 liter press will press 87 pounds of solid must in one press so it could do around 2,000 lbs of whole grape that was 225 lbs of must and juice.
Now that you know how to size up your press, check out our posts about choosing your style of wine press, using rice hulls at press, and our wine pressing video.
How to Pick Your Style of Press
Using Rice Hulls While Pressing Your Wine
For more information and pricing on wine presses offered at MWG please emal sales@juicegrape.com
Fall Foods to Pair with Red Wine

It’s that season! The air is getting crisper, the leaves are starting to change color and your mind is turning to those seasonal favorites such as pumpkin EVERYTHING, apples and apple pie, turkey, roasted veggies and sweet potatoes.
But when it comes to pairing your wine with those delicious autumnal treats, where to begin?
Here are a few things to keep in mind when deciding which red wine to try with your fall favorites.
Venison, lamb or beef stew pair nicely with a Red Bordeaux, Barbaresco, or Barolo. Another favorite dish in the autumn season is sweet potatoes. Pair yours with a rich red Zinfandel or if you are having more of a mashed version, enjoy it with a red blend or a lighter Pinot Noir.
Choosing a hearty vegetable stew with mushrooms or fig and goat cheese on almost anything, especially a pizza, also taste better when they are paired with a Pinot Noir. As it is so versatile, Pinot Noir also goes well when had with pork as well.
When considering meals during colder temperatures, comforting side dishes such as butternut squash risotto go nicely with a lighter Italian Dolcetto. Or a great bowl of Sausage Bolognese goes well with Sangiovese or Barbera.
Another favorite dish to indulge in even more so when the temperatures drop is a hearty chili. Serve it with a nice Malbec that will hold up well against all the flavors of the chili.
If you make a short ribs dish braised with vegetables that are cooked in red wine or something such as cheddar mashed potatoes, you can pair these with a Pinot Noir or Merlot. These red wines are medium-bodied and will add to the earthy flavors of these items.
And don’t forget desserts in the fall. That slice of pumpkin pie would be even sweeter with a glass of barrel-aged Port. Something to keep in mind, you typically want your wine to be sweeter than the dessert you are pairing it with. If a wine is too dry it will not taste as well with an overly sweet dessert.
No matter what you make in your lineup of fall favorite dishes, there is certainly a red wine to pair with it. Hopefully these gave you some ideas as you plan your autumn menu and go shopping for your wine; or better yet, see what you have in your own cellar.
Written by Michelle Griffis aka the Nutmeg Nose for MWG
Source 1
Source 2
Source 3
Source 4
How to Select the Right Cork for Your Wine

Now that you’ve made that special wine, you are going to want to bottle it and store in your wine cellar. And during that process, you will need to cork your wine as well.
How do you choose which cork to use?
Let us help you with that decision. Here are the four types of corks we offer and some details about each one:
- Natural
- Colmated
- Micro Agglomerated
- Agglomerated
Natural Corks
Natural corks are one piece and they come in grades (based on surface, water content, porosity, and visual inspection) and typically the best choice in most cases.
Aging: This cork, due to its spongy flexibility, is the one to use for aging wine beyond five years because it keeps its seal viable the longest.
Colmated Corks
Take cork from a natural cork stopper and fill its pores with glue and cork dust and you have a colmated cork.
Aging: This cork is good for medium aging, looks smoother and glides out of the bottle when you pull them.
Micro Agglomerated Corks
Micro-agglomerated corks are made and treated with granules using a steam-based process to remove TCA and other potential contaminants. This is considered a technical cork because of the process that has been used to make these corks, but it still keeps up the popular appeal of a traditional natural cork.
Aging: This cork is suitable for wine with some complexity but usually for wine with an estimated time to consume being about two years after bottling.
Agglomerated Corks
This cork is cheaper, pretty dense and made with cork dust and glue.
Aging: This cork is good for low bottling time wines so usually not used for wines that age for more than a year.
We hope this information helps you to choose the right cork for your wine. If you have any questions about our corks or which one you should choose for your particular wine or wines, please don’t hesitate to reach out and ask us for our advice. We are here to help you. Email sales@juicegrape.com or call 877-812-1137
Recent Comments