The Winemaker’s Think Tank: Vol 22 – Seven Most Common Winemaking Mistakes
What’s the Winemaker’s Think Tank?
Every Thursday we will post about a few frequently asked questions that our winemaker has answered. If you have a winemaking question you would like to have answered, please email us at support@juicegrape.com and we will try to get into next week’s post. Cheers! 🙂
Seven Most Common Winemaking Mistakes
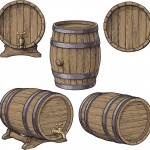
1. Headspace – When making wine, it is imperative that any vessel being used is filled completely. Filling carboys, demijohns, or fixed capacity tanks to the highest level possible, minimizing any air space it very important to prevent oxidation. If using a barrel, the barrel will allow for some evaporation as the wine ages. It is critical to top of the barrel with additional wine as this will prevent the oxidation of the wine in the barrel. Barrels do promote a small amount of oxidation, referred to as micro-oxidation, which is helpful at creating a creamier mouthfeel and promoting the expression of fruit flavors and aromas. If a large headspace develops due to evaporation, this can cause severe oxidation in the wine.
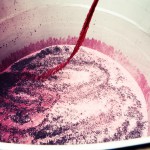
2. Degassing– Carbon dioxide gas is a byproduct of the yeast during alcoholic fermentation. Often times the bubbles of SO₂ are so small, they get trapped by the weight of the wine. If the wine is not purposefully degassed, the bubbles may come out of solution in the bottle, resulting in a fizzy wine for the drinker. The degassing process is relatively simple. One may purchase a degassing tool that is attached to a cordless power drill and stirs the wine at a high speed, agitating it and releasing the trapped bubbles. The winemaker can also splash the wine while racking, agitating the wine and releasing the trapped bubbles of gas. As long as the wine has been stirred vigorously, the gas should dislodge and escape, ensuring that it will not be fizzy in the bottle.
3. Sanitation – This may be the most important step in all of winemaking. While cleaning and sanitizing may be a tedious and time consuming process, it is critical to ensure a healthy, long lasting wine. There are an assortment of cleaning agents (B-Brite, Soda Ash, Sterox) that are excellent at cleaning wine making equipment and removing stains. These products need to be rinsed off thoroughly and should be thought of as “soap” rather than sanitizer. After the equipment has been washed and well rinsed, it must then be sanitized with potassium metabisulfite. A solution of 2 ounces of sulfite powder, dissolved into one gallon of water, will yield a strong sanitizing solution that will kill off any microbes that could spoil the wine. This will ensure the longevity of the wine in the aging vessel or bottle.
4. Bench Trials – When using a fining agent or oak additive to your wine, it is very important to first conduct a small trial of the product, before adding it to the entire batch. Assess the addition rate for the compound you would like to add to the wine. Using that as a guide for your ratio, pull out a small amount of the wine and add the compound, making sure that the ratio is accurate for that size sample. Allow the sample to sit for a few days and try it. If the results are what you were striving for, then you can apply the compound to the entire batch. This will help save you time and money if you are not satisfied with the results of the bench trial and will help you most effectively improve your wine.
5. Sulfites – Sulfites are a naturally occurring compound within wine. While sulfites do exist naturally, they are at a low level, not sufficient for helping to preserve the wine as an antioxidant. Additional potassium metabisulfite must be added to help prevent oxidation as well as prevent any advantageous microbes from growing in the wine. If the winemaker neglects to add sulfites to the wine, it will easily oxidize and could also be susceptible to bacterial contamination.
6. Record keeping – Often times with winemaking, “the devil is in the details”. The smallest change in yeast strain, nutrition, and grape acid and sugar content, can have dramatic effects on the resulting wine. The best winemakers, on the home or professional level, take meticulous notes on all of their activities and observations. By keeping track of each step of their process, they are able to reproduce their very best wines and also do research on what went wrong with their failures.
7. Timing – It is said that timing is everything. This is particularly true for winemaking. Many folks assume after fermentation, they can just leave the wine alone to age and it will come out beautifully if untouched. This is not the case. The wine needs to be maintained with racking and sulfites to ensure its longevity. Sometimes in winemaking, a fault may develop, Rather than researching a way to fix the fault or seek some professional advice, some winemakers elect to do nothing and hope the fault goes away. Often times, these faults progress and get worse. If caught early, they can be easier to fix.
We hope this information helps with your winemaking. If you have any follow up questions or winemaking questions in general, please email us at support@juicegrape.com.
Making Wine from a 1 Gallon Wine Kit By Frank Renaldi
I have never made a gallon of wine in my life; I mean not that small a batch. I am used to making much more wine at a time, from a few gallons to 4000 gallons at a winery. I have made wine from mostly fresh grapes, white juice and even 6 gallon kits. In fact I have made over 50 kits in my days, but I had to think twice before I made a ONE gallon kit.
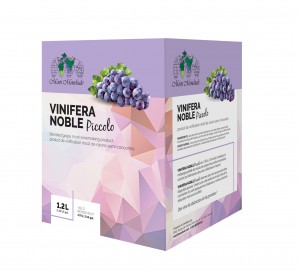
Well, I did it and guess what? It was fun! I made a one gallon kit from Mosti Mondiale Vinifera Noble. I tried the Malbec, since I just made 45 gallons from Chilean grapes. I thought it would be a good comparison on the nose and the taste. Since I made kits before, I was familiar with the process. And this small kit was no different – It was the same process you have for the standard six gallon kits.
The biggest challenge I had to deal with was the smaller fermentation and storage vessels required for one gallon of wine. I started by pouring the grape juice in a one gallon bottle and then topping it with water to measure out the correct volume. You can buy a two gallon fermentation pail, but I thought I would try using one of my 3 gallon carboys with an air trap. So I poured the gallon of adjusted wine into the 3 gallon carboy and then poured the yeast into the opening in the carboy. It worked fine.
In order to test the specific gravity of the wine during fermentation, I just poured some of the wine into a hydrometer jar. After taking the measurement, I poured the wine back into the carboy to continue fermenting. There was no wasting of wine on this batch. When I had to stir the wine, I simply shook the entire carboy.
When fermentation was complete, I racked the wine into a small pail. Then I added in the packets of sulfite, sorbate and clarifying agents supplied with the kit. Then this finished wine was poured into a gallon jug to settle for further rackings and aging. Always remember to top off the storage vessel to avoid oxidation.
I think the biggest challenge was the de-gassing of the wine. Normally, with a six gallon kit we whip the wine with a degassing wand on the end on a drill. We need to get rid of the gas trapped in the wine for clarifying and for a still wine (no fizz). With this small batch, there really is not enough wine to whip. I decided to use a vacuum pump to degas the wine, which I have also used on larger batches of kit wines. A small vacuum pump is easy to use and economical.
So, my wine is aging and smells wonderful. I will get five 750ml bottles of wine from this kit. So why make such a small batch? It is a great way to learn how to make wine as a beginning wine maker. The cost is minimal, but the experience is great. You can make 2, 3, or 4 different grape varietals and blend them when they are finished. Once you get your feet wet with these starter kits, you can move onto six gallon kits which yield 30 bottles – now we are talking. Then you have the confidence to move up to juice and grapes. After that, there is no stopping you!
Have fun with this smaller kit. I did and had fun doing it!!
Frank Renaldi


Recent Comments