


Washington Merlot Harvest

Extra, extra, read all about it – we will have Washington Wine Grapes This Year!
Specifically Own-Rooted Merlot from the Rattlesnakes Hills in Yakima Valley.
About the Soil:
The surface layers of vineyard soils are based primarily in loess, which is mostly wind-deposited silt and fine sand derived from the sediments of the ‘Missoula’ ice age floods. The content of the soils consists of a mixture of minerals derived from both the local basalt bedrock and the granite and limestone of northern Idaho and Montana.
Most of the soils are classified as silt loams (mostly Harwood-Burke, but also Weihl and Scoon), which are low in clay. The low clay content creates well-drained soils, encouraging the vines to root more deeply, a factor generally associated with high quality grapes and wines. It also creates an inhospitable environment for phylloxera, an aphid-like pest that feeds on the roots of grapevines. Due in large part to the clay-poor soils, the Yakima Valley is one of the few places on earth where European wine grapes (such as Cabernet Sauvignon, Merlot, and Pinot Noir) can still be grown on their own roots, also a factor generally associated with high quality.
The shallow soil profile contains large chunks of calcium-caked gravel and calcium carbonate horizons called “Caliche”. In most areas, the caliche forms a conspicuous white layer under the topsoil that adds mineral complexity. The deep roots of the vines penetrate through the surface layer of loess, which averages 18 inches in thickness throughout most of the vineyard, and into the underlying calcium-rich substrate. This gravelly, high pH substrate forces the vines to struggle, an additional factor associated with high quality grapes and wine.
About Being Own-Rooted:
An Own-Rooted vine is a vine that has no rootstock. This is not common in most wine regions around the world. The rootstock & vine grafting was necessary at one point to protect from specific diseases such as Phylloxera. The Washington soil type is made up of a fine silt loam which Phylloxera hates – this is why they can plant Own-Rooted vines.
It is said that there are differences in the wines from Own-Rooted vs. Rootstock Grafted Vines. There is much debate around this issue. It looks like you will have to be the judge!
About the Merlot:
The Merlot Clone coming from this vineyard has clusters that are small to medium in size. The berries are small and round. This clone produces a high vigor vine that creates a dense canopy. Yield is usually around 3-5 ton acre depending on the growing season.
The clone produces a soft, full-bodied, fruity wine full of many different complexities. A great Merlot that can stand alone and age – or be added to a blend to give the wine that extra punch of structure.
Harvest Update: 8/25/2016

ARRIVING to Hartford, CT Early Next Week:
8/29/2016:
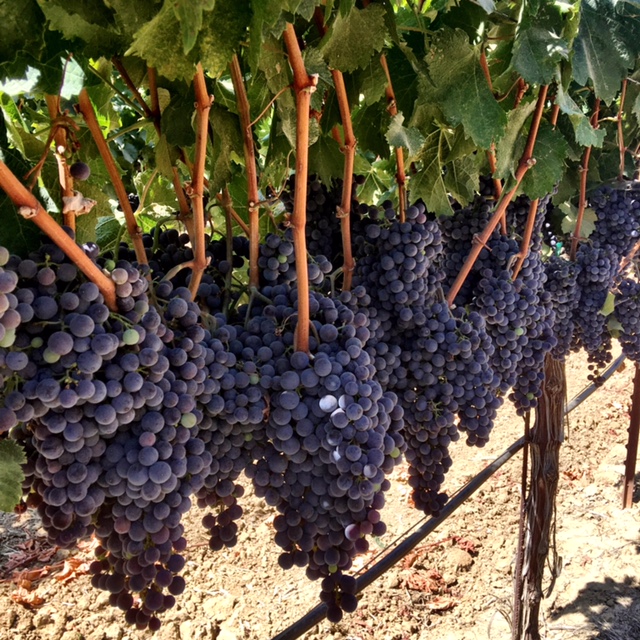
LODI
- Costamagna Chardonnay
- Lodi Gold Grenache
- Valley Beauty Barbera
- Smiling Baby Merlot
- Valley Beauty Zinfandel
9/1/2016:
LANZA – Suisun Valley
- Sauvignon Blanc
CENTRAL VALLEY
- Cry Baby Muscat (42lb)
- Muscat King (42lb)
- Cry Baby Thompson Seedless (42lb)
- Lugano Old Vine Zinfandel
- Lucerne Old Vine Zinfandel
JUICES from LODI
- A Mix of Varieties
Call 877.812.1137 or email sales@juicegrape.com for more information
Mini Harvest Report

It looks like Mother Nature is excited to get her winemaking on because the grapes are ripening early and fast! Download our E-Book for the ENTIRE list of wine grapes and juices we will be bringing in this fall HERE –> MWG_2016 Harvest Menu E-Book
Mini Harvest Report:
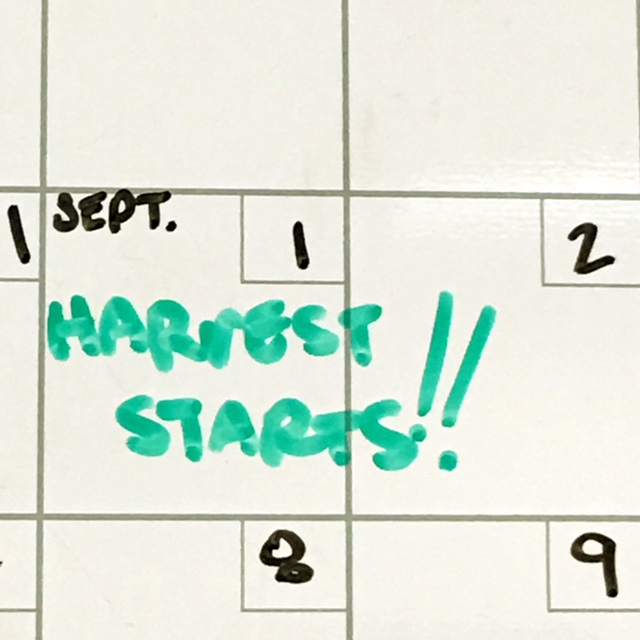
Central Valley & Lodi: Brix are in the high teens. We are expecting to have grapes in Hartford, CT as early as September 7th.
Suisun Valley, Paso Robles, Contra Costa, Amador, Sonoma, and Napa: The whites will be harvest on September 1st and should be to Hartford, CT on September 7th. The red grapes are maturing well. The Brix are creeping up there. We think that we are still on track for a September 15th harvest date, with the grapes arriving in Hartford, CT as early as September 20th.
Juices: California juices will start arriving on September 7th. We hope to see the Italian juices sometime in the first week of October.
Prices: The grape and juice prices will be available by August 16th. Please give us a call at the office to secure your order.
We look forward to working with you this fall. If you have any questions please do not hesitate to contact us at 877.812.1137 or sales@juicegrape.com
Take An Adventure to Lodi Wine Country

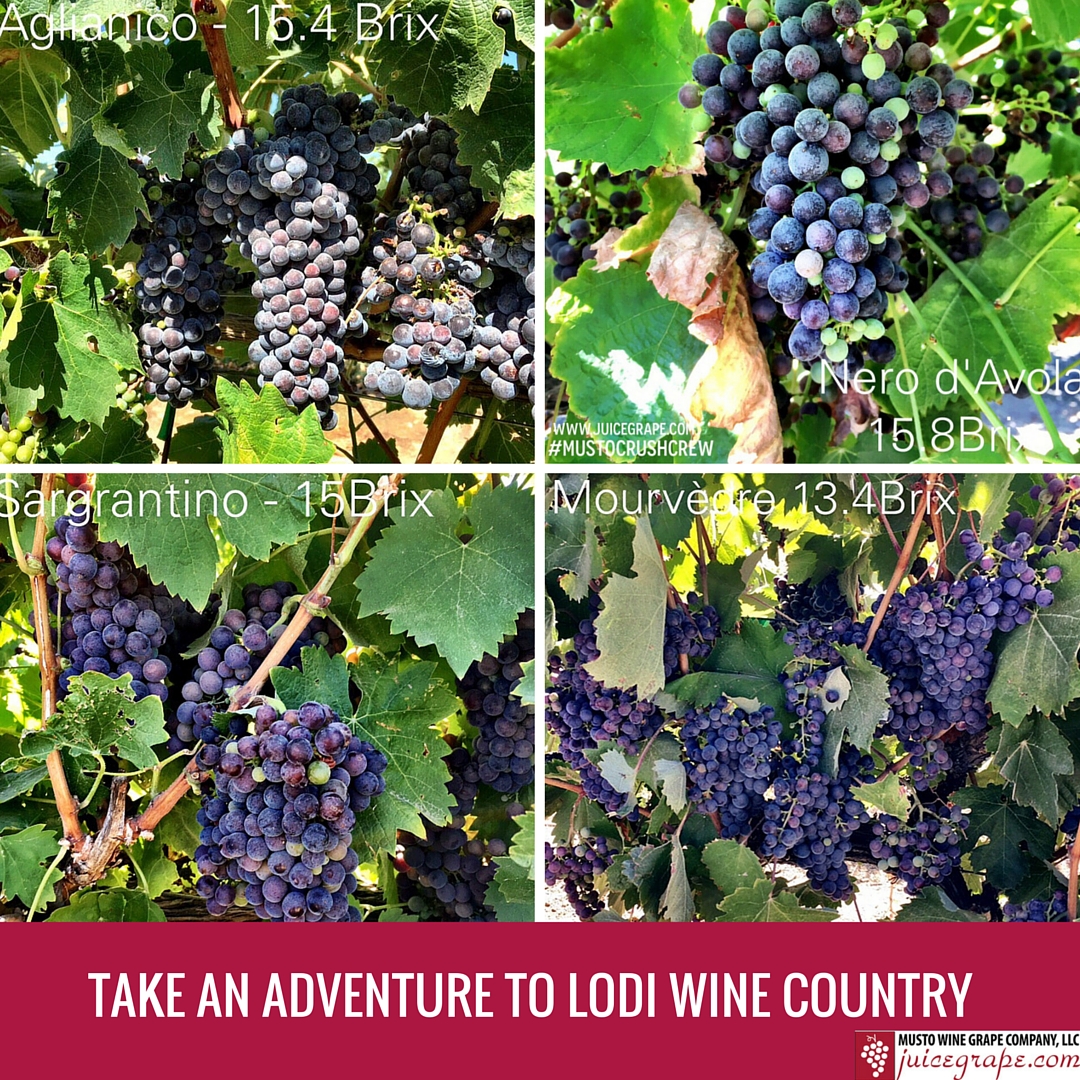
We are bringing Lodi Wine Country to you this fall. An exciting time for the region, Lodi was recently named “Wine Region of the Year” by Wine Enthusiast Magazine. The grapes are grown in a Mediterranean style climate producing wines of great character and strength. Keep an eye out for our newer Italian Wine Grape Program from this region. These grapes will be producing some fantastic and age worthy wines.
Bring on the Bordeaux! – A Home Wine Making Experience (4)
This gallery contains 1 photo.
So 11/6 was a sad day. When we went to punch down the wine, there was an off odor. To be specific it smelled like rotten eggs. This means my yeast is “stressed”. UGH!!! I’ll admit I panicked a little. Why does this happen? Well there are multiple reasons. One is in the Vineyard. Sometimes the grapes are sprayed too close to the time of harvest and the copper or sulfur compounds will stay on the grape. Another, is the yeast can get stressed if there aren’t enough nutrients for them. Sometimes the grapes don’t have enough nutrients, and as winemakers we fail to properly introduce enough supplemental nutrients for the yeast to complete fermentation.
Thankfully, there are multiple ways to treat this issue.
- You can aerate or “rack and splash” the must in order to “blow off” the smell. This will only work if the issue is lack of oxygen.
- You can add DAP. DAP stands for Diammonium Phosphate. It is a source of nitrogen (aka food for the yeast). Therefore, when you introduce DAP the yeast has more food to eat and the odor disappears.
- After fermentation, you can run the wine over copper. The copper will absorb the sulfite and help eliminate the odor. However, it will strip the wine of some flavors.
- You can add Reduless after fermentation. Reduless will not strip the wine like copper and it will remove the smell if it is a h2s issue.
We chose option 2 and it worked! We introduced 100 grams of DAP to the wine and in 2 days the off odor was gone.

Once we were able to get rid of the odor we added a 1/2lb of French oak dust. This addition helps protect against oxidation and increase color stability. The next time we will introduce oak to our wine will be during the aging process.

Thanks again for stopping by. Next time we will discuss Maloactic Fermentation.
Cheers ~ CM
Bring on the Bordeaux! – A Home Wine Making Experience (3)
")
It’s all in the yeast
We waited for our must to come up to a temperature of about 60 degrees and added our yeast starter, opti red, and tannin ft rouge. Below are our reasons for these additions.
Yeast occurs naturally on the skins of all wine grapes. If they are left alone, these yeasts will ferment the juice into wine. Some winemakers let the “wild” yeast ferment the juice. We however, use cultured yeasts. This is because we received grapes from multiple vineyards and the different strains of wild yeast will fight for the sugar or their “food”. This can cause the wine to not fully ferment and result in a stuck fermentation because of all the competition between yeasts.
The yeast we chose was FX10. We chose FX10 because it is a vigorous fermenter. It enhances the mouth feel to be big mid-palate with major fruit concentration. The wine will have notes of intense fruits while maintaing a soft, silky mouth feel.
To kick off pitching our cultured yeast we heated up a bowl of distilled water to 110 degrees. Dissolved a tablespoon of sugar in the water (the sugar helps the yeast go from a “freeze dried state” to a “living, wet state”). Added 72 grams of GoFerm. We let the GoFerm sit alone until the temperature was 104 degrees. Then we added the FX10 yeast. The whole process takes about 15 minutes. The bubbles in the photo below are proof that the yeast is awake and working.

Before we mixed our yeast starter in with our must, we added our opti red and tannin ft rouge (pictured below). The opti red helps extract more color from the skins. The tannin helps create a better mouth feel and more complexity in the wine. All you need to do to add this is dilute them in distilled water and mix into the must.

Below is a photo of us adding the yeast starter to the must. We took juice from the must and mixed into the yeast starter first. We did not just dump it in. In our opinion, it is better to try to make it all “one organism” instead of dumping into the must right away. It makes for a smoother start to fermentation. Once the additives and yeast were added we punched down the cap.

Now we monitor the must’s temperature, brix level, and smell. If there are any off odors we want to make sure to deal with them right away.
Thanks again for stopping by. Next time we will get into DAP and when to add oak additives.
Cheers ~ CM & FJ
Bring On The Bordeaux! – A Home Winemaking Experience (2)
")
So before we start going into how our wine is doing, we wanted to outline some winemaking terms. Here’s a mini wine vocabulary lesson.
Degrees Brix: Expresses the percentage of sugar by weight. This scale is on a Triple Scale Hydrometer. Measuring the Brix by using a hydrometer will help you determine the level of alcohol you wish to produce in your wine.
pH: This is the potential Hydrogen ion. The pH scale spans from 0, representing extreme acid, to 14, representing an extreme base or alkai. For winemaking purposes only the 0-7 scale is considered and wine should between 3-4. The more intense the wine acid is, (the lower the number) the less free sulfite is needed to afford proper protection and hence wine stability.
Total Acidity: This measurement refers to the amount of acid that is in your wine in grams/liter of percent of volume. Ideally, your TA should be between 0.65%-0.85% for white wine and 0.60%-0.80% for red wines. If the acid is too low your wine is susceptible to bacteria and spoilage. If it is too high your wine will taste too tart.
We took the must out of the cooler on 10/28 and waited for the must to heat up. Once the must started to heat up we took our measurements. The Brix were 25.5, TA was 5.985, and pH was 3.88. My pH is a little on the higher side. My TA is pretty good for a dry red and my Brix are at a great level to make a 12.5% alcohol per volume wine.
Some tips for taking your pH and TA measurements. I would suggest purchasing some type of all in one SO2, pH, and TA testing equipment. To test TA on your own can be very complicated and not very accurate. I would suggest looking into a Vinmetrica kit. They do all of the tests and it’s easy and accurate.
Also, try not to get distracted and mix up your solutions like I did. It took me 30 minutes to get the correct TA reading because I was mixing in the wrong solution. #airheadmove
Thanks again stopping by and checking out our winemaking process. The next post will concentrate on yeast, yeast nutrient, and other additives that help the wine during fermentation.
Cheers ~ CM & FJ
Bring On The Bordeaux! – A Home Winemaking Experience
This year we are making Bordeaux Blends. One blend is made up of 68% Cabernet Sauvignon from Oakville, 14% Petite Verdot from Atlas Peak, and 18% Merlot from Caneros, Napa Valley. This blend costs more than my first our first cars so we are praying we don’t screw them up. Lol
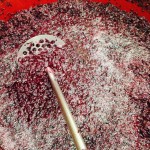
We crushed the grapes on 10/22. It was a deep, dark, and beautiful color purple.
There is more information to come! Stop by for the next post updating our wine making process!
Next we will be discussing Degrees Brix, Total Acidity, and pH Levels
Until next time….
Cheers ~ CM & FJ
Images via D. Pelletier
Recent Comments