How to Improve Color and Mouthfeel When Making Red Wine
No Wimpy Wines!
How to Improve Color and Mouthfeel when Making Red Wine
A more common complaint amongst home winemakers is that their red wine lacks the depth of color and full body and mouthfeel that they would prefer. Everyone loves a wine that has a heavier mouthfeel, giving the sensation of whole milk or cream on the palette. While it is not always an indicator of quality, many folks associate deeply pigmented red wines with being higher quality. Both color and mouthfeel can be easily managed or enhanced at fermentation through the following factors:
Physical Manipulation:
When selecting the grapes for your batch of wine, it is important to know what kind of wine characteristics that they generate naturally and how that matches up with your personal indicators of quality. If you favor very deeply pigmented wines, perhaps the integration of a very dark grape into your blend will help to boost color, right from the crush. Even a 10% addition of a deeply colored grape such as Petite Verdot, Petite Sirah, or Chambourcin can enhance the overall color of your batch and not detract from the primary varietal’s unique flavor character.
Cold soaking the grapes is another way to physically manipulate the grapes to achieve better color extraction. After crush, grapes can be lightly sulfited, and then allowed to cold soak, provided that they are kept around 40°F. Keeping the must around 40°F is important to inhibit yeast or bacterial growth in the must. There are many ways to keep the grapes this cold, including putting them in a refrigerator, using dry ice, using frozen sanitized jugs of water, or creating a small chilling closet with air conditioning and temporary walls. The extended cold soak will allow the condensed grape skin tannins to leach out and help lock in color by binding to color pigment molecules (anthocyanins). The addition of pectic enzymes during the cold soak will also aid in the color securing process.
Nutrient Additions:
The additions of various supplemental nutrients will affect the color and mouthfeel positively. Booster Rouge and Opti-Red are supplemental nutrients for red wine fermentation that help to increase mid palette mouthfeel and enhance color stability. Opti-Red is high in polysaccharides that will help to lock in color pigments and create a more intense color. Booster Rouge is a yeast derivative nutrient that helps to contribute mid-palette volume and firmer structure to wines. Both of these nutrients also help with creating a smoother tannic profile to red wines.
Tannin Additions:
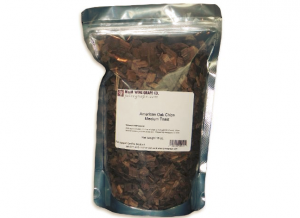
The addition of tannins at crush to the grape must will help to contribute to the overall mouthfeel of red wines, but more specifically to the mid-palette volume of the wine. Products such as FT Rouge or Oak Dust can be added to the must at the beginning of fermentation to act as sacrificial tannins for the yeast to consume throughout their metabolic process. Rather than have the yeast consume the grape tannins, they will consume the oak tannins, leaving the preferred grape skin tannins. This will help to increase the overall preferred tannin content of the wine, increasing the overall mouthfeel and perceived palette volume. FT Rouge is also very effective at locking in color pigments, working synergistically with the previously listed nutrients.
Every wine we make has the opportunity to be the best vintage yet. Following these tips may help you to improve your wines potential for greatness!
12 Steps to Making Wine from White Grapes
Making Wine from White Grapes
1. Sanitize and Crush and Destem – Inspect your grapes and remove any moldy clusters. Crush and destem into clean and sanitized food grade plastic tubs. Always rinse your receiving vessel with a sanitizing strength potassium metabisulfite solution (2oz/gallon or 3tbsp/gallon). Make sure that the sanitizing solution touches all the surfaces of the vessel and that the vessel is completely emptied out of all sanitizing solution after. Shake free any drops as best you can from the vessel. Having remaining sulfite liquid in the vessel will prohibit fermentation. Do not rinse the sanitizer off with water after sanitizing as that will reintroduce bacteria to the environment.
2. Once all of the grapes are crushed, try to accurately measure your quantity of must. Add ¼ tsp of potassium metabisulfite for every 5 gallons of must that you have. Mix up the must thoroughly.
3. Wait for 2 hours after the sulfite addition and then add pectic enzyme to the must. Musto Wine Grape offers generic pectic enzyme or Cinn Free pectic enzyme that is specifically designed for white wine grapes. Follow the directions for the individual type of enzyme. Always mix it with water to create a 10% solution (if you use 5mls of enzyme, mix it with 45mls of water). The water allows it to better circulate throughout the must. Allow the pectic enzyme to work for 6 hours before pressing.
4. Press the Must – Wash the press and sanitize using potassium metabisulfite. Again, make sure the press does not have an excessive puddles or lingering amounts of sanitizing solution remaining. Sanitize the receiving container for fermentation (carboy, tank, demijohn, barrel) and any pumps or tubing that you may use. Anything that comes in contact with the wine should be rinsed with sulfite sanitizing solution. Place a screen or mesh (also sanitized) inside of the press to hold back any extra skins or seeds from getting through. Start by scooping up the must and placing it in the press. Some of the liquid will immediately flow through; this is the “free run”. When the press is full, slowly begin pressing. Do not try and press every last drop out of the must as this can lead to seed cracking and bitterness in the wine. Fill each container to within 6 inches of the top, to allow room for fermentation. This process will cause the juice to foam up and generate gas, therefore volume.
5. After pressing the grapes, mix the container thoroughly and take and record your measurements. Measure Brix, pH, and TA. If you need to adjust your juice at all, this is the time to do it. Ideally your Brix should be between 21-26 degrees, the pH between 3.2-3.5, and the TA between 6.5-8.5g/L. Your initial Brix reading, multiplied by .55, will give you a close estimate of your ending alcohol by volume percentage.
6. If you would like to use fermentation tannins (FT Blanc) or fermentation nutrients such as Opti-White, add them after measurements and adjustments have been made. Musto Wine Grape packages FT Blanc and Opti-White in small packs for 5 gallon batches. Mix any of these ingredients in thoroughly.
7. After measurements have been taken and any adjustments have been made, it is time to set yeast if you are using a cultured yeast strain. Use 1gram/gallon of wine must. Follow the yeast set directions on the packet explicitly and/or see the separate “Yeast Set” instructions.
8. After you atemperate and add your yeast, cover your tank with a floating lid or your carboy or demijohn with an airlock. An air lock will allow the carbon dioxide to escape the container without additional air getting in to oxidize the wine.
9. Stir the juice every other day to re-suspend the yeast and nutrients. Keeping the yeast in suspension is important to give it access to sugar and nutrients and to avoid the production of H₂S.
10. If you are using additional yeast nutrients to assist in fermentation you will add them after fermentation has started. Fermaid O is added at the beginning of fermentation (1 day after yeast set) and all others (BSG yeast nutrient, Fermaid K, AnchorFerm) will be added at 1/3 depletion of the Brix (2/3 of the beginning amount of Brix). Follow the directions for the individual yeast nutrient, hydrating with water and mixing thoroughly.
11. If you are adding malolactic cultures to your wine (Chardonnay), you may also chose to do this at 1/3 Brix depletion. If using a malolactic nutrient (Opti-Malo Plus) with the bacterial culture, hydrate the nutrient in a separate container from the bacteria and add to the must directly before the addition of the bacteria. Follow all directions on the bacteria and nutrient packets explicitly.
12. Monitor the progression of the juice by taking daily hydrometer readings. Using a sanitized wine thief or syringe, pull a sample of fermenting wine that is large enough to fill the hydrometer cylinder. Always sanitize the hydrometer and the cylinder before taking a reading. Look to the meniscus of the wine surface in relation to the hydrometer for the most accurate reading. When the wine is fermented to dryness (0.90 Specific Gravity), is has completed its primary fermentation. Allow the lees particles to settle, and then rack the wine into a sanitized container. Be sure that the container is filled within ½” of the top to prevent air exposure. At this point, it is imperative to add ¼ tsp of potassium metabisulfite per 5 gallons of wine. The sulfites will kill off any harmful microbes and prevent the wine from oxidizing.
13 Steps to Making Red Wine from Grapes
13 Steps to Making Red Wine from Grapes
1. Sanitize and Crush and Destem – Inspect your grapes and remove any moldy clusters. Crush and destem into clean and sanitized food grade plastic tubs, stainless steel tanks, or glass carboys or demijohns. Always allow an extra 20% of volume for fermentation purposes as the wine will “expand” throughout fermentation. Always rinse your fermentation vessel with a sanitizing strength potassium metabisulfite solution (2oz/gallon or 3tbsp/gallon). Make sure that the sanitizing solution touches all the surfaces of the fermentation vessel and that the vessel is completely emptied out of all sanitizing solution after. Shake free any drops as best you can from the fermentation vessel. Having remaining sulfite liquid in the vessel will prohibit fermentation. Do not rinse the sanitizer off with water after sanitizing as that will reintroduce bacteria to the environment.
2. Once all of the grapes are crushed, try to accurately measure your quantity of must. Add ¼ tsp of potassium metabisulfite for every 5 gallons of must that you have. Mix up the must thoroughly.
3. Wait for 6-8 hours after the sulfite addition and then add pectic enzyme to the must. Musto Wine Grape offers generic pectic enzyme or Color Pro pectic enzyme that is specifically designed for red wine grapes. Follow the directions for the individual type of enzyme. Always mix it with water to create a 10% solution (if you use 5mls of enzyme, mix it with 45mls of water). The water allows it to better circulate throughout the must. Allow the pectic enzyme to work for 12 hours before yeast set.
4. Twenty four hours after crushing the grapes, mix the container thoroughly and take and record your measurements. Measure Brix, pH, and TA. If you need to adjust your must at all, this is the time to do it. Ideally your Brix should be between 23-28 degrees, the pH between 3.4-3.7, and the TA between 6-7g/L. Your initial Brix reading, multiplied by .55, will give you a close estimate of your ending alcohol by volume percentage.
5. If you would like to use fermentation tannins (FT Rouge, oak dust) or fermentation nutrients such as Opti-Red, add them after measurements and adjustments have been made. Musto Wine Grape packages FT Rouge and Opti Red in small packs for 5 gallon batches. If using oak dust, use 1/4cup for every 5 gallons of must. Mix any of these ingredients in thoroughly.
6. After measurements have been taken and any adjustments have been made, it is time to set yeast if you are using a cultured yeast strain. Use 1gram/gallon of wine must. Follow the yeast set directions on the packet explicitly and/or see the separate “Yeast Set” instructions.
7. After you atemperate and add your yeast, you may cover the vessel lightly with an old sheet or towel or place the lid gently on top of the bucket, if an airlock is in place. An air lock will allow the carbon dioxide to escape the pail without additional air getting in to oxidize the wine.
8. Obtain a must punch tool, a long stainless steel spoon, or your bare hands, and sanitize your tool or hands with sulfite sanitizer. This is what you will use to “punch down” or mix up the must three times a day. Try to mix everything very well, pushing all of the skins back down to the bottom, getting them very wet, and bringing up the piqued from the bottom. This should be done as often as possible, preferably three times a day. [Before work (7am), after work(5pm), and before bed (10pm)] When punching down every evening, take a sample of the liquid and using your hydrometer, track the Brix depletion. You should notice a drop in Brix daily.
9. If you are using additional yeast nutrients to assist in fermentation you will add them after fermentation has started. Fermaid O is added at the beginning of fermentation (1 day after yeast set) and all others (BSG yeast nutrient, Fermaid K, AnchorFerm) will be added at 1/3 depletion of the Brix (2/3 of the beginning amount of Brix). Follow the directions for the individual yeast nutrient, hydrating with water and mixing thoroughly.
10. If you are adding malolactic cultures to your wine, you may also chose to do this at 1/3 Brix depletion. If using a malolactic nutrient (Opti-Malo Plus) with the bacterial culture, hydrate the nutrient in a separate container from the bacteria and add to the must directly before the addition of the bacteria. Follow all directions on the bacteria and nutrient packets explicitly.
11. Punch down and take Brix measurements daily. When your hydrometer reads 0.90, you have fermented to dryness. At this point your malolactic fermentation may still continue, but the primary alcoholic fermentation is complete. You may now press the wine. Wash the press and sanitize using potassium metabisulfite. Again, make sure the press does not have an excessive puddles or lingering amounts of sanitizing solution remaining. Sanitize the receiving container (carboy, tank, demijohn, barrel) and any pumps or tubing that you may use. Anything that comes in contact with the wine should be rinsed with sulfite sanitizing solution. Place a screen or mesh (also sanitized) inside of the press to hold back any extra skins or seeds from getting through. Start scooping up the must and placing it in the press. Some of the liquid will immediately flow through, this is the “free run”. When the press is full, slowly begin pressing. Do not try and press every last drop out of the must as this can lead to seed cracking and bitterness in the wine. Fill each container to within ½” of the top and secure a bung and airlock in place. Malolactic fermentation will exude a small amount of carbon dioxide and there will be trapped gas within the wine that will need to escape the container.
12. Allow the wine to sit for 2-3 weeks. You can conduct malolactic chromatography or bring a sample to a winemaker at Musto Wine Grape for analysis to ensure that your secondary fermentation is finished. At this point you should see a nice thick layer of lees in the bottom of the carboy or demijohn. You will want to place the full vessel onto an elevated surface such as a table and place the new, sanitized, empty vessel on the floor below. Using a sanitized siphon, rack the wine into the new carboy. You may have space at the top which will need to be “topped off” with more wine. You can either use wine from another container, or finished wine to do this. It is very important that there is less than a 1/2” of headspace in each container. At this point you should also add 1/4tsp of potassium metabisulfite per 5 gallons of wine.
13. Now it is time to let your wine age. You will need to rack it and add additional SO₂ every 3 months. Make sure you sanitize all equipment and containers when racking and keep them topped off within ½”. Come visit Musto Wine Grape for bottling advice and supplies.


Recent Comments