How to Make Syrah Wine from Chilean Wine Grapes
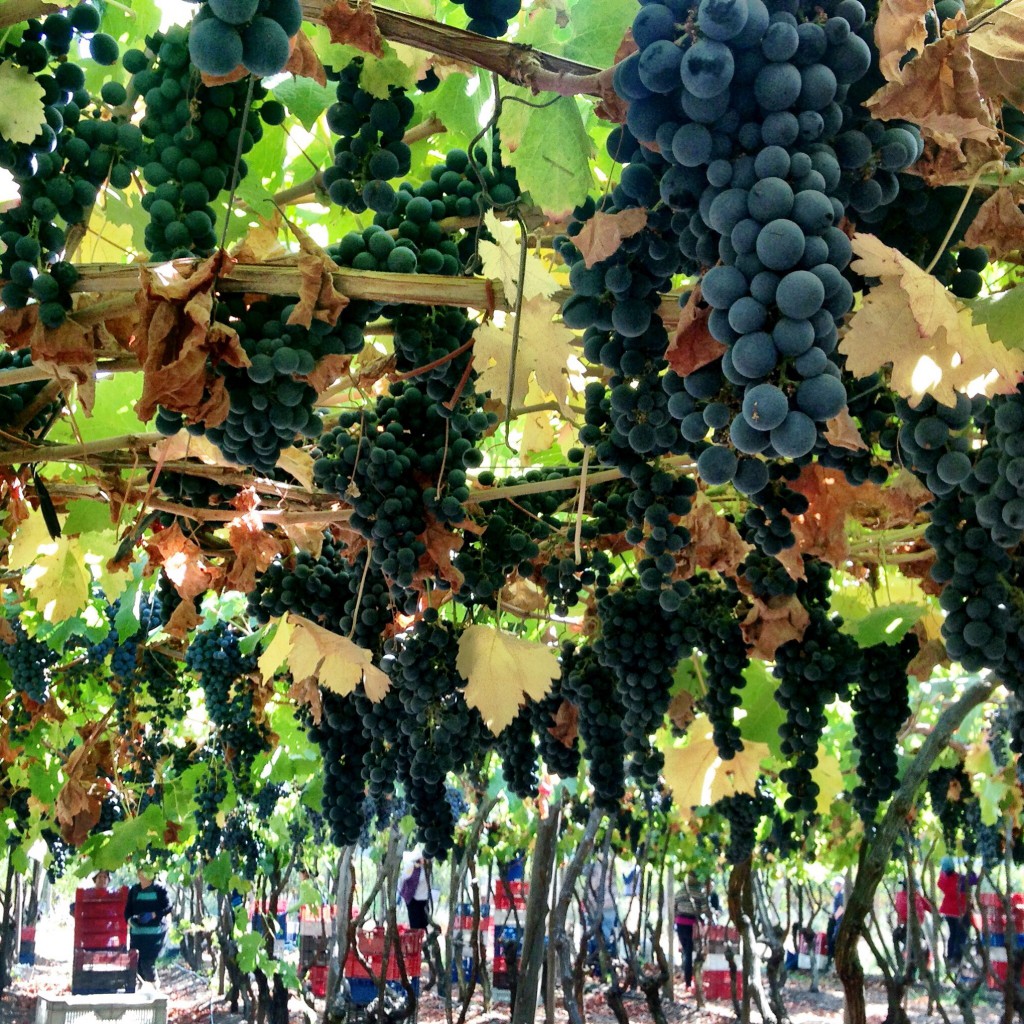
Chilean Syrah from Colchagua Valley has received high praise from publications like Wine Enthusiast, earning 93+pts. It’s a wine variety that is often overlooked from Chile and is a wine worth making this season. Chilean Syrah boasts flavors of plum, wild berry, and earth aromas. I highly suggest introducing this wine to oak barrels or an oak infusion. The medium acidity and powerful aromas are complemented by the French Oak flavor profile.
Yeast Suggestion: CSM yeast
Oak Suggestion: French oak barrels or chips
Wine Flavor Profile: Bold, medium tannins, blackberry, plum, wild berry, leather, smoke, chocolate, and oak
How to Make Syrah Wine from Chilean Wine Grapes:
- Crush Syrah grapes into a sanitized bin or tub. (Each 18lb crate will make 1.25 gals of finished wine).
- Apply 50ppm of Potassium Metabisulfite and stir well. Allow to sit for 8-12 hours.
- Apply .5ml of Color Pro Pectic enzyme per box diluted into a 10% solution with water to the must and stir. Allow to sit for another 8-12 hours.
- Mix Booster Rouge, FT Rouge, and Opti-Red, with spring water until it is the consistency of pancake batter and pour over top of crushed grapes. Mix in well.
- Add rehydrate CSM yeast (1g/gal) with Go Ferm rehydration nutrient and warm water. Allow to sit for 15 minutes and pour over top of crushed grapes.
- Punch down grapes 3 times per day throughout the duration of fermentation and monitor temperature and Brix levels daily. Use a hydrometer to test sugar content in a strained juice sample. Make sure the temperature does not exceed 85F.
- One day after adding the yeast, add Fermaid O, mixed with spring water into the pancake batter style slurry. Dump into grapes during a punch down.
- After the depletion of 1/3 of the Brix (when the Brix level is between 16-11), add Fermaid O that is mixed with spring water into the pancake batter style slurry. Dump into to grapes at a punch down.
- Add Malo-lactic bacteria the same day as the Fermaid K. If you are using liquid cultures, just pour over the grape must and mix. If you use the dry cultures, rehydrate them in warm spring water according to their specific directions, utilizing any rehydration nutrients recommended.
- When the Brix have dropped below zero, press the wine into a sanitized tank, carboy, or demijohn. Make sure the vessel is topped up all the way to the top of the neck and sealed properly with a bung and airlock.
- Rack after 48 hours and then again in a week. Allow MLF to complete before adding sulfites.
- Allow the wine to age and rack it every 2 months and add sulfites when racking.
- Add oak infusion after 2nd or 3rd racking. Taste test along the way until the oak profile is where you want it to be.
Interested in making your own wine? Musto Wine Grape Company is here to help! Musto’s New England’s largest supplier for home winemaking products and services. Visit juicegrape.com or give us a call at (877) 812 – 1137 to learn more.
Product Spotlight: CSM Yeast
Product Spotlight: CSM Yeast
CSM yeast was derived from Bordeaux and helps create a vibrant aromatic profile. CSM aids in adding complexity to the palate and pairs well with malolactic fermentation.
Why you want to use it:
It’s the perfect yeast for the Chilean fruit. It reduces vegetal aromas, adds complexity, stabilizes color, and helps increase the aromatic profiles of berries and spices.
Use Tips:
Fermentation starts quickly with this yeast. Be prepared to see Brix drop 24 hours after inoculation. It can stand up 14% ABV and can handle temperatures from 59–90°F. However, I highly suggest keeping your fermentation temps lower than 75°F. Once you hit 80°F you lose aromas and “burn off” flavors. Keeping your wine between 59–75°F during fermentation is a best practice.
You also want to use nutrients when using CSM; nutrients such as Fermaid-O and Fermaid-K. CSM tends to produce H2S (rotten egg smell) if there aren’t enough nutrients during fermentation.
Avoid cold shocking the yeast at inoculation. You’ll want to get the must and the yeast starter within a few degrees of each other before pitching the yeast starter. But without temperatures falling lower than 55°F. Temps below 55°F could stall fermentation and/or kill the yeast.
Goes best with:
CSM was cultivated to help ferment Cabernet Sauvignon, Cabernet Franc, Grenache, Merlot, Sangiovese, Petit Verdot. However, we have seen it used on Carmenere, Malbec, and Syrah from Chile with great results.
Dosage:
6gm/gals
Flavor Profile:
Cherry pit, raspberry, blackberry, spice, violet, bark, and sweet pepper
Ready to make wine? Musto Wine Grape Company is here to help you make the wine of your dreams! The Spring South African & Chilean winemaking season starts soon! Secure your winemaking grapes or juices and give us a call at (877) 812-1137 to speak with one of our Musto Crush Crew members. We can get you set up with everything you need and provide customer support along the way to ensure your success!
The Winemaker’s Think Tank: Vol 14 – What temperature should my juice be before yeast is added?
What’s the Winemaker’s Think Tank?
Every Thursday we will post about a few frequently asked questions that our winemaker has answered. If you have a winemaking question you would like to have answered, please email us at support@juicegrape.com and we will try to get into next week’s post. Cheers! 🙂
What temperature should my juice be before yeast is added?
The ideal temperature for most yeast strains to conduct a successful fermentation is between 60-70 degrees Fahrenheit. Be sure that the juice is at least 60 degrees before adding any yeast to ensure that the yeast will not die of cold shock when added to the wine.
Check out Musto’s Youtube Video below for Step by Step Yeast Starter Instructions from Winemaker & Bootcamp Professor Frank Renaldi.
We hope this information helps with your winemaking. If you have any follow up questions or winemaking questions in general, please email us at support@juicegrape.com.
Bring on the Bordeaux! – A Home Wine Making Experience (3)
It’s all in the yeast
We waited for our must to come up to a temperature of about 60 degrees and added our yeast starter, opti red, and tannin ft rouge. Below are our reasons for these additions.
Yeast occurs naturally on the skins of all wine grapes. If they are left alone, these yeasts will ferment the juice into wine. Some winemakers let the “wild” yeast ferment the juice. We however, use cultured yeasts. This is because we received grapes from multiple vineyards and the different strains of wild yeast will fight for the sugar or their “food”. This can cause the wine to not fully ferment and result in a stuck fermentation because of all the competition between yeasts.
The yeast we chose was FX10. We chose FX10 because it is a vigorous fermenter. It enhances the mouth feel to be big mid-palate with major fruit concentration. The wine will have notes of intense fruits while maintaing a soft, silky mouth feel.
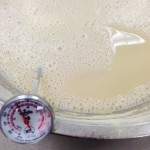
To kick off pitching our cultured yeast we heated up a bowl of distilled water to 110 degrees. Dissolved a tablespoon of sugar in the water (the sugar helps the yeast go from a “freeze dried state” to a “living, wet state”). Added 72 grams of GoFerm. We let the GoFerm sit alone until the temperature was 104 degrees. Then we added the FX10 yeast. The whole process takes about 15 minutes. The bubbles in the photo below are proof that the yeast is awake and working.
Before we mixed our yeast starter in with our must, we added our opti red and tannin ft rouge (pictured below). The opti red helps extract more color from the skins. The tannin helps create a better mouth feel and more complexity in the wine. All you need to do to add this is dilute them in distilled water and mix into the must.
Below is a photo of us adding the yeast starter to the must. We took juice from the must and mixed into the yeast starter first. We did not just dump it in. In our opinion, it is better to try to make it all “one organism” instead of dumping into the must right away. It makes for a smoother start to fermentation. Once the additives and yeast were added we punched down the cap.
Now we monitor the must’s temperature, brix level, and smell. If there are any off odors we want to make sure to deal with them right away.
Thanks again for stopping by. Next time we will get into DAP and when to add oak additives.
Cheers ~ CM & FJ





Recent Comments