Holiday gifts for the winemaker in your life
Puzzled about what to get? This gift guide is here to help steer you toward finding that oh-so-perfect gift for your favorite fermenter.
Help them perfect their craft by supporting their interest and investing in some fantastic fermentation-based gifting this holiday season!
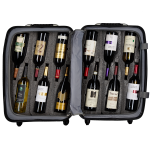
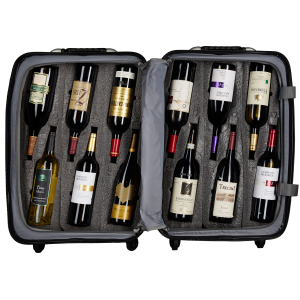
For the traveling winemaker: Are they the kind of winemaker who is always bringing bottles for friends and family to try, even when flying or traveling far distances for the holidays? Make their life easier with a wine suitcase that can help them bring their wine to others, and in turn bring some of their purchased wine back safe and sound. They’ll thank you when they don’t have to deal with the potential of broken glass and spilled wine.
For the aspiring chemist: If they don’t already have one, a Vinmetrica that can test pH, TA, and SO2 is an amazing gift that will make their life a lot easier.
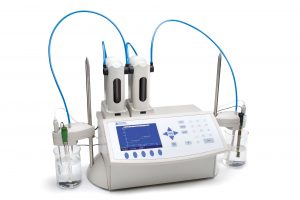
For the more serious chemist: If you’re really feeling generous, a Hanna titrator can be life changing! You’ll have to gauge how serious they are and how much time they spend testing their wines, and what they test. (Do you hear them talk about TA, YAN, and total SO2? If so, this may be reasonable. If not, maybe stick with one of these other gifts, at least this year.)
For the sommelier-type winemaker: A gift card to their favorite wine bar or wine shop. It’s rare to meet a winemaker who isn’t interested in trying new styles, regions, or winemakers they’ve heard about. Feed their curiosity by setting them up with a way to explore new wine territory by gifting them with the opportunity to do so.
For the picky winemaker: Let the gift-receiver choose whatever they would like with a A Musto Wine Grape gift certificate. One of the benefits of this is that they can either come in to shop around or if they’re out of state, just give us a call and place an order over the phone or through our website.
For the winemaker with the travel bug: A weekend getaway to their favorite wine region. This will let them talk and learn from some of their favorite producers, allowing them to bring back what they’ve learned to incorporate into their own winemaking!
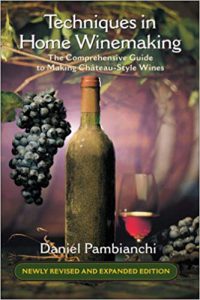
For the literary winemaker: When winemakers have a question, they’ll oftentimes reach to books such as “Knowing and Making Wine” by Emily Peynaud and/or “Techniques in Home Winemaking” by Daniel Pambianchi. These reliable books serve as fantastic references for many questions that arise for both amateur and commercial winemakers.
Looking for some stocking stuffers? Think corkscrews, a decanter, aerator, refractometer, or custom labels for their wine bottles are always appreciated!
The Musto Crush Crew’s Holiday Wine Cocktail Recipes
It’s time to break out those cozy drinks by the fire!
The Musto Crush Crew loves a boozy cocktail and we wanted to share a few of our favorite holiday recipes. Try one, try all, or add your own spin to these delicious holiday drinks.
Mulled Wine
Mulled wine has been called “The Winemaker’s Hot Toddy”. It delivers delicious wine flavors with a hint of spice. A great drink for the winter months.
Link to recipe: http://blog.juicegrape.com/index.php/2018/12/the-winemakers-hot-toddy-mulled-wine/
Autumn Sangria
We tried a delicious fall Sangria recipe and it delivered! We loved it so much we are making it for our next winter party. Give it a try, Sangria isn’t just for the summer time.
Link to recipe: http://blog.juicegrape.com/index.php/2019/11/rose-autumn-sangria-recipe/
Coquito
A Latin spin on eggnog, we are obsessed with this creamy liquor drink. Notes of nutmeg and a little zing of rum will put you in the holiday spirit.
Link to recipe: http://blog.juicegrape.com/index.php/2019/11/coquito-recipe/
Musto Wine Grape Company is here to help! We are New England’s largest supplier for home winemaking products and services. We can get you set up with all of your juice, grape and equipment needs and have you on track to making your own perfect pairing for next fall!
Visit juicegrape.com or give us a call at (877) 812 – 1137 to learn more.
We look forward to hearing from you!
Top Gifts for Wine Lovers!
Here are some of our top gift picks for the 2019 holiday season sure to bring cheer to all wine lover’s far and near!
Insulated Wine Tumblers
-
Keep your wine (or other drink of choice) at the perfect temperature with our new stainless steel insulated wine tumblers, with oh so relatable sayings on them!
- Link to product: http://bit.ly/Wine-Tumblers
Wine Folly: Magnum Edition
-
Whether you are a newbie in the wine world or a seasoned professional, you’ll benefit from having all the information you need at your finger tips with Wine Folly’s Magnum Edition.
- Link to product: https://amzn.to/34Zd2nq
Corkcicle Air
-
The perfect tool for keeping your white wines chilled without ending up with a messy, water filled bucket when you’re done.
- Link to product: https://amzn.to/32K8IXm
Sipski Shower Wine Glass Holder
-
Because bathtubs and showers still aren’t wine glass friendly (get with the times, bath manufactures) this little tool will keep your glass safe while you relax with your soap and suds.
- Link to product: http://bit.ly/33Oe19K
Glass Wine Saver Carafe
-
Surpassing the abilities of most wine savers these days, this cleverly designed carafe includes a special float that sits on the surface of the wine so it never makes contact with the air, keeping it fresh for much longer.
- Link to product: http://bit.ly/2q0Eang
Stainless Steel Wine Chiller
-
Thanks to double-walled, vacuum-insulated stainless steel that also eliminates drippy condensation, this keeps your wine at a perfectly cool temperature for hours. No trips to the fridge or cooler needed!
- Link to product: http://bit.ly/2ObVj58
Red Wine Stain Remover
-
A stain remover that works like magic on spills of your favorite vintage, as well as berries, beets and more. Works on colorfast, washable fabrics and is best on stains that haven’t set in yet.
- Link to product: http://bit.ly/2CEoqZB
BONUS GIFT IDEA
Gift Certificate
-
Purchase a Musto Wine Grape Gift Certificate for any desired amount. We are sure your winemakers will put it toward their most desired items in the Spring and Fall winemaking seasons.
- Link to product: http://www.juicegrape.com/Gift-Certificate-25-50-100/
We hope this helped check a few off your list! What are you hoping Santa brings you this year?
Questions? Still don’t know what to get your winemaker? Give us a call at 877-812-1137 or email sales@juicegrape.com to discuss the perfect gift for your winemaker.
Top Wine and Food Pairings for Thanksgiving
We can’t believe it’s almost Thanksgiving!
This year, harvest season flew right past us. Now it’s time for everyone to wine down 😉 and enjoy great food and wine with our families during the holiday season. To make things simple and easy, we’re providing you with our favorite wine pairings for your thanksgiving meals to help you spend less time roaming the aisles of the liquor store and more time laughing and making memories with your families.
Sauvignon Blanc:
Goes perfect with appetizers like salads and veggie platters. The flavors of apple and melon would be a great starter wine, while being both refreshing and not overly heavy before your Thanksgiving meal.
Riesling:
Same goes for Riesling, depending on if it is more on the sweet or dry side. The fruity flavors will go well with the other fruit flavors like cranberry sauce, and the crispness will also go well with the salads and veggies platters.
Pinot Noir:
A wine that can pair with most of the Thanksgiving dishes being passed around, from turkey to sweet potatoes and cranberry sauce. The smooth flavors of plum, cherries and berries accompany these dishes perfectly.
Zinfandel:
Another wine that can pair with most of the Thanksgiving dishes being served. It provides more of a sweet plum or berry jam flavor with the added bonus of some notes of pepper. This is great for the heavier dishes where the sweet and spicy will balance out the richness of a casserole or creamy mashed potatoes.
We hope everyone has a yummy and safe Thanksgiving!
Musto Wine Grape Company is here to help! We are New England’s largest supplier for home winemaking products and services. We can get you set up with all of your juice, grape and equipment needs and have you on track to making your own perfect pairing for next fall! Visit juicegrape.com or give us a call at (877) 812 – 1137 to learn more. We look forward to hearing from you!
We tried Empathy’s Rosé Autumn Sangria recipe and it was too good not to share!
We tried Empathy’s Rosé Autumn Sangria recipe and it was too good not to share!
While Empathy’s Rosé is a crowd pleaser pairing just by itself, there’s nothing wrong with spicing things up! We’ve included Empathy’s recipe for their Rosé Autumn Sangria, and we’ve included some tasty parings to go along with it.
Empathy’s Rosé Autumn Sangria
Let’s start with what you’ll need for ingredients
- 1 Red Apple
- 1 Green Apple
- 2 Oranges
- 1 Lemon
- 1 lime
- 2 Pomegranate
- 3-4 Cinnamon Sticks for garnish
- 2 Cups Apple Cider
- 1 Bottle of Empathy Rose
How to Make It
- Slice up all of the fruit, dicing the apples into sticks.
- Pour all of the fruit into a pitcher
- Add bottle of Empathy Rosé and Apple Cider
- Stir and serve over ice. Garnish with cinnamon sticks and orange peel.
Musto Wine Grape’s Rosé Autumn Sangria Pairings
- Butternut Squash Soup. The cinnamon and apple cider will go especially well with this savory autumn soup, which often times has apples and cinnamon blended in. Try Musto Crush Crew’s Autumn Butternut Squash Soup!
- Pear, Blue Cheese and Candied Pecan Salad. The crisp pear, the creamy and salty blue cheese, and the sweet nutty pecan flavors perfectly compliment this sangria recipe.
- Shaved Brussels Sprouts Salad with Lemon and Pecorino. Brussels sprouts, like most brassica, can be a difficult food to pair with. Using this autumn sangria recipe, with all of its spicy and fresh fruit additions, is an excellent route to go.
Want to try this with your own Rosé? Musto Wine Grape Company is here to help! We are New England’s largest supplier for home winemaking products and services. We can get you set up with all of your juice, grape and equipment needs and have you on track to making your own perfect pairing for next fall! Visit juicegrape.com or give us a call at (877) 812 – 1137 to learn more. We look forward to hearing from you!
Coquito Recipe
Who doesn’t love a delicious holiday cocktail? Over the years the Musto Crush Crew has helped Coquito makers find the perfect bottle to display their creation. Coquito is a Puerto Rican holiday drink. It is a delicious blend of sweetness, nutmeg, and a little zing of rum. You and your guests won’t be disappointed when you try out this tasty holiday drink. For the month of November, in honor of Coquito season we are offering 10% off select wine bottles. Click HERE for more details. Below is our suggested recipe. We hope you enjoy it!
Ingredients
-
2 – 14 ounce cans condensed milk
-
2 – 14 ounce cans evaporated milk
-
2 – 14 ounce cans coconut milk
-
4 ounces pure vanilla extract
-
1 teaspoon ground cinnamon
-
½ teaspoon nutmeg
-
14 ounces white Puerto Rican rum
Directions
-
Combine all ingredients into a blender and mix until well combined.
-
Transfer mixture into glass bottle (1 gallon-sized or 3 liter-sized) and refrigerate overnight.
-
Serve in a glass of your choice and top with a sprinkle of ground cinnamon.
Once you create your delicious Coquito check out Musto’s wide selection of wine bottles. Coquito looks wonderful when gifted in a Frosted Bottle, Standard Clear, Standard Green, and more!
recipe via The Latin Kitchen
How to do paper chromatography
Paper chroma-whata??
Paper chromatography: the way that home winemakers (and some commercial winemakers) check to see if their wines have completed malolactic fermentation or if they are still in the process of it. This is the time of year that winemakers are staying up on at what point their wine is at in the process of malolactic fermentation, because it will dictate when they can add potassium metabisulfite for the first time to their finished wine.
Why is it important?
Some wines should go through MLF for stylistic and stability reasons, whereas others should not.
How do I do it?
You’ll need to get a paper chromatography kit. This includes 3 acid standards (malic, lactic, tartaric), the solvent solution, chromatography paper, capillary tubes, and a plastic jar.
How accurate is it?
That’s the thing – it’s more qualitative than quantitative. Maybe it will show that there is still malic acid present, but that doesn’t mean it tells you how much is present, how long it’s been at this point, or if it’s even still decreasing anymore. It is qualitative in the sense that it shows: yes, acid X is present, or no, acid X is not present. If you’re searching for a more exact number or reference point you can send your samples in to a lab – if you’re looking to get an overall picture of whether or not your wine has any malic acid or lactic acid present, then using paper chromatography is the way to go.
What does this stuff look like?
How do I do it?
- Collect your wine samples
- Draw a line 1-2 inches from the bottom of the paper using a pencil (pen will not work)
- Mark with an X or dot where you will place the samples.
- Use capillary tubes (one for each sample – don’t mix them up) to draw up a very small sample of the the standards (malic, lactic, and tartaric) and then the wine samples and drop a very small amount of the liquid onto the paper. You will notice it will spread out once it hits the paper so be sure not to drop too much liquid. Less is more here.
- Let the dots dry and repeat 3 times. This will make it easier to read down the road.
- Roll the paper up and staple either side without the paper overlapping onto itself.
- Pour a small amount of paper chromatography solvent solution into the bottom of the plastic jar. Be careful to not inhale this. Place the stapled paper, sample side touching the solution, into the jar. Screw the lid on and let sit for ~8 hours, or enough time for the solvent to reach from the bottom to the top of the paper.
- Take the paper out (carefully) and let it air dry until the entire sheet turns blue and yellow dots are clearly visible.
- Match up where you see specific acid dots with the wine samples and you can detect if malic and/or lactic acid is present in each sample.
Helpful hints
You will likely need to run this test at least a couple of times to see the decline in MLB and confirm its completion
Be sure not to add any potassium metabisulfite to your wine until MLF has completely finished!
Use space heaters or a warm room for wines undergoing MLF to help speed the process along
Collect your test samples
Happy Halloween from the Crush Crew!
Happy Halloween from the Crush Crew!
We put together some awesome wine pairings to go with all the Halloween candy you’ll be getting- Uh, I mean your kids will be getting tonight!
We hope everyone has a safe and spooky Halloween.
Peanut butter cups
- Ruby port. The sweet, rich flavors of ruby port will meld great with the chocolate and peanut butter combination.
Twizzlers
- Pinot Noir. Since Twizzlers are one of the less intense flavored Halloween candies you’ll encounter, reach for a more delicately flavored. Bright cherry, raspberry, and earthy flavors will be a delicious compliment to Twizzlers.
Snickers
- With so many flavors and textures in Snickers, you’ll need a wine that can stand up to it – a high alcohol Syrah that already has aromas of chocolate, tobacco, spice, and stewed fruit is the go-to here.
Starburst
- Beaujolais Nouveau with its high acidity and low tannins, notes of bubblegum, strawberry, and banana, will pair great with the flavors of Starburst.
Skittles
- Riesling. High acidity and sweetness will match perfectly with these sweet, fruity chewy candies.
Butterfingers
- Chardonnay. A luscious buttery Chardonnay will meet the rich and layered flavors of Butterfingers.
Pressing with rice hulls
Yes – sometimes rice hulls are used for wine making!
Why, you ask?
Well, that’s a great question and we’re here to answer it.
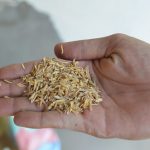
Q: First of all, what are rice hulls, anyway?
A: The husks, or hulls, of rice. It’s the seed coating.
Q: What do they do?
A: They can be used during pressing your grape skins as a way to increase the ease of drainage during the pressing. By incorporating them during the pressing, the size and shape of the hull creates pathways for the otherwise very slippery grape skins to pass through, allowing the free run and the press run to escape with more ease.
Q: Do they impart any flavor or odor?
A: Nope.
Q: How do I use them?
A: Just sprinkle them throughout the grapes as you place them into your press.
A: 50 lbs of rice hulls can be used for 2-6 tons of grapes.
Q: Is it necessary to use them?
A: Absolutely not. However, you will hear about certain home winemakers as well as commercial winemakers who choose to use them. It’s very much a personal preference. To a degree it also depends on the variety you are pressing; some “slip skin” grape varieties can create clogging issues in presses more easily than others. There’s no particular downside to using them if you choose to do so – they will really just make the pressing easier.
Interested in learning more about incorporating rice hulls into your pressing protocol? Stop by Musto Wine Grape or give us a call to learn more about the rice hulls we carry and our experience using them. Happy pressing!
Musto Crush Crew’s Sweet Autumn Butternut Squash Soup
During harvest we need some tasty fuel to keep us going. This sweet autumn butternut squash soup is nourishing and fulfilling, sure to satisfy the whole family. As the temperatures drop, we wanted to share this recipe to help keep you warm!
Ingredients
- 3 cups of diced butternut squash
- 1 unpeeled, diced apple
- 1 unpeeled, diced pear
- 2 tablespoons of extra-virgin olive oil
- 2 garlic gloves, minced
- 1 small onion, ½” diced
- ½ teaspoon of curry powder
- ¼ teaspoon of ground ginger
- ¼ teaspoon of ground cinnamon
- 4 cups of vegetable broth
- Salt & black pepper
- ¼ cup chopped walnuts (toasted), 2 tablespoons roasted pumpkin seeds, chives and plain greek yogurt as optional toppings.
Instructions
- Heat the oil in a large saucepan over medium heat and add the onion. Stir frequently until tender (for about 5 minutes) then stir in the garlic and continue to stir for another minute.
- Add the squash, apple, pear, curry powder, cinnamon and ginger. Stir.
- Stir in the broth, increase heat to high. Cover and bring to a boil.
- Once boiling, reduce heat and maintain at a low boil, covered for 30 minutes.
- Let cool for about 15 minutes and transfer to a blender (if you do not have an immersion blender). Puree until very smooth. Transfer back into the pot, reheat and season with salt and pepper to taste. Serve with optional toppings.
Pair with a bottle of Gewurztraminer. This semi-sweet aromatic wine has notes of cinnamon, ginger and honey that compliment the silky and spicy characteristic of this soup.
Gewurztraminer Recipe + Instructions
- First choose if you want to make a sweet wine or a dry wine, as this will dictate a lot of your decisions when making your wine.
- Secondly, feel confident in your pronunciation of this delicious variety, as you’ll be telling all of your friends about the great wine you’ve made to be paired with the butternut squash soup. Let’s say it together. Guh-VERTZ-truh-meen-er. That’s right!
- Decide if you are going to make wine from fruit, juice, or concentrate. This time of year you’ll need to be making wine from juice or concentrate.
- Add pectic enzyme to your juice. This will help with settling and clarifying down the road to ensure a clear and beautiful finished wine.
- Pick the yeast of your choosing. Some great options for retaining the fruity, aromatic, perfume-like traits of Gewurztraminer include Alchemy I, Vin 13, QA23, and D47. Rehydrate your yeast using Go-Ferm for best results.
- Time to ferment your wine! If you’re using a kit, follow the directions they give you.
- If fermenting fresh juice, add Booster Blanc and Opti-White to increase mouth feel and mid-palate intensity.
- When you see the Brix drop by 2-3, add Fermaid O to your juice.
- Continue checking the Brix each day. When you see a 1/3 drop in the starting number, add Fermaid K to ensure the fermentation remains strong and the yeast have the energy they need.
- When alcoholic fermentation is over, rack off the gross lees. Add potassium metabisulfite. This is important, as this is a variety that stylistically does not benefit from malolactic fermentation.
- If you want to back sweeten, you can do so. Gewurztraminer can make fantastic dry, semi-sweet, and sweet wines, so you can’t go wrong with whatever you decide!
- For more information about making wine from juice click HERE!









Recent Comments