2016 HARVEST OUTLOOK FOR CHILE
2016 HARVEST OUTLOOK FOR CHILE
Musto Wine Grape Company, LLC. has been importing quality Chilean wine grapes for over 10 years. We have developed long lasting relationships in Chile and are constantly growing and developing the program. The vineyards are located between the Andes Mountains and Pacific Ocean. Therefore, the vines have excellent growing conditions for perfect ripeness and complexity thanks to the ocean breeze and Mediterranean climate.
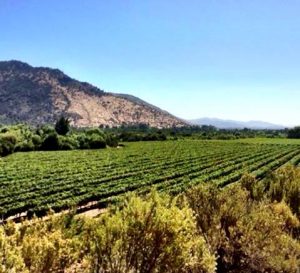
The Curico Valley has been a wine grape growing region since the 1800’s and is located about 115 miles south of Santiago in the Central Zone of Chile. It is known as the “Heart of the Chilean wine industry”. Curico has the perfect fertile soil and is best known for its micro climates and the ability to grow over 30 different wine grape varieties. Situated along the Guaiquillo River and nestled between mountains on its east and west sides, Curico’s Mediterranean climate and unique topographical features helps to create some of the finest wine grapes in South America.
The climate in the valley is characterized by morning fog and wide day-night temperature fluctuations. Climatic conditions in some parts of the valley favor wines with higher acidity, such as white varieties including Chardonnay, Sauvignon Blanc, Vert and Gris. High quality Cabernet Sauvignon, Syrah, Merlot, and Carménère grapes are sourced from warmer areas of the valley, such as Lontué, particularly when produced from ancient vines.
Terroir: Sandy, clay, decomposed granite, volcanic-alluvial
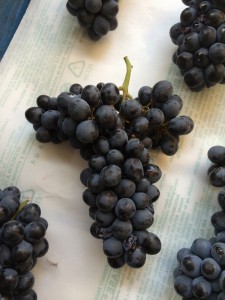
It has been a hot and dry season in Chile, thus producing a light but intense crop. The fruit looks to be well balanced with a lot of flavor. We will have multiple shipments from Chile this year. The first container will arrive in early May and will arrive with the white varieties – Chardonnay, Pinot Grigio, and Sauvignon Blanc. The containers that follow will contain the red wine grapes.
We are currently taking orders for the Chilean grapes. So far we are sold out of Petite Verdot. We are close to being sold out of Viognier, Pinot Grigio, Chardonnay, and Cabernet Franc. Please give us a call at the office 877.812.1137 or email us sales@juicegrape.com to secure your pre-order.
Varieties Available:
– Cabernet Sauvignon (clone 46)
– Cabernet Franc
– Carmenere
– Malbec
– Merlot
– Petite Verdot
– Pinot Noir
– Syrah
– Chardonnay (clone 5)
– Pinot Grigio
– Sauvignon Blanc (clone 42)
Note about Malbec: The Malbec grape has become increasingly popular over the past 5 years. Malbec from Chile produces a very fruit forward and complex wine. On the front of the palate you sense berry flavors, black cherry, blueberry, plum, and raspberry. On the palate there are notes of coffee, cocoa, and tobacco. Depending on the flavor profile you prefer we suggest ageing your Malbec in French, America, or Hungarian oak. This brings out the vanilla, coconut, and other toasty notes in the wine. You will create a wine that has fantastic fruit flavor, good acid, tannins, and a complex mouth feel. For the best color and extraction consider whole berry maceration.
We are looking forward to bringing you our high quality grapes from Chile in mid-May! The grapes come in 18lb cases and yield about 1.25 gallons per case. We strongly advise you to pre-order these grapes as last year we sold out of many varieties last season.
Cheers! And Happy Winemaking!
2016 HARVEST OUTLOOK FOR SOUTH AFRICA
2016 HARVEST OUTLOOK FOR SOUTH AFRICA
The Breede River Valley is surrounded by the Atlantic and Indian Oceans, and is nestled between the Simonsberg and Drakenstien mountains. Because of this unique topography, cool air from the oceans flows through the valley creating small, cooler micro-climates. Farmers are able to use the Breede River to irrigate their vines, thus creating ideal grape growing conditions in an otherwise un-farmable part of South Africa. The valley is an hour’s drive from Cape Town and more temperate than the Stellenbosch Valley – resulting in grapes that express good fruit characteristics without overripe jamminess.
Yet even with the cooler micro-climate and irrigation, South Africa had a very dry growing season. Unseasonable heat waves in December and February caused earlier-than-normal harvest schedules. These heat waves also caused some varieties to become unavailable to us this year. Unfortunately due to this season’s climate and berries not reaching full maturity, the Cabernet and Merlot from South Africa did not meet our quality standards and thus will not be available this season. However, the Pinotage and Sauvignon Blanc matured perfectly and are on their way to Connecticut. We expect the grapes to arrive around March 18th. While the hot and dry growing conditions this season will result in lighter yields, the berries will be more intense thus leading to more complex and intense finished wines.
We are looking forward to bringing you our high quality Pinotage and Sauvignon Blanc from South Africa in mid-March! The grapes come in 20lb cases and yield about 1.25 gallons per case. We strongly advise you to pre-order these grapes as last year we sold out of the Pinotage.
Note about Pinotage: The Pinotage Grape was created in 1925 and is a cross between two vinifera grapes, Pinot Noir and Cinsault. Abaraham Izak Perold created the grape to bring out the brilliant robust flavors that both Pinot Noir and Cinsault possessed, while making the grape easy to grow. Now Pinotage is known to produce smoky, earthy flavors with hints of tropical fruits. Pinotage sourced from the Breede River Valley produce wines that express notes of cedar, plums, and dark berry notes. The wine then rounds out with a smooth, tannic structure. Enjoy these wines with a hearty stew or red meat. Please note that if you punch through too vigorously during fermentation you can get an almost burned plastic characteristic. It is better to ferment Pinotage at lower temperatures.
Note about Sauvignon Blanc from South Africa: Sauvignon Blanc produced from the Breede River Valley are often very complex and with notes of minerals such as flint, and bright fruit flavors such as apricot.
Cheers! And Happy Winemaking!
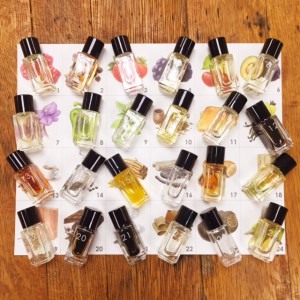
Red Wine Essence Aroma Kit
Every “Wine Wednesday” we have decided to work on some type of wine education. This Wednesday we decided to focus on the aromas in Red Wine.
So the first question is – Where do wine aromas come from? Well they initially come from the grape and the terrior. Have you ever heard the quote “you can’t make great wine from bad grapes, but you can make bad wine from great grapes”? This couldn’t be more true. The grape is the starting point for the wine and its aromas. That being said, different grape varieties have different aromas associated with them. For example, most red wines have notes of dark berries and other plants. Specifically, Cabernet Sauvignon usually has aromas of black currant, mint, and violet. Each wine grape has a different aroma starting point which is impacted by where the grapes is grown, the yeast that is inoculated, oak, and any other additives that are introduced into the wine during the fermentation and aging process. Red wine aromas are complicated but pleasing representations of the vineyard & winemaker’s work.
When tasting wines many people have difficulty describing the different aromas they smell. The kit that we used challenged us to identity specific aromas and describe them. First, we smelled each essence and guessed what it was. We had some interesting descriptors…bubblegum, salt water, and aftershave just to name a few. When the actual aromas were revealed sometimes we were right and sometimes we were way off. But being challenged to describe what we smelled and training our sense of smell will only help us when making our own wines. This will also help us at wine judging events, winemaking events, and even when identifying faults.
All in all it was a great learning experience.
Stay tuned for more updates about our wine education courses (we will be adding a new aromas/faults class soon) and Spring Harvest Updates! Cheers!
Musto Wine Grape Company, LLC. Youtube Channel
It’s official….We have a YouTube Channel! Visit us on YouTube for our monthly winemaking videos. This month is all about cleaning and sanitizing.
Cheers!
Lanza-Musto Malbec is “Best of Class”
According to WineJudging.com our 2014 Wooden Valley Malbec, made with Lanza-Musto Grapes is “Best of Class“. Congratulations to the Lanza-Musto and Wooden Valley Winery Team!
Any Home Winemakers entering their 2014 Lanza-Musto Malbec’s in the competitions this year? You might end up with a “Best in Show”!
Zinderella
The inspiration for the Zinderella brand has been drawn from the perseverance & willingness to never give up on a dream! From humble beginnings to overcoming many obstacles & challenges, this grapes embodies so much more than just wine. From the heart of the esteemed Lodi Appellation, in a land recognized as the Zinfandel Capital of the World; our grapes inspire the deep Zinfandel Flavors and attributes of the journey! This is our “Zinderella Story”.
All the grapes sourced for the Zinderella brand are Old Vine. Specifically, Zinfandel vines over 30 years old. If you are looking for a new, interesting, and complex Zinfandel, then Zinderella is for you!
Lanza Musto Vineyards – Cabernet Clone Descriptions
Cabernet 169: The Cabernet 169 clone is a French clone that. The first 169 clone to come to the US was planted by UC Davis in 2003. Since then, it has been gaining popularity in all the major Cabernet growing regions. Especially in on Mount Veeder. It has good berry size, high vigor, and a well-balanced acid to sugar ratio. The wine can be higher in alcohol depending on the winemaking style. It was created to produce a big and bold Cabernet with intense complexity. The color is a vibrant, deep red. The mouth feel tends to be bold and linger. This grape is definitely for the adventurous winemaker. (selling out as we speak)
Koch Cabernet: The Koch ranch Cabernet is farmed on incredibly rocky soil. The soil absorbs most of the moisture therefore producing a more intense fruit. This is only 8 acres, so please reserve your cases as soon as possible. We always sell out of the Koch Cabernet. (selling out as we speak)
Cabernet 15: This Cabernet Clone originates from Aquitcuine, France (South East France, Bordeaux, largest grape region in France). It is known for its high yield, high levels of Anthocyanins (attributes to aging and color), and high tannins. The wines are described as having raspberry, cherry, plum, and cocoa notes. It has an intense body and is structurally solid. Definitely an age worthy Cabernet.
Cabernet 8: The Clone 8 Cabernet Clone was one of the most popular plantings in France and then in the US in the 1990’s. From our research, it has been said that it was one of the plantings that came it California in a suitcase. Clone 8 is strong Cabernet producer that yields about 6 tons to the acre. The wines have great fruit characteristics, deep color, good sugar to acid ratio, and are structurally sound. The tannins are strong.




Recent Comments