12 Steps to Making Wine from White Grapes
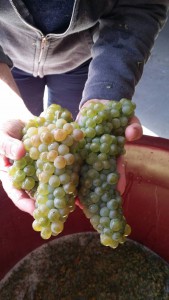
Making Wine from White Grapes
1. Sanitize and Crush and Destem – Inspect your grapes and remove any moldy clusters. Crush and destem into clean and sanitized food grade plastic tubs. Always rinse your receiving vessel with a sanitizing strength potassium metabisulfite solution (2oz/gallon or 3tbsp/gallon). Make sure that the sanitizing solution touches all the surfaces of the vessel and that the vessel is completely emptied out of all sanitizing solution after. Shake free any drops as best you can from the vessel. Having remaining sulfite liquid in the vessel will prohibit fermentation. Do not rinse the sanitizer off with water after sanitizing as that will reintroduce bacteria to the environment.
2. Once all of the grapes are crushed, try to accurately measure your quantity of must. Add ¼ tsp of potassium metabisulfite for every 5 gallons of must that you have. Mix up the must thoroughly.
3. Wait for 2 hours after the sulfite addition and then add pectic enzyme to the must. Musto Wine Grape offers generic pectic enzyme or Cinn Free pectic enzyme that is specifically designed for white wine grapes. Follow the directions for the individual type of enzyme. Always mix it with water to create a 10% solution (if you use 5mls of enzyme, mix it with 45mls of water). The water allows it to better circulate throughout the must. Allow the pectic enzyme to work for 6 hours before pressing.
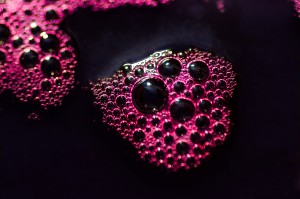
4. Press the Must – Wash the press and sanitize using potassium metabisulfite. Again, make sure the press does not have an excessive puddles or lingering amounts of sanitizing solution remaining. Sanitize the receiving container for fermentation (carboy, tank, demijohn, barrel) and any pumps or tubing that you may use. Anything that comes in contact with the wine should be rinsed with sulfite sanitizing solution. Place a screen or mesh (also sanitized) inside of the press to hold back any extra skins or seeds from getting through. Start by scooping up the must and placing it in the press. Some of the liquid will immediately flow through; this is the “free run”. When the press is full, slowly begin pressing. Do not try and press every last drop out of the must as this can lead to seed cracking and bitterness in the wine. Fill each container to within 6 inches of the top, to allow room for fermentation. This process will cause the juice to foam up and generate gas, therefore volume.
5. After pressing the grapes, mix the container thoroughly and take and record your measurements. Measure Brix, pH, and TA. If you need to adjust your juice at all, this is the time to do it. Ideally your Brix should be between 21-26 degrees, the pH between 3.2-3.5, and the TA between 6.5-8.5g/L. Your initial Brix reading, multiplied by .55, will give you a close estimate of your ending alcohol by volume percentage.
6. If you would like to use fermentation tannins (FT Blanc) or fermentation nutrients such as Opti-White, add them after measurements and adjustments have been made. Musto Wine Grape packages FT Blanc and Opti-White in small packs for 5 gallon batches. Mix any of these ingredients in thoroughly.
7. After measurements have been taken and any adjustments have been made, it is time to set yeast if you are using a cultured yeast strain. Use 1gram/gallon of wine must. Follow the yeast set directions on the packet explicitly and/or see the separate “Yeast Set” instructions.
8. After you atemperate and add your yeast, cover your tank with a floating lid or your carboy or demijohn with an airlock. An air lock will allow the carbon dioxide to escape the container without additional air getting in to oxidize the wine.
9. Stir the juice every other day to re-suspend the yeast and nutrients. Keeping the yeast in suspension is important to give it access to sugar and nutrients and to avoid the production of H₂S.
10. If you are using additional yeast nutrients to assist in fermentation you will add them after fermentation has started. Fermaid O is added at the beginning of fermentation (1 day after yeast set) and all others (BSG yeast nutrient, Fermaid K, AnchorFerm) will be added at 1/3 depletion of the Brix (2/3 of the beginning amount of Brix). Follow the directions for the individual yeast nutrient, hydrating with water and mixing thoroughly.
11. If you are adding malolactic cultures to your wine (Chardonnay), you may also chose to do this at 1/3 Brix depletion. If using a malolactic nutrient (Opti-Malo Plus) with the bacterial culture, hydrate the nutrient in a separate container from the bacteria and add to the must directly before the addition of the bacteria. Follow all directions on the bacteria and nutrient packets explicitly.
12. Monitor the progression of the juice by taking daily hydrometer readings. Using a sanitized wine thief or syringe, pull a sample of fermenting wine that is large enough to fill the hydrometer cylinder. Always sanitize the hydrometer and the cylinder before taking a reading. Look to the meniscus of the wine surface in relation to the hydrometer for the most accurate reading. When the wine is fermented to dryness (0.90 Specific Gravity), is has completed its primary fermentation. Allow the lees particles to settle, and then rack the wine into a sanitized container. Be sure that the container is filled within ½” of the top to prevent air exposure. At this point, it is imperative to add ¼ tsp of potassium metabisulfite per 5 gallons of wine. The sulfites will kill off any harmful microbes and prevent the wine from oxidizing.
13 Steps to Making Red Wine from Grapes
13 Steps to Making Red Wine from Grapes
1. Sanitize and Crush and Destem – Inspect your grapes and remove any moldy clusters. Crush and destem into clean and sanitized food grade plastic tubs, stainless steel tanks, or glass carboys or demijohns. Always allow an extra 20% of volume for fermentation purposes as the wine will “expand” throughout fermentation. Always rinse your fermentation vessel with a sanitizing strength potassium metabisulfite solution (2oz/gallon or 3tbsp/gallon). Make sure that the sanitizing solution touches all the surfaces of the fermentation vessel and that the vessel is completely emptied out of all sanitizing solution after. Shake free any drops as best you can from the fermentation vessel. Having remaining sulfite liquid in the vessel will prohibit fermentation. Do not rinse the sanitizer off with water after sanitizing as that will reintroduce bacteria to the environment.
2. Once all of the grapes are crushed, try to accurately measure your quantity of must. Add ¼ tsp of potassium metabisulfite for every 5 gallons of must that you have. Mix up the must thoroughly.
3. Wait for 6-8 hours after the sulfite addition and then add pectic enzyme to the must. Musto Wine Grape offers generic pectic enzyme or Color Pro pectic enzyme that is specifically designed for red wine grapes. Follow the directions for the individual type of enzyme. Always mix it with water to create a 10% solution (if you use 5mls of enzyme, mix it with 45mls of water). The water allows it to better circulate throughout the must. Allow the pectic enzyme to work for 12 hours before yeast set.
4. Twenty four hours after crushing the grapes, mix the container thoroughly and take and record your measurements. Measure Brix, pH, and TA. If you need to adjust your must at all, this is the time to do it. Ideally your Brix should be between 23-28 degrees, the pH between 3.4-3.7, and the TA between 6-7g/L. Your initial Brix reading, multiplied by .55, will give you a close estimate of your ending alcohol by volume percentage.
5. If you would like to use fermentation tannins (FT Rouge, oak dust) or fermentation nutrients such as Opti-Red, add them after measurements and adjustments have been made. Musto Wine Grape packages FT Rouge and Opti Red in small packs for 5 gallon batches. If using oak dust, use 1/4cup for every 5 gallons of must. Mix any of these ingredients in thoroughly.
6. After measurements have been taken and any adjustments have been made, it is time to set yeast if you are using a cultured yeast strain. Use 1gram/gallon of wine must. Follow the yeast set directions on the packet explicitly and/or see the separate “Yeast Set” instructions.
7. After you atemperate and add your yeast, you may cover the vessel lightly with an old sheet or towel or place the lid gently on top of the bucket, if an airlock is in place. An air lock will allow the carbon dioxide to escape the pail without additional air getting in to oxidize the wine.
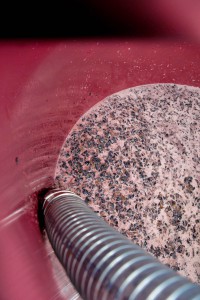
8. Obtain a must punch tool, a long stainless steel spoon, or your bare hands, and sanitize your tool or hands with sulfite sanitizer. This is what you will use to “punch down” or mix up the must three times a day. Try to mix everything very well, pushing all of the skins back down to the bottom, getting them very wet, and bringing up the piqued from the bottom. This should be done as often as possible, preferably three times a day. [Before work (7am), after work(5pm), and before bed (10pm)] When punching down every evening, take a sample of the liquid and using your hydrometer, track the Brix depletion. You should notice a drop in Brix daily.
9. If you are using additional yeast nutrients to assist in fermentation you will add them after fermentation has started. Fermaid O is added at the beginning of fermentation (1 day after yeast set) and all others (BSG yeast nutrient, Fermaid K, AnchorFerm) will be added at 1/3 depletion of the Brix (2/3 of the beginning amount of Brix). Follow the directions for the individual yeast nutrient, hydrating with water and mixing thoroughly.
10. If you are adding malolactic cultures to your wine, you may also chose to do this at 1/3 Brix depletion. If using a malolactic nutrient (Opti-Malo Plus) with the bacterial culture, hydrate the nutrient in a separate container from the bacteria and add to the must directly before the addition of the bacteria. Follow all directions on the bacteria and nutrient packets explicitly.
11. Punch down and take Brix measurements daily. When your hydrometer reads 0.90, you have fermented to dryness. At this point your malolactic fermentation may still continue, but the primary alcoholic fermentation is complete. You may now press the wine. Wash the press and sanitize using potassium metabisulfite. Again, make sure the press does not have an excessive puddles or lingering amounts of sanitizing solution remaining. Sanitize the receiving container (carboy, tank, demijohn, barrel) and any pumps or tubing that you may use. Anything that comes in contact with the wine should be rinsed with sulfite sanitizing solution. Place a screen or mesh (also sanitized) inside of the press to hold back any extra skins or seeds from getting through. Start scooping up the must and placing it in the press. Some of the liquid will immediately flow through, this is the “free run”. When the press is full, slowly begin pressing. Do not try and press every last drop out of the must as this can lead to seed cracking and bitterness in the wine. Fill each container to within ½” of the top and secure a bung and airlock in place. Malolactic fermentation will exude a small amount of carbon dioxide and there will be trapped gas within the wine that will need to escape the container.
12. Allow the wine to sit for 2-3 weeks. You can conduct malolactic chromatography or bring a sample to a winemaker at Musto Wine Grape for analysis to ensure that your secondary fermentation is finished. At this point you should see a nice thick layer of lees in the bottom of the carboy or demijohn. You will want to place the full vessel onto an elevated surface such as a table and place the new, sanitized, empty vessel on the floor below. Using a sanitized siphon, rack the wine into the new carboy. You may have space at the top which will need to be “topped off” with more wine. You can either use wine from another container, or finished wine to do this. It is very important that there is less than a 1/2” of headspace in each container. At this point you should also add 1/4tsp of potassium metabisulfite per 5 gallons of wine.
13. Now it is time to let your wine age. You will need to rack it and add additional SO₂ every 3 months. Make sure you sanitize all equipment and containers when racking and keep them topped off within ½”. Come visit Musto Wine Grape for bottling advice and supplies.
The Winemaker’s Think Tank: Vol 6 – Do I Add Yeast to My Wine?
What’s the Winemaker’s Think Tank?
Every Thursday we will post about a few frequently asked questions that our winemaker has answered. If you have a winemaking question you would like to have answered, please email us at support@juicegrape.com and we will try to get into next week’s post. Cheers! 🙂
Do I Add Yeast to My Wine?
Some winemakers prefer what is called a “natural method” of fermentation, by allowing the yeast that live on the grape skins to ferment the must into wine. While these yeast can start the process of fermentation, they generally have too low of a population and alcohol tolerance to successfully finish the fermentation process. The most successful fermentations are conducted with lab cultured yeast cells. This is not to say that this method isn’t natural as well. Scientists travel to famous wine growing regions to obtain samples of the natural yeast flora that exist in those environments. They take these samples back to the lab and culture them, breeding select and healthy populations that can be packed and sold to winemakers all over the world. These selected yeast strains have a higher alcohol tolerance and have had the benefit of many trials and research conducted on their behalf to see exactly how they affect a wine. By using these strains you will not only have a more successful fermentation, but also more predictable results rather than the unpredictable results of the wild flora “natural yeast” that live on the skins. Through their research, scientists have found that certain yeasts promote certain attributes of the wine such as color security, fruit characters, spice flavors, and acid reduction. A vintner may select one of these commercially bred strains to get the desired effect they would like in their end product.
We hope this information helps with your winemaking. If you have any follow up questions or winemaking questions in general, please email us at support@juicegrape.com.
Yeast Starter Instructions Up on Youtube!
Hello Winemakers!
We are excited to release our newest video – “Yeast Starter Instructions.” In the video Winemaker Frank Renaldi teaches us how to correctly create a Yeast Starter for your fermentation. Please feel free to visit our YouTube Page for more videos HERE.
Cheers! 🙂
Yeast Pairings for Chilean Wine Grapes
Yeast Pairings for Chilean Wine Grapes
Cabernet Sauvignon: BM45, BM4X4, D80, RC212, D254
Cabernet Franc: BM45, RP15, D254, D80, BDX
Petite Verdot: BM4X4, D80, D254
Chardonnay: QA23, VIN13, D47, COTE DES BLANCS
Pinot Grigio: 71B, VIN13, QA23, R2
Sauvignon Blanc: VIN13, QA23, R2, D47, V1116
Which yeast will you use? 🙂
Also, don’t forget to watch our Youtube Video on “Yeast & Stuck Fermentation”
Cheers! And Happy Winemaking!






Recent Comments