


The Winemaker’s Think Tank: Vol 35 – How do I know if fermentation is complete?

What’s the Winemaker’s Think Tank?
Every Thursday we will post about a few frequently asked questions that our winemaker has answered. If you have a winemaking question you would like to have answered, please email us at support@juicegrape.com and we will try to get into next week’s post. Cheers! 🙂
How do I know if fermentation is complete?
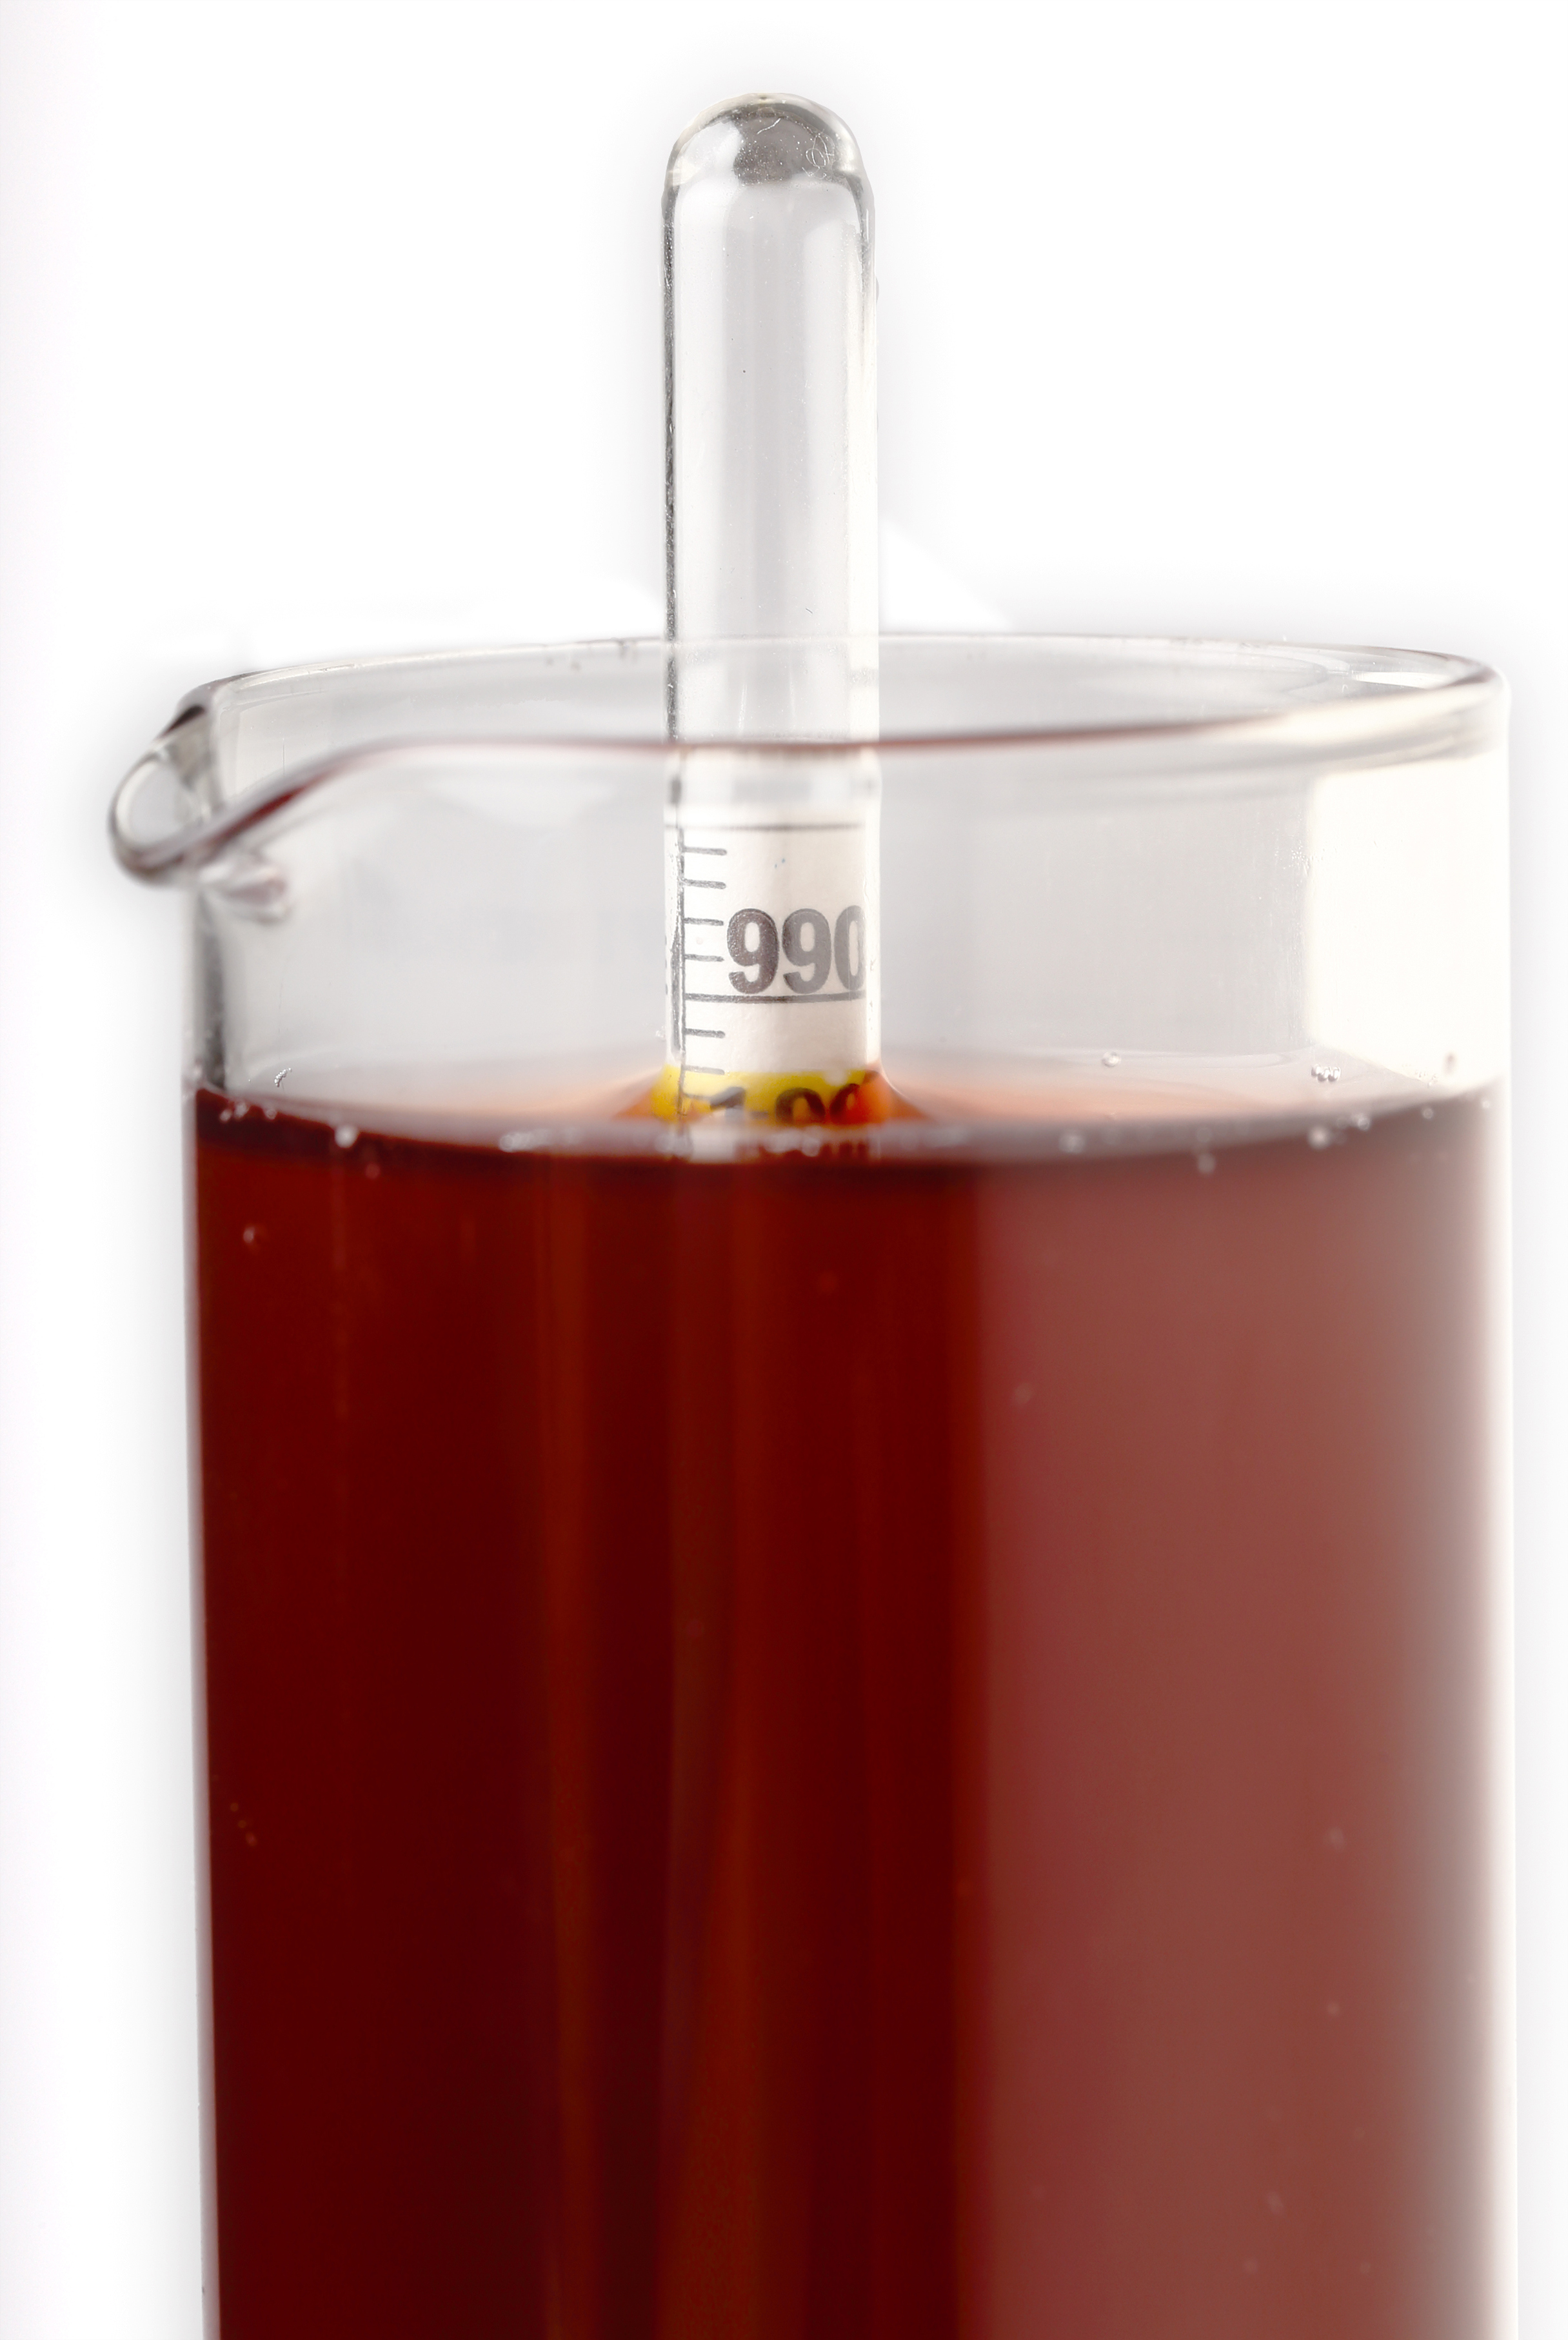
It is often easy to see visual signs of fermentation: from activity in the airlock, bubbles, and the formation of a cap to the aromas of yeast and carbon dioxide, the wonders of fermentation are succinct observation. But how does the home winemaker know when the fermentation is complete? The simplest way of seeing if fermentation is complete is to taste the wine and observe if there is any sweetness to it. If there is still sugar that you can taste, the yeast have not yet completed their job. The most accurate and scientific way of seeing if fermentation is complete is to take a measurement of the Brix via a hydrometer. A hydrometer is a glass instrument that reads sugar content via the hydrometers buoyancy in wine juice. The juice sample should always be placed into a sanitary, cylindrical shaped vessel. As the wine ferments, yeast consumer sugar and excrete alcohol, making a thinner, less dense liquid. At the beginning of fermentation, the hydrometer will not sink very far into the wine. The sugars within the juice make it thicker and the hydrometer will float on top of the juice. As fermentation progresses the new wine becomes less dense and sugary, allowing the hydrometer to sink down into the liquid. When the fermentation is complete, the hydrometer will sink down into the liquid to the 0 mark, if not farther. When reading the hydrometer, spin it slightly in the cylinder to dislodge any bubbles that may cling to the sides of the hydrometer. Observe where the meniscus of the wine falls on the gradients of the hydrometer. This will give you your sugar level in degrees Brix of the fermenting wine. When the hydrometer sinks to zero or below, the fermentation is complete and you can rack the wine.
We hope this information helps with your winemaking. If you have any follow up questions or winemaking questions in general, please email us at support@juicegrape.com.
Wine Class Schedule

We have a bunch of classes coming up! Make sure to RSVP via Facebook or Sign Up via the website!
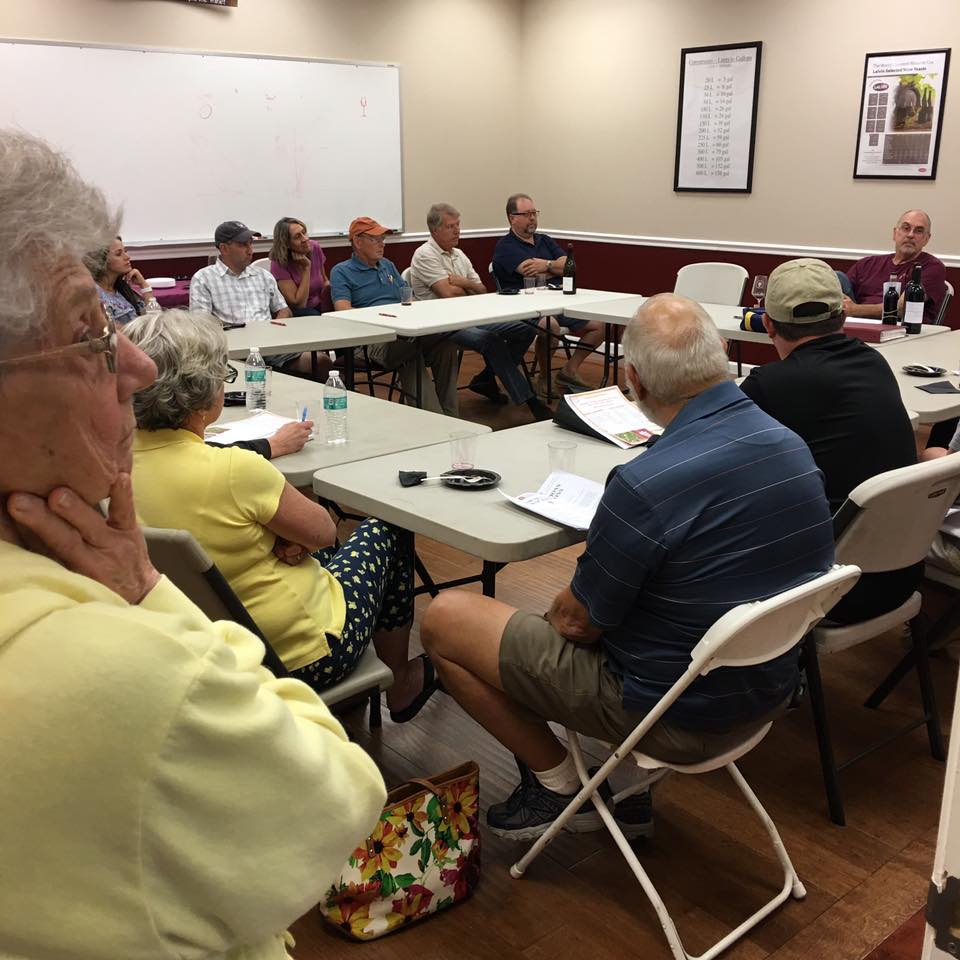
Saturday September 23rd: Common Winemaking Mistakes (FREE) at 10:00AM – RSVP by clicking HERE
Saturday September 30th: Winemaking 201 – Winemaker Lab Skills ($75.00) at 10:00AM – sign up by clicking HERE
Saturday October 7th: Winemaker Bootcamp ($150.00) at 9:00AM – sign up by clicking HERE
The Winemaker’s Think Tank: Vol 30 – How do I test for pH?

What’s the Winemaker’s Think Tank?
Every Thursday we will post about a few frequently asked questions that our winemaker has answered. If you have a winemaking question you would like to have answered, please email us at support@juicegrape.com and we will try to get into next week’s post. Cheers! 🙂

How do I test for pH?
Testing for pH is a reasonably simple process for your wine. Based on your budget, you can obtain a variety of pH measuring implements. There are pH test strips that will give you an approximate level of pH in your wine. They give a color reaction that when compared to a chart, indicates the pH of the wine. The next level up in sophistication as well as price is a basic pH meter. Musto wine grape offers a simple handheld pH meter that can be calibrated in a matter of minutes and gives precise and accurate pH readings. The probe must be stored properly in a storage solution to ensure that it does not dry out. The probe lasts from 12-18 months, depending on its care and must be purged after this time frame. With the most basic model, you throw out the entire unit and buy a new one. With the more sophisticated models of pH meters, the probe is replaced separately from the unit (which should last indefinitely).
We hope this information helps with your winemaking. If you have any follow up questions or winemaking questions in general, please email us at support@juicegrape.com.
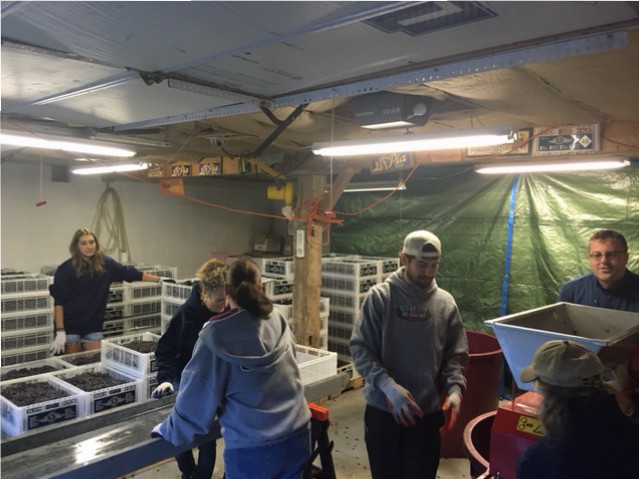
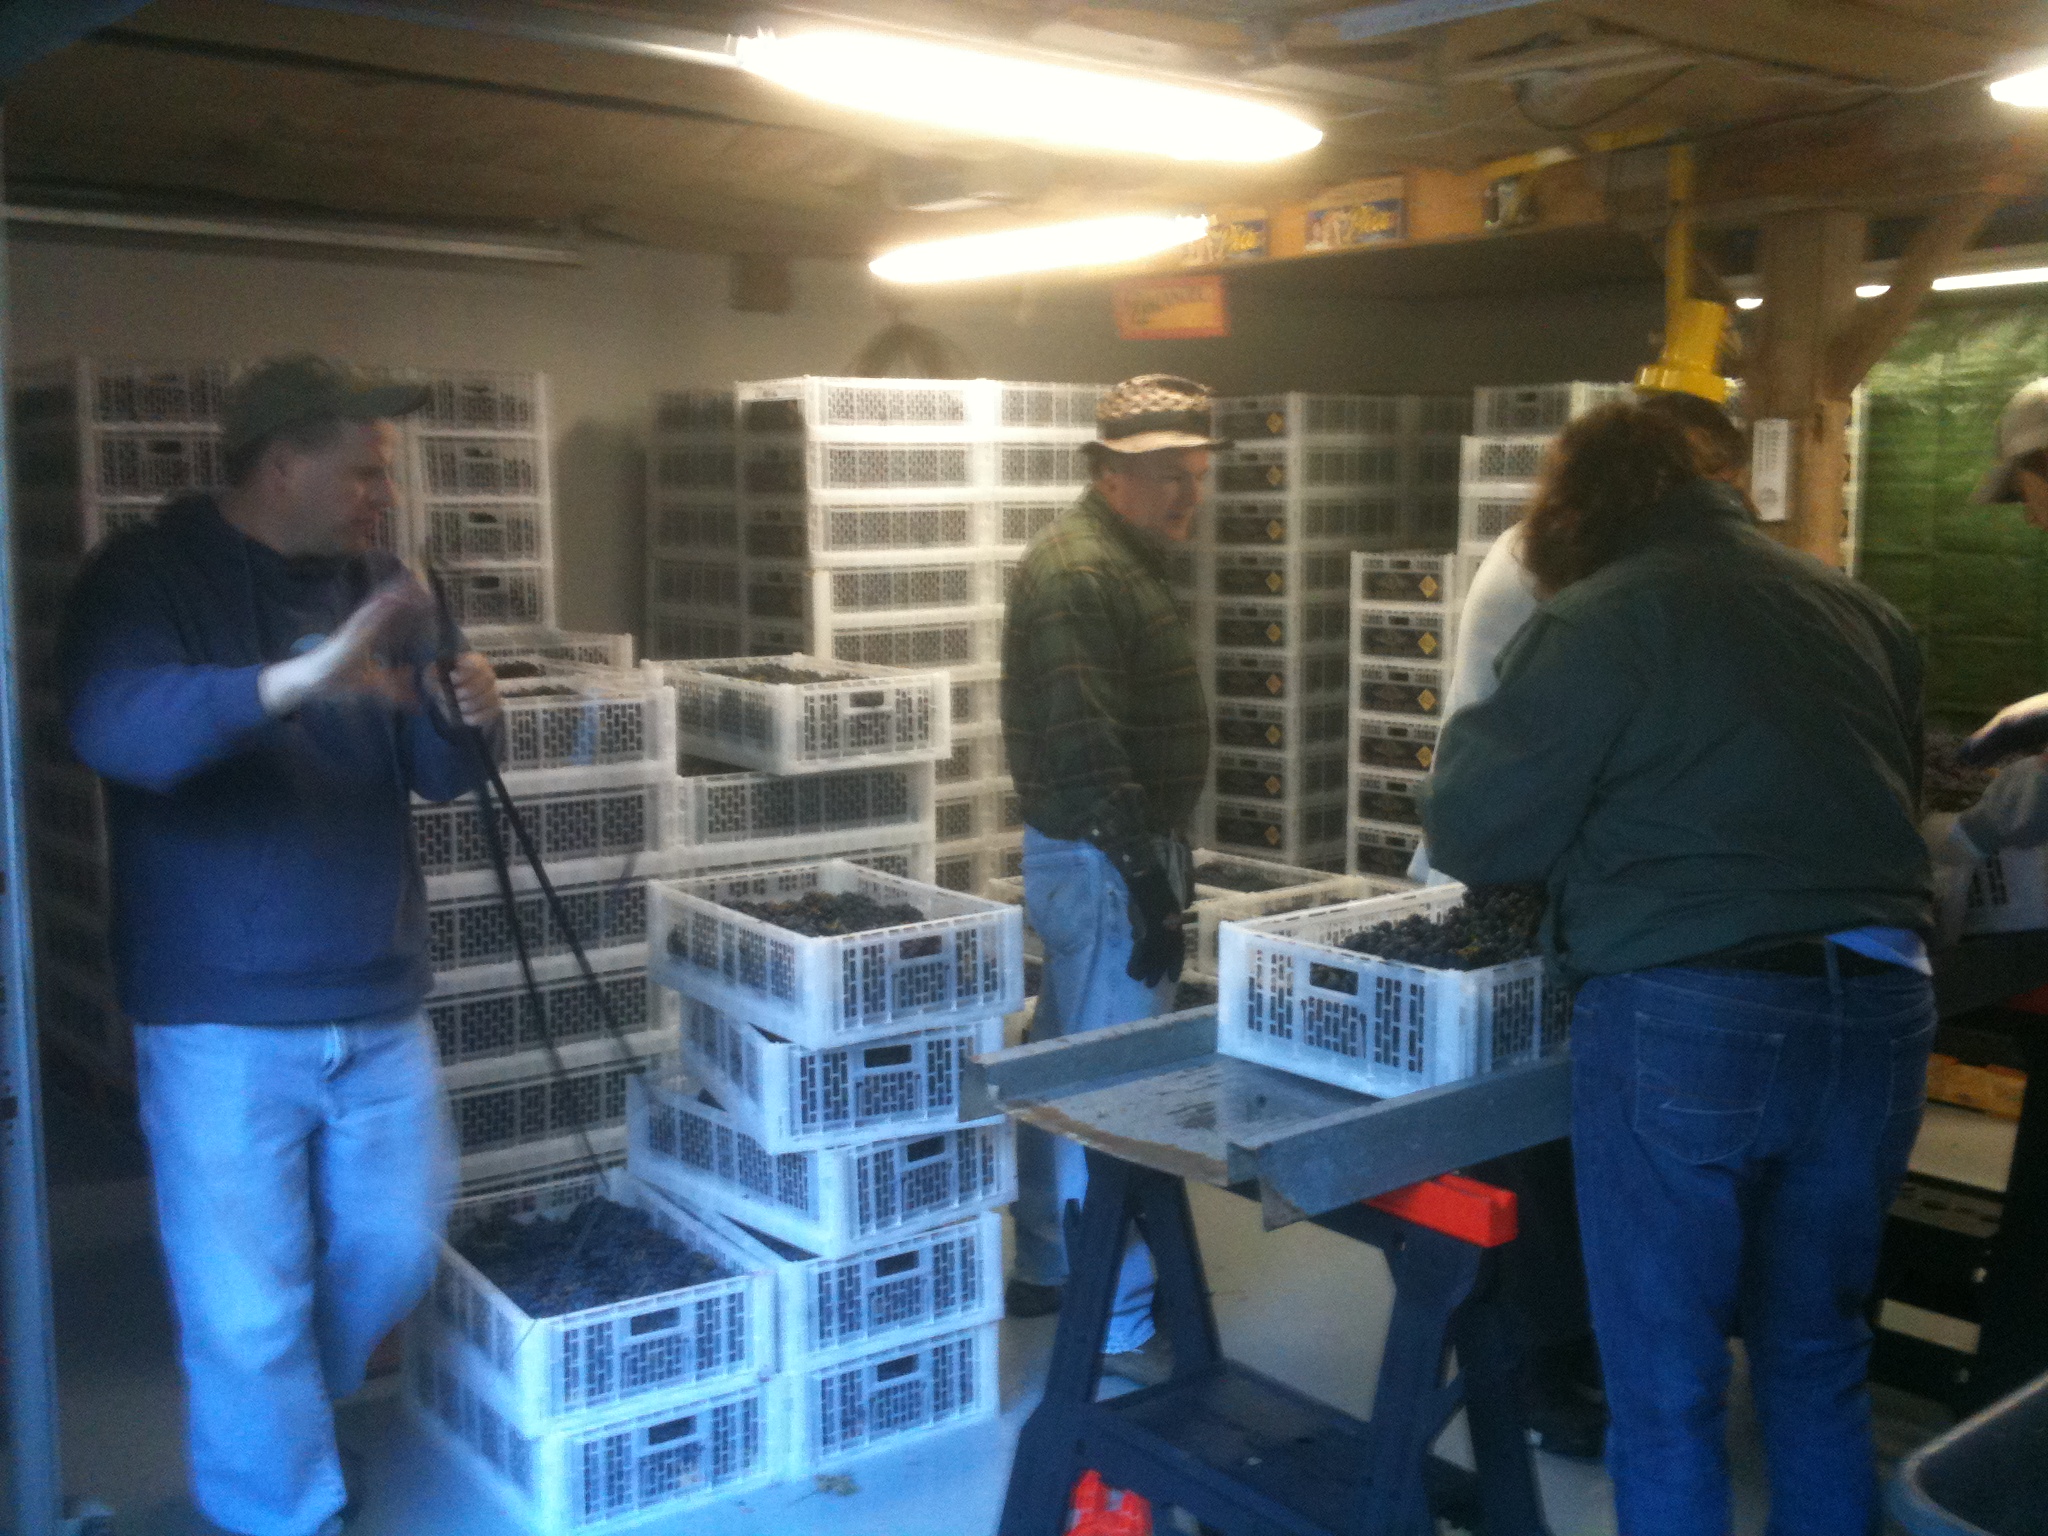
Winemaker Spotlight: Greg Ambrose

My wine passion started 17 years ago when my father officially started to teach me to make wine. He had tried unofficially in the early 70’s but I was a reluctant 7 year old with other things on my mind. I began making wine from grapes with a friend and we started with a single 30 gallon barrel. We picked up grapes from a local distributor and worked out of my friends single car garage (half full of lawn tools).
We spent the next 9 years trying to source better grapes, each year looking to step up in quality. And then the Musto team contracted with the Lanza family which made a tremendous improvement in the quality of our wines. I still search for higher quality grapes but have come to the realization that we are now working with the best possible fruit available.
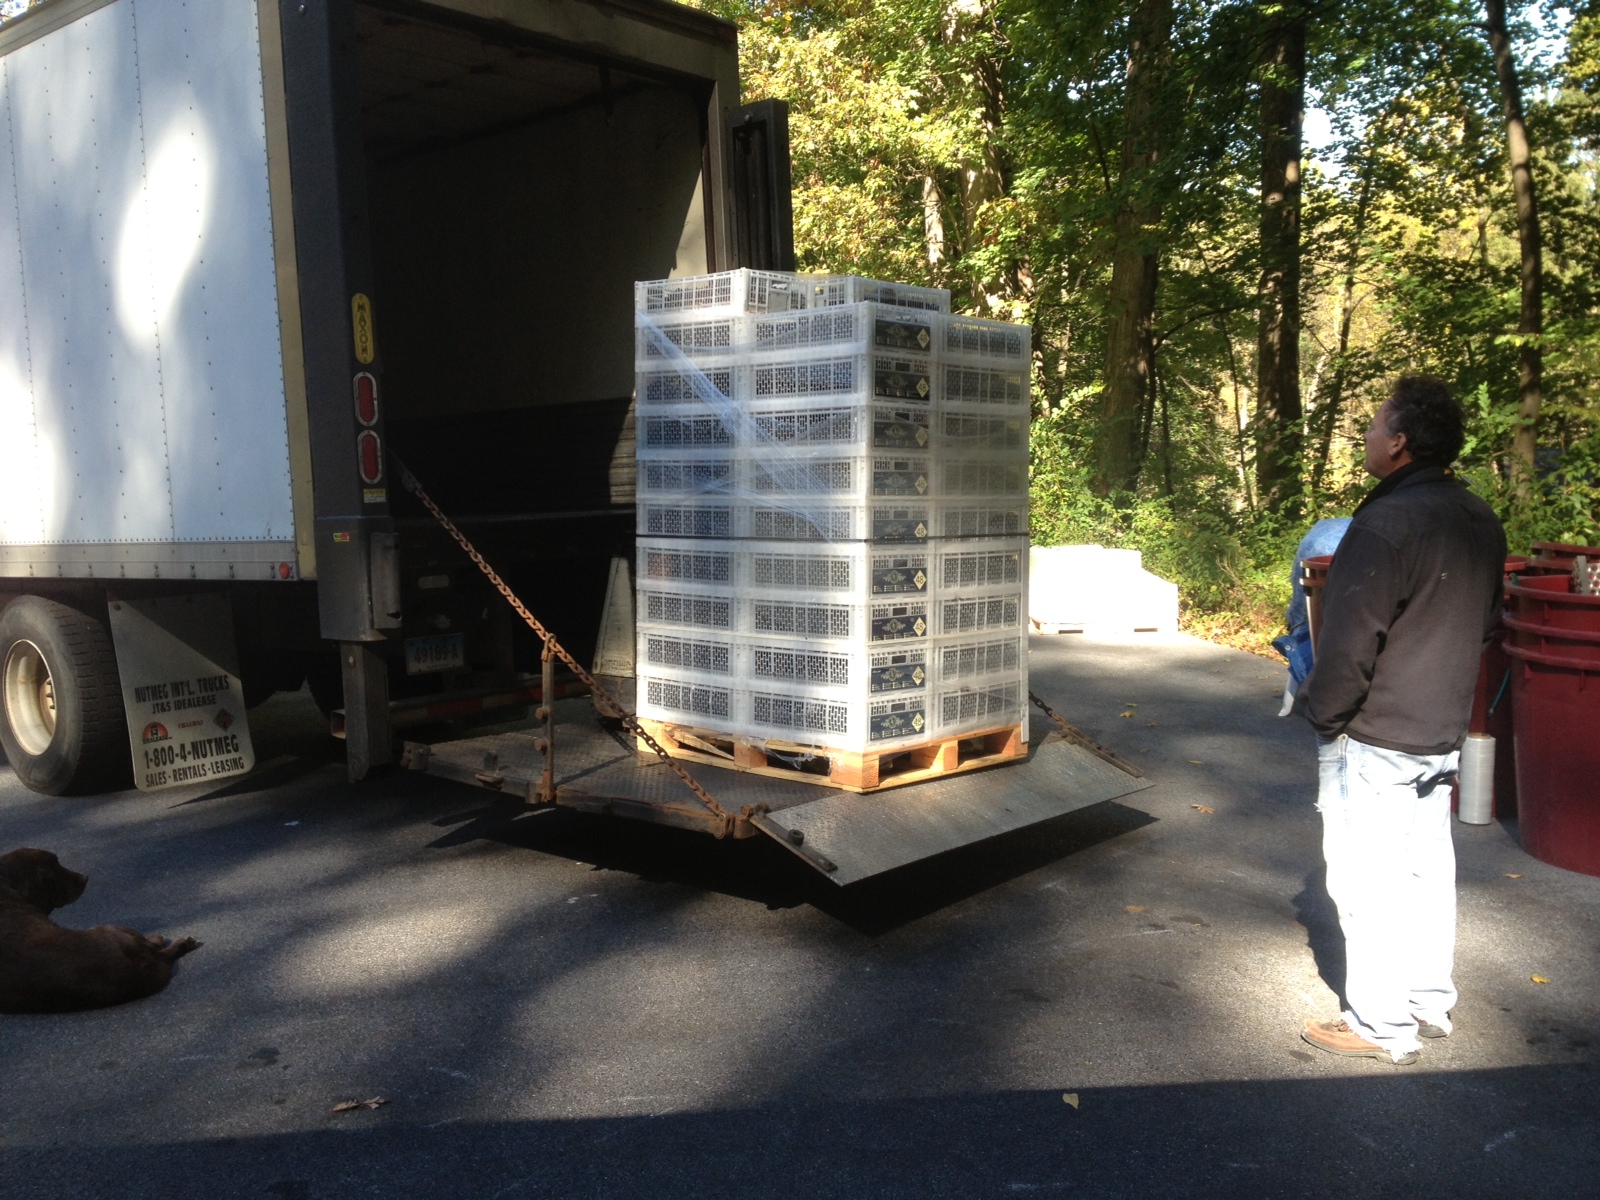
Our coop now consists of 7 families and we have outgrown the single car garage. We moved production to my double car garage which has been converted to our crush pad and fermentation room. The garage has been insulated, painted and new lighting and an exhaust system installed. The Musto family now ships us over 5 tons of grapes each fall.
We receive grapes and clean all our equipment on day 1 and crush the grapes on day 2. Crush day is filled with music, great food, wine, more food then more wine. It’s truly Christmas, New Years and the Super Bowl all rolled into one! With a lot of hands to help, we run a sorting table to clean the grapes and then load the crusher destemmer. We ferment in 15- 500 liter tubs and produce around 350 cases of wine. The tubs completely fill the garage and after a short cold soak they ferment for about 10 days. We usually order 6-7 varieties with each family making their own blends we end up with 10-15 wines styles.
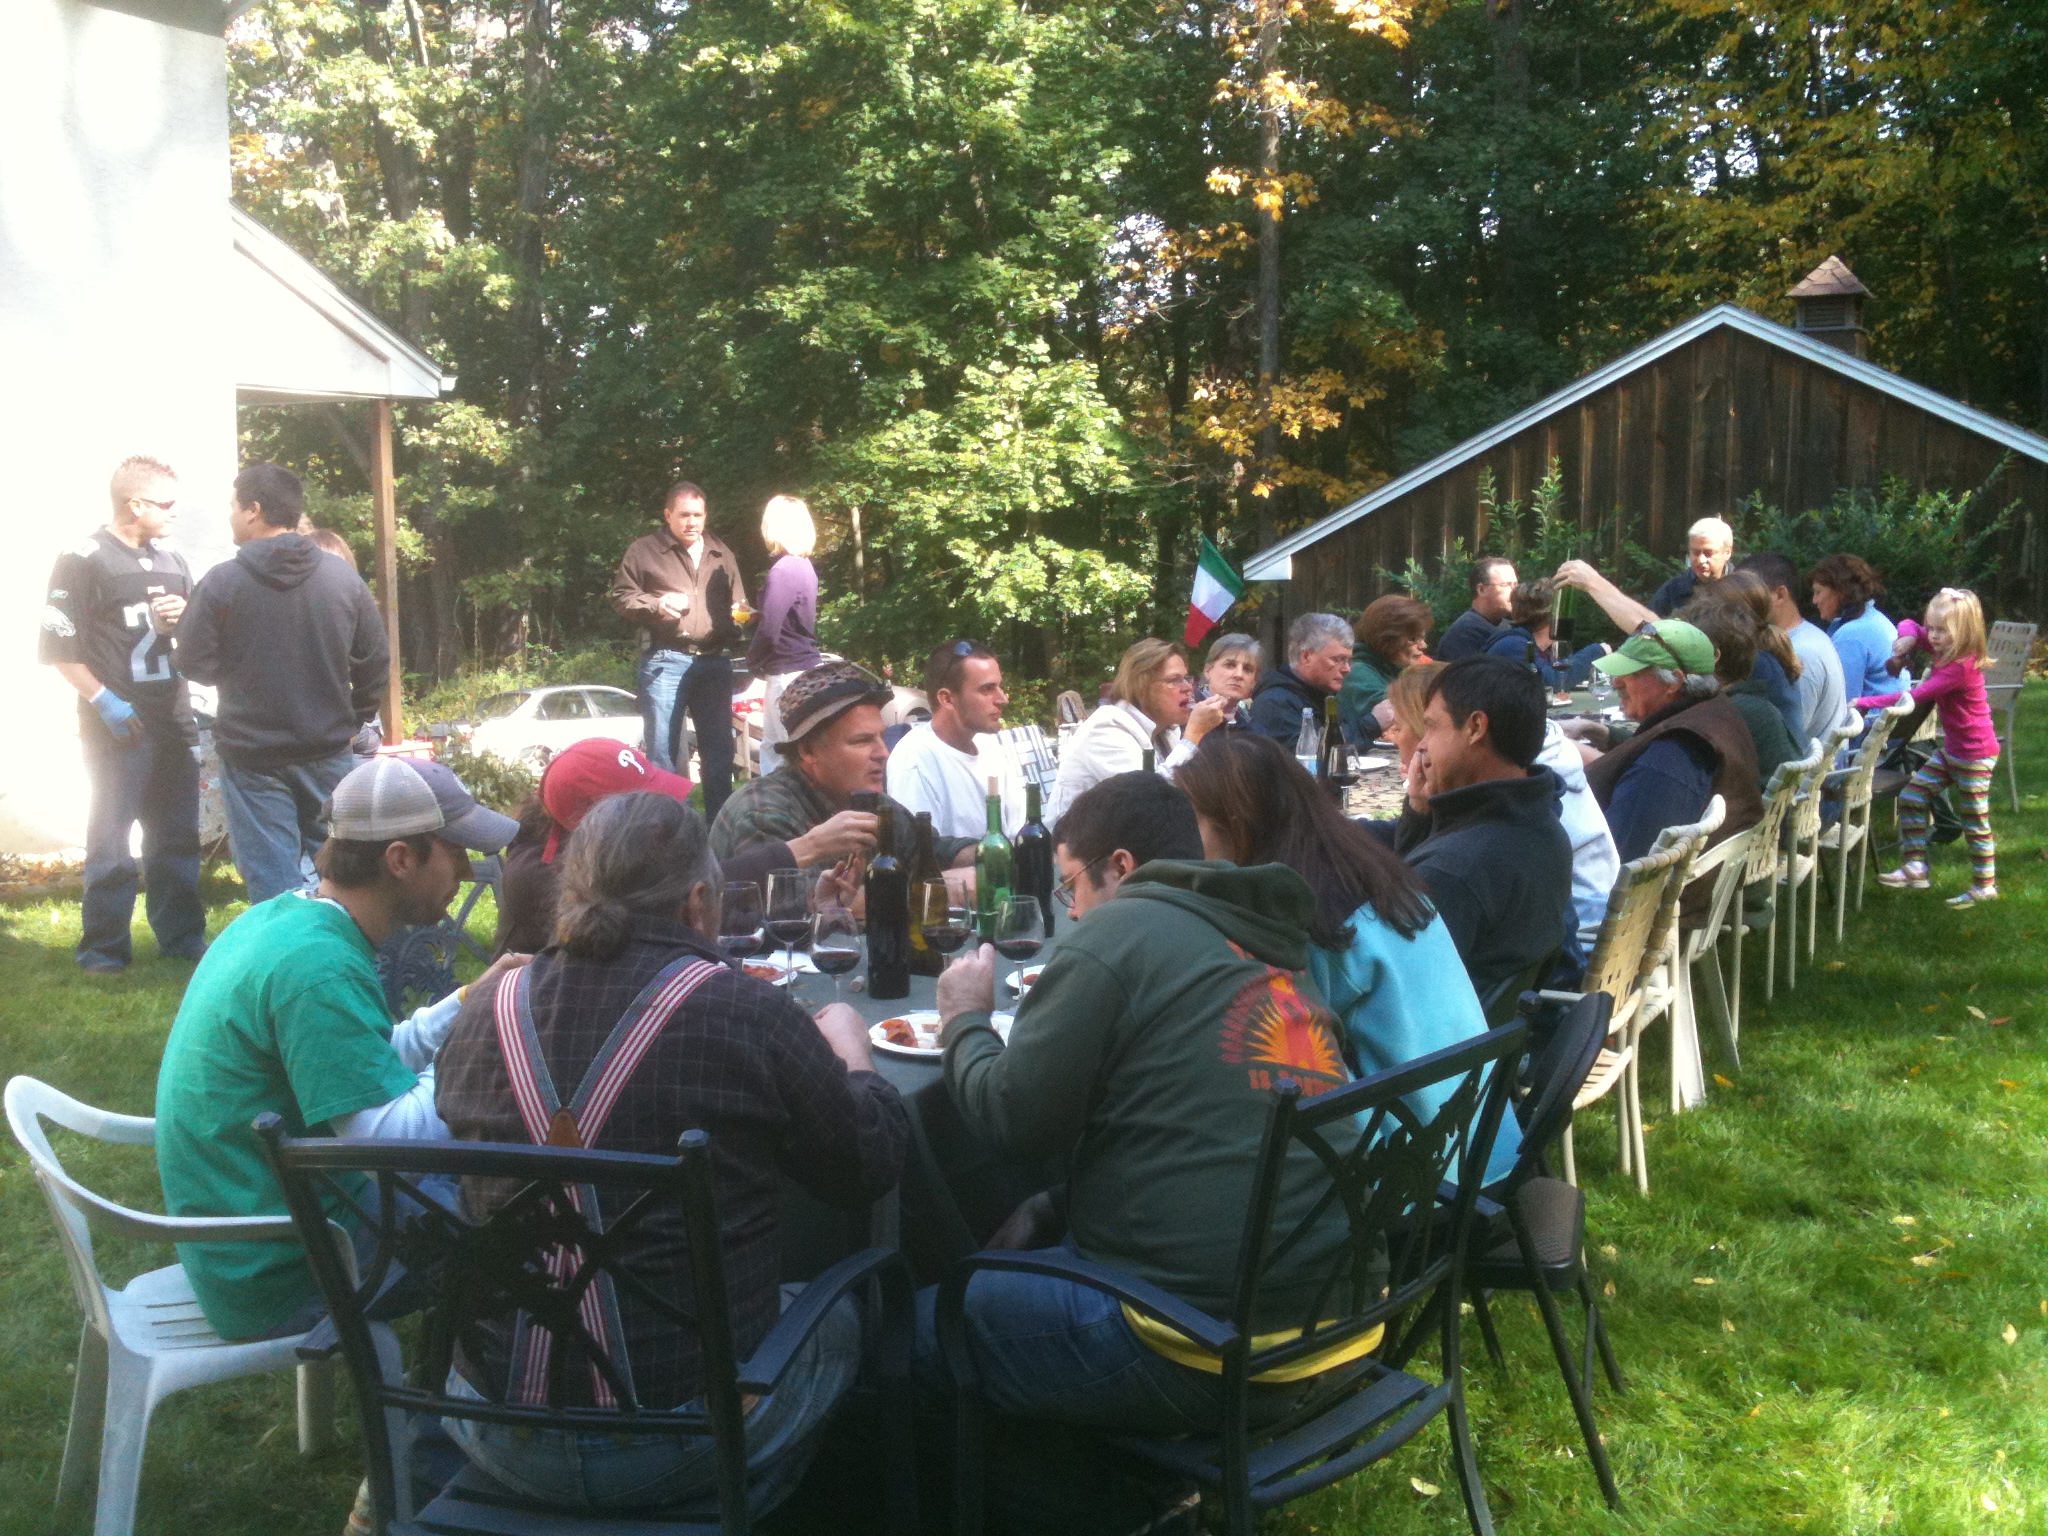
Mid day the 30 of us stop working and sit down for lunch. It’s always at a single long table and we eat as one big family. This has become an important tradition with family and friends and includes toasts and short speeches and plenty of laughter. It’s a very special day and it actually gets me emotional even to write about it.
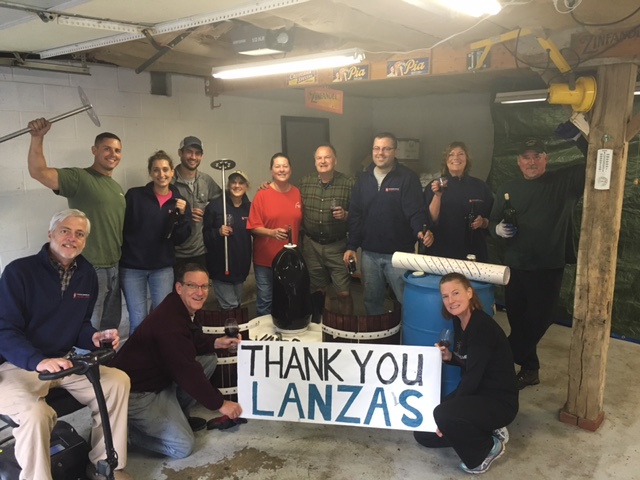
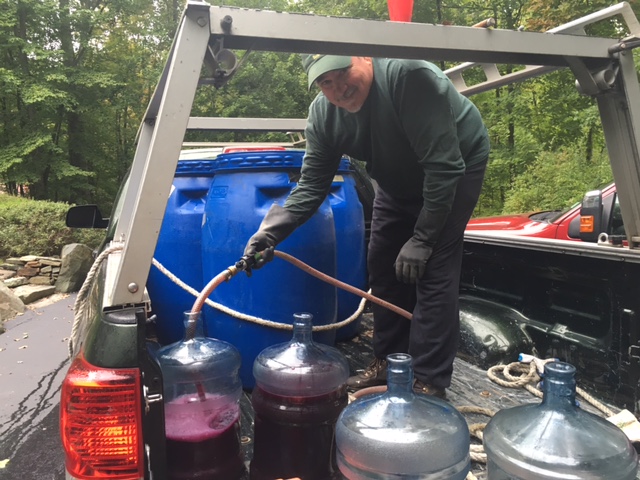
Pressing two weeks later is another story. It’s takes us two full days to press and then deliver the wine to each of the seven homes. Using pickup trucks, food grade drums, pumps and long hoses, we deliver wine to each house in the same way oil deliveries are made. We pump the wine down into each cellar and fill the barrels at each house. It’s more of a working weekend than crush day but we still mange to fit in great food and great wine. After making delivery runs we assemble back at the crush pad/garage for clean up. The day always ends up with a post event review. With more food and wine, we talk about how things went this year and suggestions for improvements to our process that we might make next year. Usually there is robust conversation about who stood out as an MVP and they receive an ovation.
The Musto and Lanza families are fantastic partners and we consider them part of our family.


Want to be featured in the “Winemaker Spotlight” series? Send Christina an email with a description about your harvest traditions and photos of your winemaking cellar to cmusto@juicegrape.com to be featured!
The Winemaker’s Think Tank: Vol 29 – How do I test for Brix?

What’s the Winemaker’s Think Tank?
Every Thursday we will post about a few frequently asked questions that our winemaker has answered. If you have a winemaking question you would like to have answered, please email us at support@juicegrape.com and we will try to get into next week’s post. Cheers! 🙂
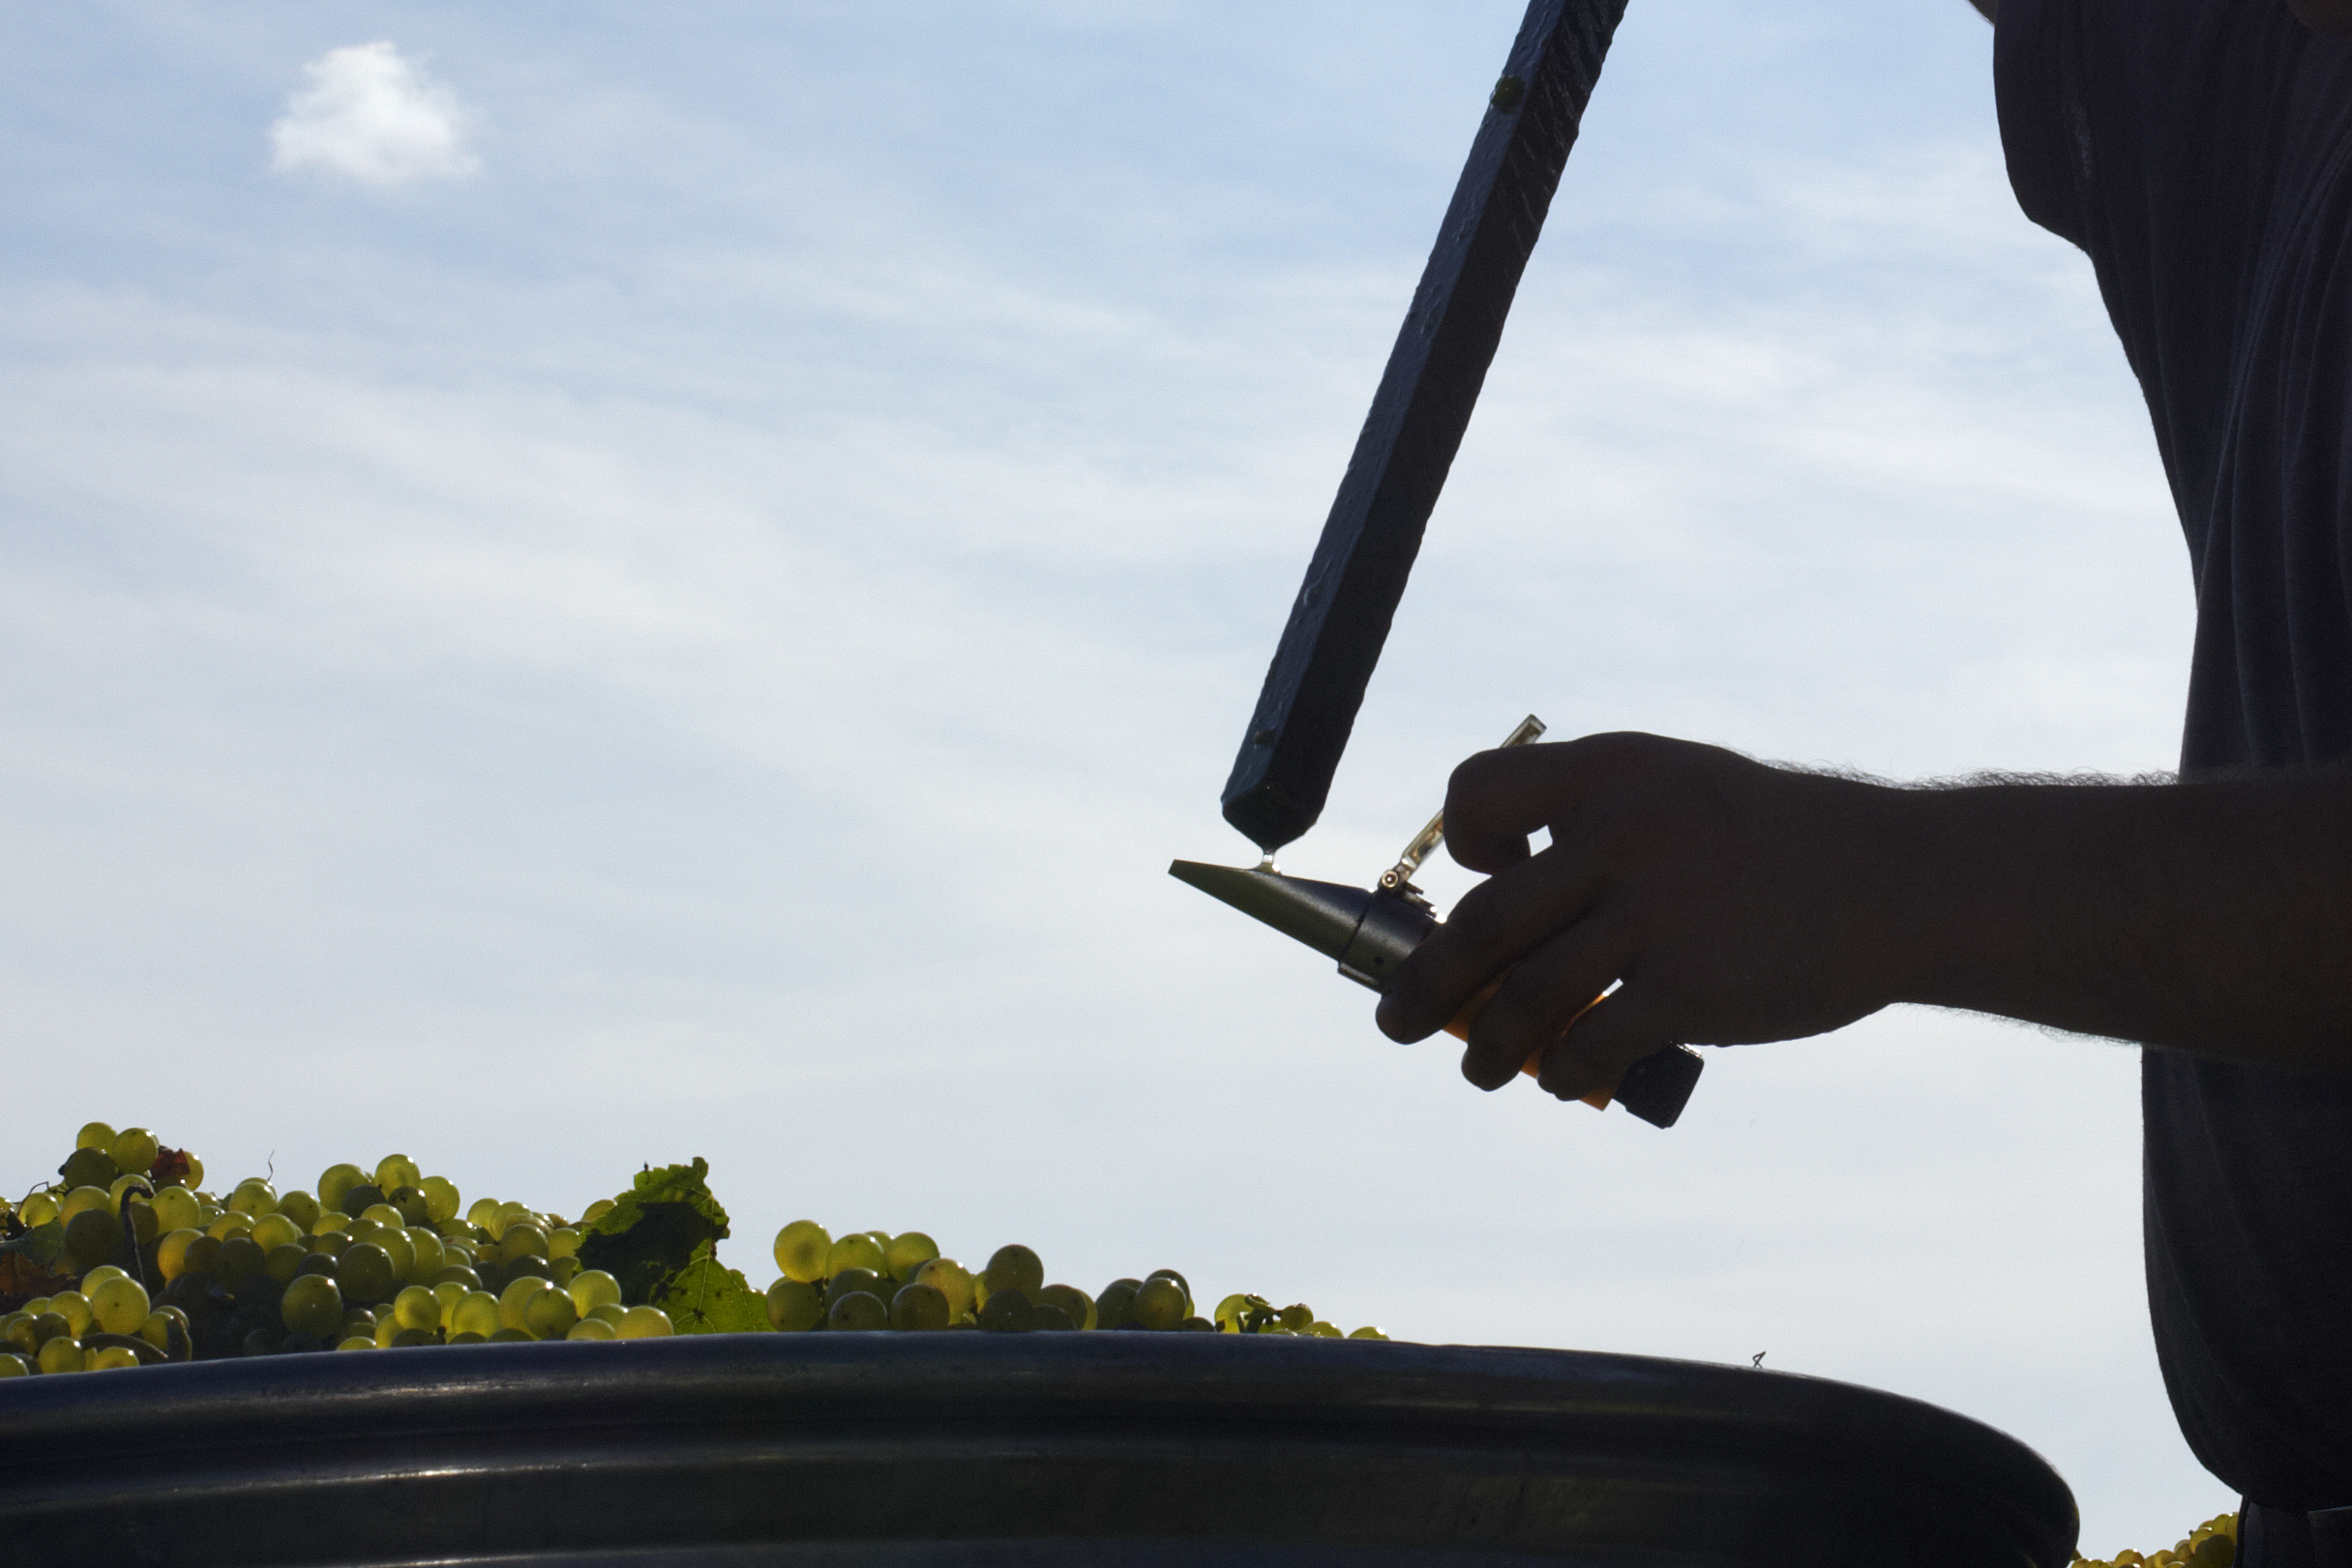
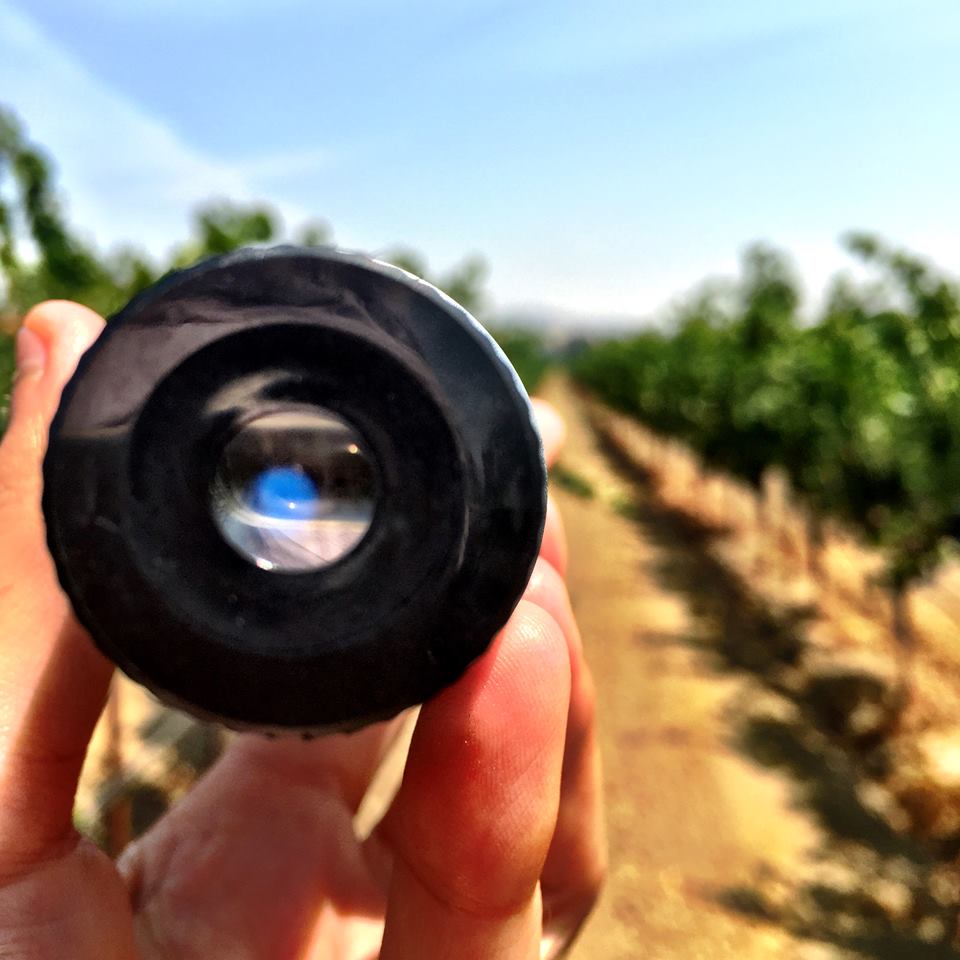
{refractometer used in vineyard for brix levels}
How do I test for Brix?
There are two ways to test for Brix in your grape juice and/or must. Prior to the addition of yeast and fermentation, one may use a hand refractometer to measure the sugar content (Brix) of the grapes. First the sampling method must be discussed. Simply taking one grape and squeezing it on the refractometer is not an accurate measurement of the entire batch, it is only reflective on the sugar content of that grape. The most accurate way to measure Brix would be to crush and process the grapes into a fermenting tub, punch down to thouroughly mix the must and allow to sit for 24 hours. This will create a more homogenous product from which to draw a sample. Using a hydrometer is simple, place a drop of grape juice on the lens of the hydrometer and lower the plastic coverslip. Hold the refractometer to your eye and look towards a bright light source. The light gets refracted by the sugar and will form an indicator line on the lens inside of the refractometer. This lens has a marked measurements column which will then give you your initial, pre-fermentation Brix level.
{hyrdometer testing brix levels}
Once yeast has been introduced to the must and begins to excrete alcohol, the refractometer loses its accuracy. This is when the hydrometer becomes more useful in this instance. To use the hydrometer, you will also need a cylindrical container; a graduated cylinder works well (the cylinder must be taller than the hydrometer). Pour a strained sample of the must or juice into the sanitized cylinder. Put the sanitized hydrometer into the cylinder and spin it slightly to dislodge any bubbles that may cling to the sides of it. Allow it to come to rest in the juice and observe the meniscus of the liquid and where it falls on the gradients of the hydrometer. This will give you the Brix level of the fermenting wine. As the wine ferments, the Brix level will continue to drop until it is at zero.
We hope this information helps with your winemaking. If you have any follow up questions or winemaking questions in general, please email us at support@juicegrape.com.
The Winemaker’s Think Tank: Vol 28- What are the best ways to get maximum extraction from red wine grapes to create a dark red wine?

What’s the Winemaker’s Think Tank?
Every Thursday we will post about a few frequently asked questions that our winemaker has answered. If you have a winemaking question you would like to have answered, please email us at support@juicegrape.com and we will try to get into next week’s post. Cheers! 🙂
What are the best ways to get maximum extraction from red wine grapes to create a dark red wine? And does a large primary fermenter make a difference in extracting color etc. from red wine grapes as opposed to a small primary fermenter of, say, 5 gallons?
There are many factors that can assist in the extraction of pigmentation and tannins from red wine grapes. A combination of some of these methods will ensure the best extraction of pigments in the red wine. The first method that will help ensure a deep bold color in red wines is a cold soak. After crushing the grapes into a fermenting tub, add 50ppm of potassium metabisulfite to prohibit microbial growth. After 6 hours, add pectic enzyme, specifically Color Pro, to help break down the grapes and assist with the color extraction. Now comes the more challenging part, the cold soak. The goal is to get the grape must to 40°F to extract the tannins but discourage bacterial growth; you may do this by bringing the fermentation tub into a cool area such as a walk in fridge (if you have that luxury) or a cold garage. If it is getting nice and cold at night, this may work fine for you. Otherwise you will have to chill down the must by adding frozen containers of water. You can fill up gallon jugs with water (that have been sanitized with potassium metabisulfite) and freeze them. Submerging quite a few of these in the must will chill it down significantly. However there is a risk of the jugs leaking. Another method would be to obtain 4inch PVC tubing and caps for the end. The PVC tubing will need to be as long as the height of your fermenting vessel. Place a secure cap on one end of the tube and seal it. (Always sanitize anything that will come in contact with your must with potassium metabisulfite first.) Fill the tube with ice and place standing upright (to the best of your ability) in the must. The solid skins and thickness of the must will help keep this upright. Then place another cap on the exposed end but do not seal it. You will have to replace the ice every 8 hours. If using 4 tubes per tub of must, this should keep the grape must around 40°F. If you can keep the must at 40°F, cold soaking it for 3 days will bring out deep pigments and provide dense color saturation. You will need to warm up the must to 65°F before setting yeast.
There are a few fermentation aids that will help with color securing. Opti-Red and FT Rouge are excellent products for this purpose. Opti-Red is a yeast derivative nutrient that helps to secure color and provide smoother tannin integration. FT Rouge is a blend of tannins that will also secure color pigments throughout fermentation. Using both of these compounds will greatly enhance the depth and richness of your red wine color.
Lastly, the shape of your fermentation vessel will mildly affect the color of your wine. If you have a tall cylindrical shaped fermentation bin, the cap will rise up and maintain less contact with the fermenting wine. Regular punch downs will be more critical. If you have a wider fermentation vessel, the surface area of the cap will increase, giving it more area to come in contact with the wine. These are subtle differences that won’t greatly affect the outcome of the wine and will not replace the incredibly important punch downs that should occur every 6-8 hours.
We hope this information helps with your winemaking. If you have any follow up questions or winemaking questions in general, please email us at support@juicegrape.com.
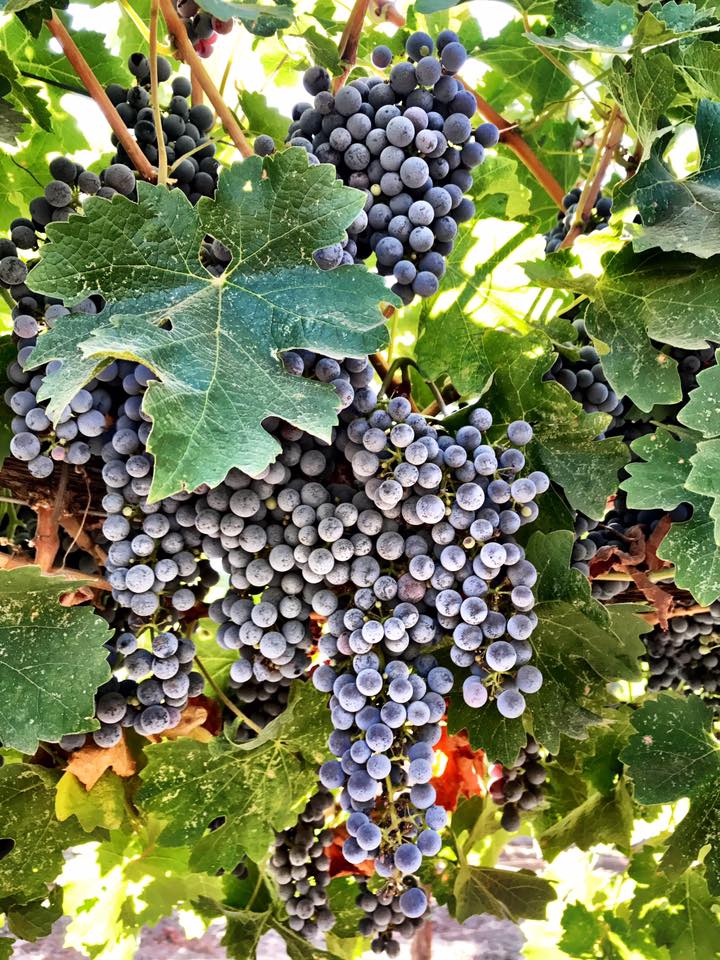
Clone 337 Cabernet

Good Morning from Madera! Our Clone 337 Cabernet is looking GORGEOUS and coming in at 21/22 Brix. We will work to harvest these around 24-25 Brix. According to the weather we will see a heat spike in the coming days. Central Valley harvest may be here before we know it! Seeing grapes as early as September 6th!
Clone 337 is best known as one of the premier French clones. It is similar to the Dijon clones and gives good yield, small intense berries, and very fruit forward flavors. These wines create a lush mouthfeel, have deep color, and intense dark fruit, chocolate, and intense tannins. Age in French or Hungarian Oak for an extra shot of intensity and depth.
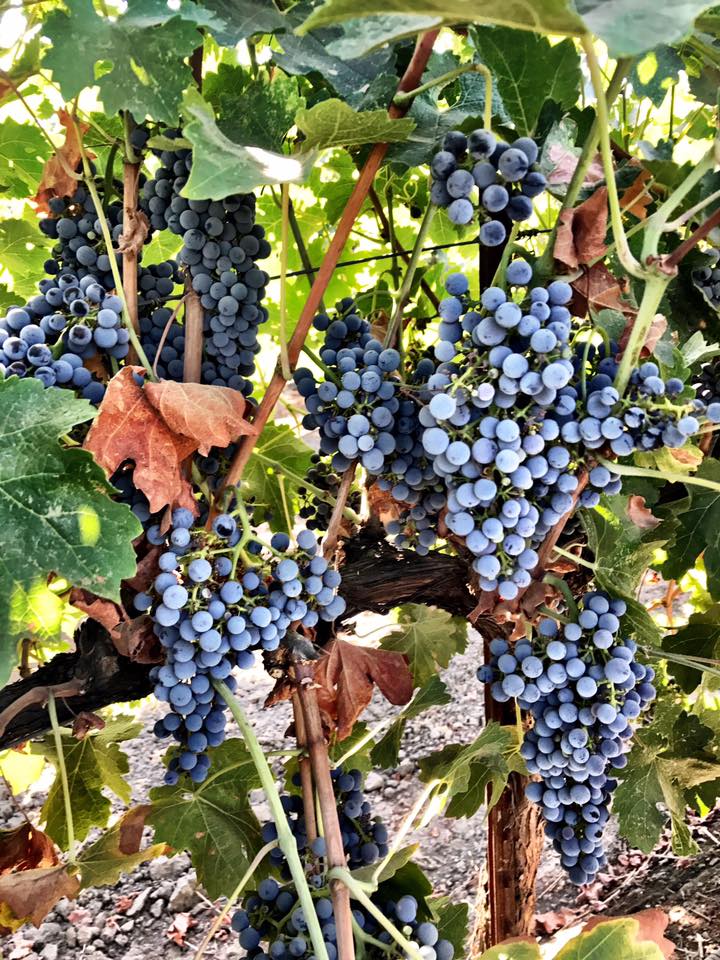
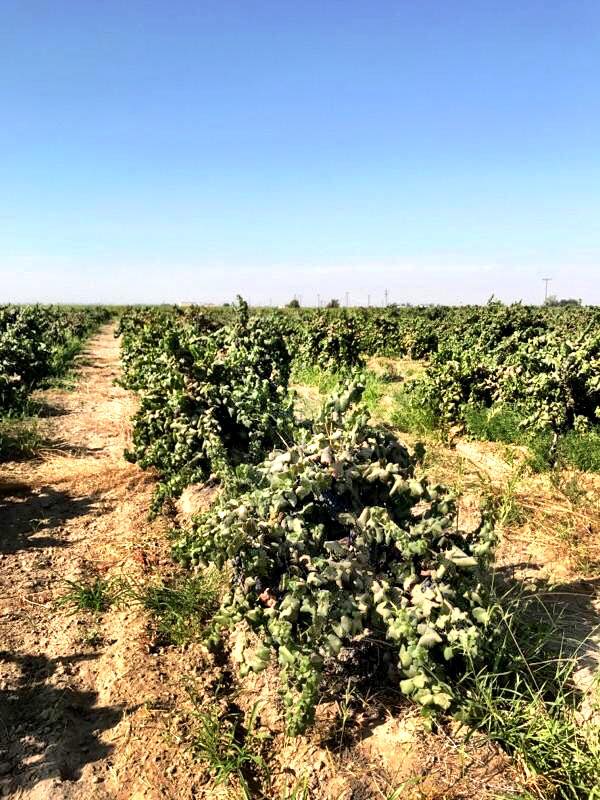
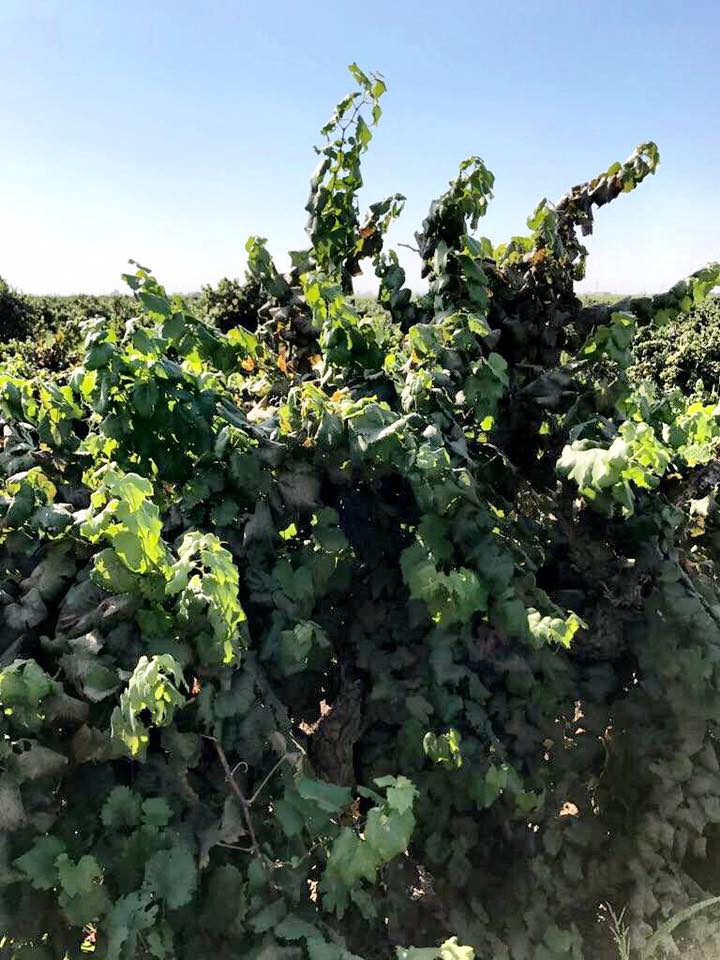
Morning views of the 70 year old head trained Alicante Bouchet

Morning views of the 70 year old head trained Alicante Bouchet. Head pruned by hand and small bunches full of flavor and color. Old vine is an understatement…..
Alicante is a variety that was cultivated in 1866. Its deep red color makes it great for blending with lighter red wines such as Zinfandel and Pinot Noir. A popular grape during prohibition, the old school Italian blend consists of 18 boxes of Zinfandel, 2 boxes of Alicante, and 1 box of Muscat or make it straight for a delicious light bodies red.

The Winemaker’s Think Tank: Vol 27- What are Brix?

What’s the Winemaker’s Think Tank?
Every Thursday we will post about a few frequently asked questions that our winemaker has answered. If you have a winemaking question you would like to have answered, please email us at support@juicegrape.com and we will try to get into next week’s post. Cheers! 🙂
What are Brix?
Brix is the unit of measurement of the sugar content within fruit, and specifically to winemaking, grapes. One degree Brix is equal to 1 gram of sucrose within 100 grams (100ml) of liquid. The average Brix level for grapes is between 20-30.
We hope this information helps with your winemaking. If you have any follow up questions or winemaking questions in general, please email us at support@juicegrape.com.
The Winemaker’s Think Tank: Vol 26 – How do I test for Acid?

What’s the Winemaker’s Think Tank?
Every Thursday we will post about a few frequently asked questions that our winemaker has answered. If you have a winemaking question you would like to have answered, please email us at support@juicegrape.com and we will try to get into next week’s post. Cheers! 🙂
How do I test for Acid?
When testing for acidity in wine, you are looking for the Total Acidity value, or the amount of acids in grams per liter of wine. While this may sound complex, it will help you in achieving a proper balanced flavor in your end product. You will need a few basic lab supplies: a test tube, a small 10ml graduated syringe, phenalthalein, sodium hydroxide. Draw a 15ml sample of the wine to be tested into the test tube. Add three drops of the phenalthalein. Swirl the drops around in the wine to mix it in thoroughly. (Note: When using sodium hydroxide, be very careful. It is a strong base that can cause burns. We suggest wearing eye and skin protection.) Using the 10 ml graduated syringe, slowly drop in the sodium hydroxide by .5ml at a time. Every drop, swirl the test tube contents to mix and observe any color reactions. Upon adding the drop, you will see an immediate color change, that will then dissipate. For white wines, you will observe a pink color and for red wines you will observe a grey color. Keep repeating the process of adding a drop, swirling and observing until the color change is permanent. The amount of sodium hydroxide used, when the color change is permanent, will give you the Total Acidity. If 6ml of Sodium Hydroxide are used, then the wine contains .6% or 6g/L of TA.
We hope this information helps with your winemaking. If you have any follow up questions or winemaking questions in general, please email us at support@juicegrape.com.
Recent Comments