


Aging Your Wine

Bulk Aging
As seen in and written for Winemaker Magazine
Written By Christina Musto-Quick
Aging your wine is not the most exciting winemaking topic, but it is a critical topic. Aging wine is considered from the time after your fermentation is completed through the time spent in the bottle before consumption. The three basic goals of aging your wines are to assure stability, to correct a flaw or fault, and to evolve the wine style by increasing complexity, flavor, and aroma. The goal of this article is to give you a deeper insight into the benefits of aging your wine, no matter your winemaking style or skill level.
Considerations of Aging Wine
Let’s start with looking at each of the factors that affects the aging process: Time, temperature, oxygen, oak, yeast lees, pH, the composition of the wine, and wine stability.
Time
Different aging styles require different allotments of time. Aging a Bordeaux with high acid and high tannins will take much longer to age than a softer California Cabernet. Grapes grown in cooler climates tend to need more time to age due to their higher acid and tannin structure, whereas grapes from a hotter region can usually be enjoyed earlier. Of course, as I write that, I am left thinking about how subjective that sentence is. Normally we are ready to bottle our whites 7–8 months after fermentation. I like my reds to go one year of bulk aging before bottling, and longer is better.
Temperature
Just as all chemical reactions are influenced by temperature, so are the reactions during wine aging. Wine aging is best from 58–70 °F (14–21 °C). You don’t want to over chill or over heat the wine during the aging process. You could lose a lot of positive aromas and flavors that way. If you don’t have a natural “ideal” temperature in your cellar, I would suggest installing an air conditioning unit in your wine cellar to handle those warm summer days. The colder winter temperatures will not hurt the wine as much as the summer heat. The biggest factor is to avoid temperature fluctuations from hot to cold. Wine likes to age at a steady temperature.
Oxygen
Excessive exposure to oxygen during aging can have a negative effect on your wine. The introduction of small amounts of oxygen during the aging process can help soften your wine and stabilize the color in red wine. This is the benefit of the barrel, as it allows micro oxidation through the staves. Too much oxygen can lead to off flavors (acetaldehyde) and the browning/pinking of the color. Too much oxygen will cause your free SO2 levels to drop, which can then cause oxidized qualities in your wine (acetaldehyde — nuttiness, Sherry characteristic). The more phenolic material in the wine, the more oxygen the wine can safely absorb. This is why white wines are so susceptible to oxygen contact such as browning, whereas red wines carry more phenolic properties and are less likely to brown or have negative effects so quickly.
It is said that a wine is “saturated” with oxygen at about 6 mL of oxygen per liter of wine, or 8 mg/L, or 8 ppm. Single saturation examples include racking, movement to tank or barrel, fining, filtration, and bottling. How do you measure this? With a dissolved oxygen meter or, some wine grape and juice wholesalers have the testing equipment to do it for you on site. How do you control these saturations and not over saturate your wine? Limit headspace, stay vigilant about topping off your barrels, utilize inert gas to flush out air, measure and adjust your SO2 levels every 6 weeks, and monitor your saturation levels.
Oak
Many wine styles depend on oak aging. Oak aging highly impacts the aroma and flavor profile of the wine. This is because of the flavor the oak imparts by itself and the complexity added to the wine through micro oxidation. Barrels can be challenging — you need to properly clean them, swell them, and consistently keep track of them by topping off your wine. If you have the funds and the time to monitor and cultivate your barrel I would highly suggest purchasing one. If you do not, there are some great alternatives we will discuss later in this article.
Why is aging in an oak barrel so great? Wood vessels allow limited oxygen exposure, allow for slight evaporation (hence needing to top off your barrels), and add flavor components and complexities. Something to consider is the size of the oak barrel you purchase. If you purchase a new barrel smaller than 30 gallons (114 L) then you need to taste from your barrel every couple of weeks. This is because the less surface area you have, the more flavor extraction you will get from the barrel. Obviously, the younger the barrel the more flavor extraction will occur. As time goes on (after 3 or 4 years), the barrel will become neutral, meaning the oak extraction is greatly reduced. However, the barrel itself is still useful, as it allows the wine to mature and adds complexity to the wine. Also, cleaning your oak barrels is VERY important. Barrels can harbor microbes and it can be difficult to sanitize them if not properly cleaned.
Yeast Lees
Aging on the lees is a great practice for white wines. The most popular wine to age on the lees is Chardonnay, but winemakers are aging Sauvignon Blanc (France), Albariño (Spain), Muscadet (France), and Champagne (France) on the lees too.
I spoke with Kristen Parsons of Chamard Vineyards in Clinton, Connecticut about her Estate Reserve Chardonnay crafted in the French Meursault style and why she ages it on the lees. After aging in barrels for primary fermentation, a secondary malolactic fermentation is carried out along with sur lie aging.
“The wine remains on the fine, silky lees that are composed of mostly autolyzed yeast cells. I stir the barrels mixing up these lees into the wine, daily, weekly, and then monthly for ten months. All of this is carried out for stylistic reasons. This attention creates a wine with a smoother structure and mouthfeel, increased body, and aromatic complexity. The resulting wine is layered with a rich and creamy mouthfeel,” Parsons said. “Another bonus it that the lees absorb oxygen, which not only enhances the character of the wine but aids in protection as well.”
pH
pH is a very important factor in all stages of winemaking. If you adjust anything in your grapes before fermentation, it is the pH. When it comes to aging your wine, a high pH is dangerous as the wine is vulnerable to spoilage organisms. It is important to make sure the SO2 is in balance with the pH. The SO2 effectiveness is critical to color and freshness, especially in white wines. The SO2 and pH balance also INHIBITS the growth and activity of microorganisms. A pH of 3.8 is considered a critical range for Brettanomyces (barnyard), Lactobacillus (mousy/acetic acid), and Pediococcus (overly diacetyl). You do not want to be in that range. So make sure to keep track of your pH and SO2 levels. For red wines you want to be around a 3.5 pH and for white wines you want to be around 3.1–3.3 pH.
Composition of the Wine
Starting with a good wine is key to your wine aging and finishing success. Starting with a faulted wine will result in an uphill battle. Always pay attention to your fermentations and cleanliness in your home winery. If you have a wine with negative characteristics, get it tested to see what exactly is going on. Some suppliers offer sensory tests, there are also companies that can give you the chemical breakdown of your wine that you can utilize. Sometimes a little micro oxidation is exactly what the doctor ordered. Other times you might need to introduce a chemical over time to help clean up what’s going on.
Wine Stability
The wine needs to be stable — meaning proper SO2 binding, pH levels, cold stability (tartrate stability), heat stability (protein haze), combination of tannin molecules (“polymerization”), and the combination of color molecules (“polymerization”), and stabilization of color. Adjusting and aging your wine properly helps ensure that your wine stays safe in the bottle.
Benefits of Bulk Aging
There are many benefits to aging your wine as bulk. One, is the ability to correct a problem. Do not bottle your wine until you have removed faults and flaws. If you have bitter or astringent tannins in a young red wine, you can bench test fining trials.
The second is the stylistic choices you get to play with and experiment with. All wines will evolve and release more complex flavors and aromas over time. Depending on if you decide to do any oak infusions or age in an oak barrel, these practices will help impart interesting and complex flavors to your wine. Conversely, if you decide to age in a stainless tank or glass, your wine will contain a bright freshness.
The third benefit is that it allows for blending possibilities with other wines. This is one of the most fun parts about winemaking in my opinion. If you age your wine you have time to do bench trials and figure out ways to try to impart more complexity in your wine by blending other wines in your cellar. The goal of aging is to increase complexity in your wine and you have a lot of options to play with to introduce complexities.
Equipment Options
Glass
There are a few options you can try when aging your wine in glass. However, if you are aging your wine in glass you want to keep in mind that you want to keep your wine away from the light. Too much light in your cellar can impact the color saturation of your wine. Whatever option you choose, always top off your storage vessel to avoid oxidation.
Demijohns are a great glass option. They have been used by winemakers for many years. They come in multiple sizes, can be used for winemaking, cider, and depending on the style, olive curing. It is easy to do an oak infusion with a demijohn. There are a few ways to do this. You can use fishing line and a muslin hop bag filled with oak chips, use an oak infusion tube filled with oak chips, or use fishing line and a stave, spiral, or WineStix® to impart oak flavors.
Demijohns can be difficult to move around so I’d suggest getting a plant caddy and putting the demijohn on the caddy so it’s easier to move. Please note that the bottom of the demijohn is very thin glass so it can break easily, especially when filled with wine. Be careful when moving these, they are deceptively secure looking with the outside basket.
Demijohn Sizes: Demijohns are a large glass bottle that is narrow at the top and curves out into a big tear shape at the bottom. Each demijohn is equipped with a plastic basket or braided plastic basket. Some demijohns come with spigots for tasting access to the wine. They come in a variety of sizes, the most popular for winemaking are 10LTR, 25LTR, and 54LTR.
Carboys are one of my favorite options: They are inexpensive, come in an array of sizes, are easy to use, easy to clean, easy to add oak infusions, and you can see what’s going on with your wine . It’s important to see if you are accumulating a lot of sludge at the bottom of your carboy. This means it’s most likely time to rack your wine. Carboys can also be a little tough to move around when full. I’d suggest getting a plant caddy or putting your carboy inside a milk carton crate to help you move it around your cellar. Winemaker Frank Renaldi of Musto Wine Grape Company says, “Carboys are a great storage vessel when you start making wine 5- or 10-gallons (19- or 38-L) at a time. I suggest you go to a variable capacity tank when you are up to three to five carboys of the same wine. It is easier to maintain one tank versus five carboys, such as racking, filtering, additives, and SO2 additions.”
Carboy sizes: Carboy look like a water cooler water jug. They are a thicker glass than demijohns but do not come with spigots. Carboys come in a variety of sizes 3 gallon, 5 gallon, and 6 gallon.
Food-Grade Containers
PET carboys are a popular vessel, especially for those who are working with kits. These are lightweight, making them easier to lift and move around your cellar, and they will not break like glass. However, cleaning these can pose a problem. When cleaning your PET carboy you can create grooves in the plastic that can eventually be a home for bacteria, no matter how much you scrub. Keep that in mind when cleaning these and try not to scrub too hard or scratch the inside of the PET carboy.
ROTO Barrels are food-grade plastic barrels. They are great because they give that barrel vibe to your cellar without breaking the bank. You can add oak infusions, it’s easy to rack in and out of, and gives a great look to your cellar. However, just like the PET carboy, you have to be conscious of how you clean it to help avoid creating any homes for bacteria.
Flex Tanks are created from a polyethylene food-grade safe plastic. They give the winemaker the ability to utilize is as an aging vessel that is permeable like a barrel but is in a shape that is easier to store in their cellar. There are two different maturation styles that allow the winemaker to decide how much oxidation they want released into their wine . These are maturation weight, which allows a level of oxygen transfer on par with a second year barrel, and a heavyweight level which allows less oxygen transfer, approximately 50% less than the maturation weight.
Oak Barrels & Infusions
Oak barrel aging is a hot topic for winemakers. There are many different thoughts on which oak to use and how long to age in an oak barrel. Rick Lanza of Wooden Valley Winery, in Fairfield, California says that he barrel ages his Cabernet Sauvignon first and then bottle ages it for up to a year. “We prefer barrel aging for red wines because it allows the tannins to refine and become finer grained, and you get the micro oxidation through the barrel, so that helps soften the wine.”
When using oak barrels you definitely want to taste often to avoid over-oaking, make sure the barrels are topped-off monthly, properly manage your S02 levels, and be patient — it will be time well spent. Harry Hansen, Winemaker at Calistoga, California’s Sterling Vineyards says, “Barrel aging allows for more rapid development and softening of tannins, while bottle aging allows development of secondary aromas. Wines like Cabernet Sauvignon, Petite Sirah, or Tannat can accept longer aging in barrel than Pinot Noir because they have more pigment and tannin to begin with, so generally Pinot goes to bottle younger.
Flavor considerations for oak barrels consist of the type of oak (French, American, or other), the age of the barrel, the toast level, if there was a different type of alcohol aged in there previously, and the number of times it’s been used. All of these factors impart different flavors.
Barrel alternatives include staves, chips, oak powder, spheres, oak spirals, WineStix®, and more. Each has its pluses and minuses, but just like an oak barrel you want to taste your wine regularly to make sure you are imparting the flavors you want in your wine. WineMaker digital members can read more about these options at: https://winemakermag.com/article/beyond-the-barrel.
Variable Capacity Stainless Steel Tanks
Variable capacity tanks are another winemaker favorite. Hansen says he prefers using stainless steel or glass vessels for white wines because they are “impenetrable to oxygen, and the wines age most slowly. This is appropriate for delicate whites like Riesling or Sauvignon Blanc.”
Stainless steel tanks are also great for bulk aging red wines. They protect your wine, have variable levels of volume, have a sample tap you can utilize, are easy to clean, easy to infuse with oak or other products, and pretty much last forever. If you can invest in a stainless steel tank you won’t regret it!
Quick Tips: I’ve outlined a lot of equipment above but just as important as it is to find the right aging vessel for you, it’s also important to maintain your airlocks and bungs. If you don’t keep your airlocks full or bungs clean you are asking for bad things to happen with your wine. These may be small items but they can introduce big problems if not maintained. Also, always have different sized glass jugs in your cellar. This helps you manage your topping off needs without losing any wine to over-oxidation. Lastly, keep track of your SO2 Levels. Oxygen isn’t your friend and you don’t want your wine to spoil while it ages. Remember wine always wants to turn to vinegar, and it is a living product. You need to protect it!
Bulk vs. Bottle Aging
It has been said by many winemakers that complexity increases in the bottle. However, there is a point where the wine in bottle will start to lose its luster. This has to do with the type of wine, its SO2 levels, pH level, storage temperatures and its exposure to light. Winemaker Frank Renaldi says, “I am a big believer of aging wines in bulk — either tanks or barrels. I find the wine develops much better as a “team of bottles” in one vessel. Once the wine hits the bottle, it ages as a single entity. It ages in a different way, especially reds, but does it on its own.”
Winemaker Harry Hansen says, “Aging in bottle is subjective. Wines that are bigger and blacker generally can handle more cork time than light reds, which in turn can handle more cork time than delicate whites. At some point, tannins are softened, fruit characters have receded, and youth is a memory. Wines can still be very good, because what is lost in freshness is often replaced by layers of aroma. The eventual fate of every wine is to become vinegar, but as slowly as possible, please.”
So there you have it! A lot of things to think about regarding the aging of your wine, but all worth taking into consideration. I hope this information has helped shed some light on aging your wines, why it’s important, and how you can play and experiment with it.
SIDEBAR – Products to help avoid the need to age so long
Looking to impart age without aging your wines? No problem. I understand that sometimes you just want to enjoy your wine as soon as possible. If your wine has any harsh tannins or needs some “rounding out” I’d suggest looking into the following products.
Noblesse is a natural nutrient that is used to help soften wines. It can be used pre- or post-fermentation. It is great if you need to soften a high-alcohol wine or round out a wine that is too high in acid or tannin. Noblesse will help soften your wine’s mouthfeel. Sometimes our grapes are high in Brix and we can’t help but have a high-alcohol wine. Noblesse will help soften your wine’s mouthfeel giving the perception of a rounder, silky mouthfeel, while reducing any sulfur smells and burning sensation from the high alcohol.
Gum Arabic is a tartrate stabilizer that helps soften the perception of astringent and bitter tannins. It also helps stabilize your wine’s color. This is a great tool for when your wine tastes that little bit “too young.” It can help a wine taste another year older by just one simple addition.
Super Smoother is great tool that’s ideal for home winemakers because it comes in small packages intended for 6-gallon (23-L) batches. It contains glycerin and liquid oak extract. The combination of these two adds a subtle oak flavor while softening harsh tannins and smoothing out wine mouthfeel.
Tannin FT Rouge is derived from highly reactive tannins from exotic woods and chestnut. I usually suggest using this pre-fermentation to help preserve the natural tannins from the grape, help stabilize color, and enhance mouthfeel. You can use this post-fermentation but you will have to wait 3–6 weeks for the addition to show up in your wine. A simple nutrient to add to your primary fermentation schedule that can help you during the winemaking process.
For more information regarding the Fall Harvest please feel free to contact us at sales@juicegrape.com or give us a call at 877-812-1137. We are looking forward to helping you with your next great wine!
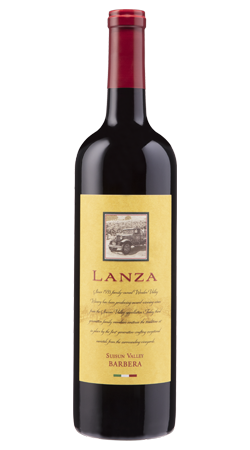
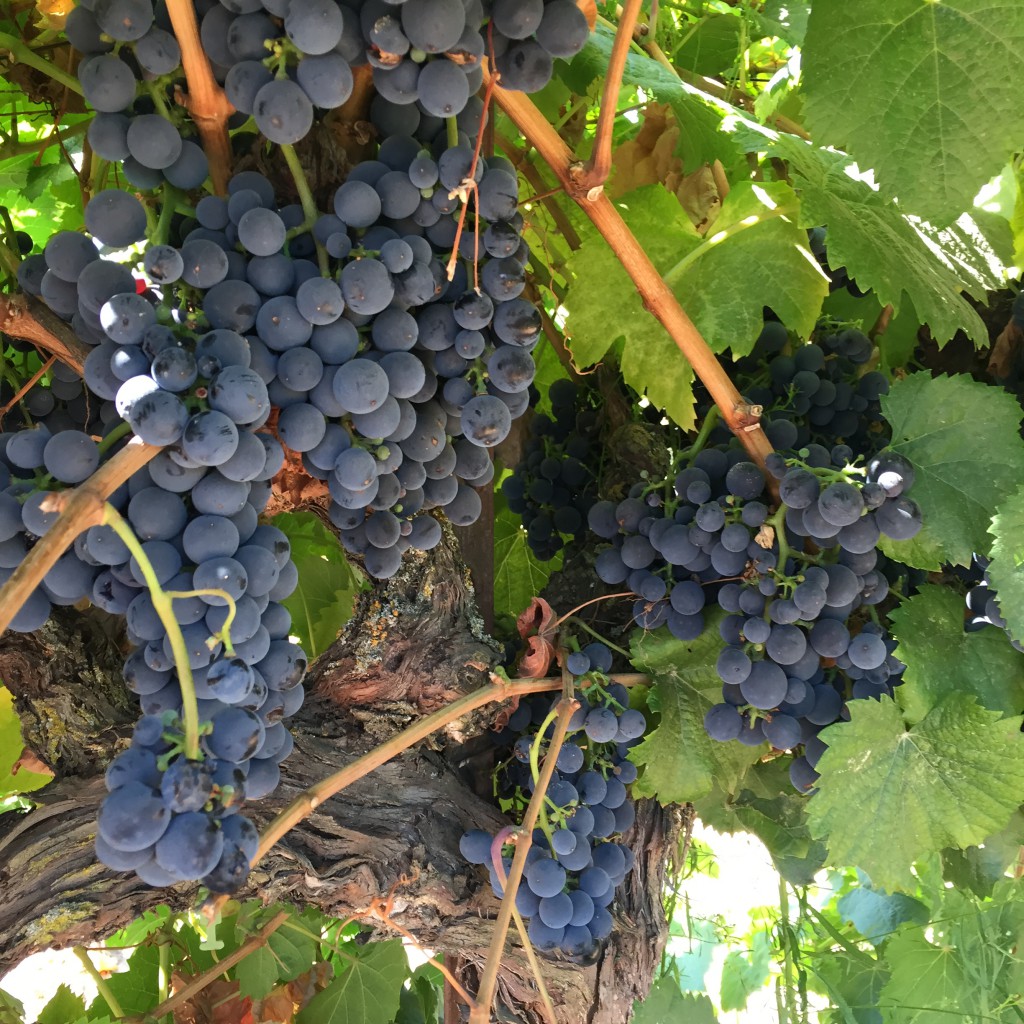
Wine Grape Spotlight: Lanza-Musto Barbera

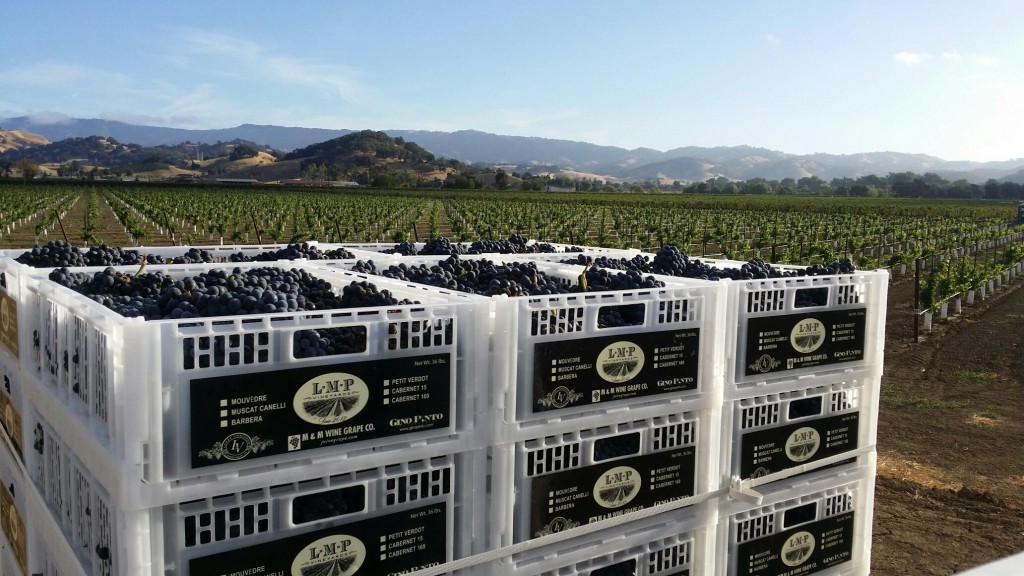
Our Barbera is flourishing in Suisun Valley. The LMV Barbera wine grape produces good yields and is known for its deep color, full-body, low tannins, and high levels of acid. Rolling in at 24.5 Brix we can’t wait to get winemaking! This Italian-style wine should be enjoyed relatively young. LMV Barbera wine gives off notes of dark cherry, plum, and boysenberry. In the past we’ve used a slight amount of French Oak to enhance the supple tannins and hints of vanilla.
Make sure to pick up a few cases this week to make at home!
Ingredients:
- 2-3 cases (36lbs) of Lanza Musto Barbera grapes
- 1.6 gms of Potassium Metabisulfite
- 3mL of Color Pro
- 1 – 6gal package of Go-Ferm
- 1 – 6gal package of chosen yeast (see yeast suggestions below)
- 1 – 6gal package of Fermaid K
- 1 – 6gal package of Fermaid-O
- 1 – 6gal package of Malolactic Bacteria
- Optional Additives:
- 1 – 6gal package of Tannin FT Rouge
- 1 – 6gal package of Opti-Red
- 1 – 6gal package of Booster Rouge
- .9oz of French Oak Dust
Yeast Suggestions:
- VRB
- VRB helps bring out ripe fruit, jammy notes, hazelnut, and dried plums. It helps soften harsh tannins, softens high acid, and adds a little extra complexity mid palate. This yeast bodes great color stability and is a great option for your Lanza-Musto Barbera.
- BRL97
- BRL97 was created for Italian wine grapes. It is a vigorous fermenter with a high alcohol tolerance. It enhances the fruity notes of the grape, while helping balance out the palate. Another great option for your Lanza-Musto Barbera.
Equipment:
- 1- 6 gallon carboy
- 1 – 5 gallon carboy
- 1- 50LTR fermentation pail w/lid
- 1- Crusher Destemmer or utilize Musto’s Crush/Destemm service
- 1- Press
- 2 – Airlocks
- 2- Drilled Bungs to fit Carboys (#7)
- B-Brite
- Potassium Metabisulfite
- Racking equipment
- Hydrometer
- Thermometer
- Ability to test for Total Acidity (TA), pH, and MLF
- Must punch down tool or stainless steel spoon
Winemaking Steps:
- Sanitize and Crush and Destem – Inspect your grapes. Crush and destem into clean and sanitized food grade 50LTR fermenting tub. Always allow an extra 20% of volume for fermentation purposes as the wine will “expand” throughout fermentation. Always rinse your fermentation vessel with a sanitizing strength potassium metabisulfite solution (2oz/gallon or 3tbsp/gallon). Make sure that the sanitizing solution touches all the surfaces of the fermentation vessel and that the vessel is completely emptied out of all sanitizing solution after. Shake free any drops as best you can from the fermentation vessel. Having remaining sulfite liquid in the vessel will prohibit fermentation. Do not rinse the sanitizer off with water after sanitizing as that will reintroduce bacteria to the environment.
- Once all of the grapes are crushed, try to accurately measure your quantity of must. Add ¼ tsp of potassium metabisulfite for every 5 gallons of must that you have. Mix up the must thoroughly.
- ALWAYS record the additions you make to your grape must!
- Wait for 6-8 hours after the sulfite addition and then add color pro to the must. Always mix it with water to create a 10% solution (if you use 5mls of enzyme, mix it with 45mls of water). The water allows it to better circulate throughout the must. Allow the pectic enzyme to work for 12 hours before yeast set.
- Twenty four hours after crushing the grapes, mix the container thoroughly and take and record your measurements. Measure Brix, pH, and TA. If you need to adjust your must at all, this is the time to do it. Ideally your Brix should be between 23-28 degrees, the pH between 3.4-3.7, and the TA between 6-7g/L. Your initial Brix reading, multiplied by .55, will give you a close estimate of your ending alcohol by volume percentage.
- If you would like to use fermentation tannins (FT Rouge, oak dust) or fermentation nutrients such as Opti-Red, add them after measurements and adjustments have been made. Mix any of these ingredients in thoroughly.
- After measurements have been taken and any adjustments have been made, it is time to set yeast if you are using a cultured yeast strain. Follow the yeast set directions on the packet explicitly.
- After you get to temperature and add your yeast, you may cover the vessel lightly with an old sheet or towel or place the lid gently on top of the bucket.
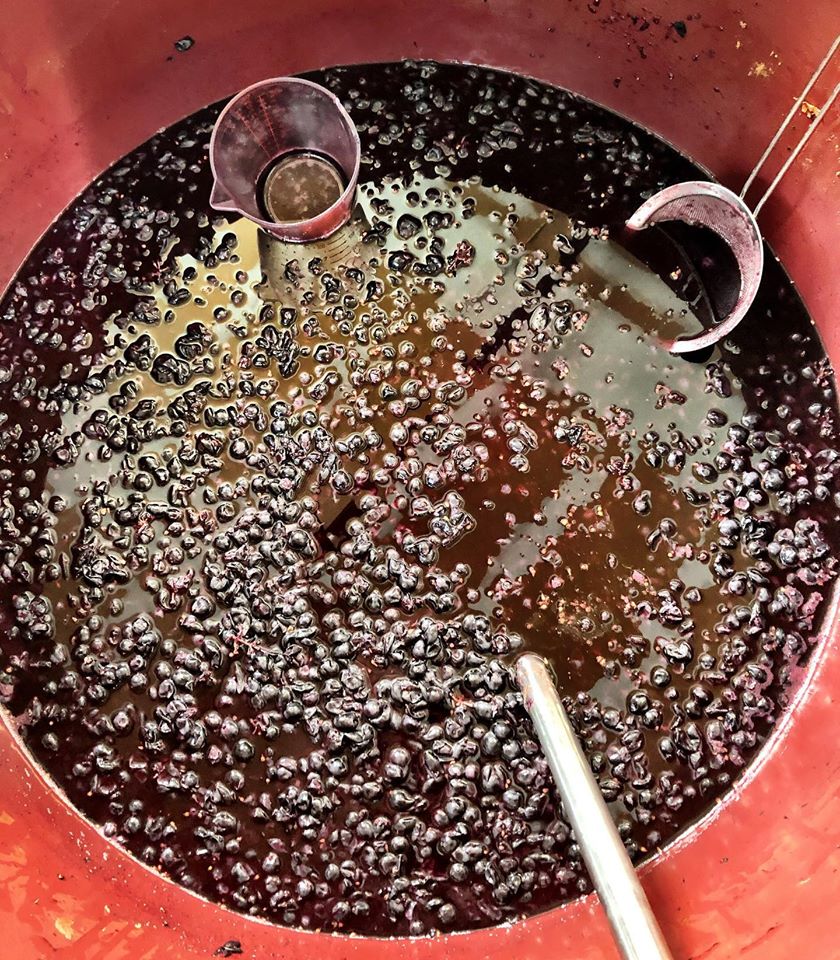
- Obtain a must punch tool, a long stainless steel spoon, or your bare hands, and sanitize your tool or hands with sulfite sanitizer. This is what you will use to “punch down” or mix up the must three times a day. Try to mix everything very well, pushing all of the skins back down to the bottom, getting them very wet, and bringing up the piqued from the bottom. This should be done as often as possible, preferably three times a day. [Before work (7am), after work(5pm), and before bed (10pm)] When punching down every evening, take a sample of the liquid and using your hydrometer, track the Brix depletion. You should notice a drop in Brix daily. Always record your additions to your must, your brix depletion, and punch downs.
- If you are using additional yeast nutrients to assist in fermentation you will add them after fermentation has started. Fermaid O is added at the beginning of fermentation (1 day after yeast set) and Fermaid K will be added at 1/3 depletion of the Brix (2/3 of the beginning amount of Brix). Follow the directions for the individual yeast nutrient, hydrating with water and mixing thoroughly.
- If you are adding malolactic cultures to your wine, you may also chose to do this at 1/3 Brix depletion. Follow all directions on the bacteria and nutrient packets explicitly.
- Punch down and take Brix measurements daily. When your hydrometer reads 0.90, you have fermented to dryness. At this point your malolactic fermentation may still continue, but the primary alcoholic fermentation is complete. You may now press the wine. Wash the press and sanitize using potassium metabisulfite. Again, make sure the press does not have any excessive puddles or lingering amounts of sanitizing solution remaining. Sanitize the receiving container carboy and any pumps or tubing that you may use. Anything that comes into contact with the wine should be rinsed with sulfite sanitizing solution. Place a screen (also sanitized) inside of the press to hold back any extra skins or seeds from getting through. Start scooping up the must and placing it in the press. Some of the liquid will immediately flow through, this is the “free run”. When the press is full, slowly begin pressing. Do not try and press every last drop out of the must as this can lead to seed cracking and bitterness in the wine. Fill each container to within ½” of the top and secure a bung and airlock in place. Malolactic fermentation will exude a small amount of carbon dioxide and there will be trapped gas within the wine that will need to escape the container.
- Allow the wine to sit for 2-3 weeks. You can conduct malolactic chromatography or bring a sample to a winemaker at Musto Wine Grape for analysis to ensure that your secondary fermentation is finished. At this point you should see a nice thick layer of lees in the bottom of the carboy. You will want to place the full vessel onto an elevated surface such as a table and place the new, sanitized, empty vessel on the floor below. Using a sanitized siphon, rack the wine into the new carboy. You may have space at the top which will need to be “topped off” with more wine. You can either use wine from another container, or finished wine to do this. It is very important that there is less than a 1/2” of headspace in each container. At this point you should also add 1/4tsp of potassium metabisulfite per 5 gallons of wine.
- Now it is time to let your wine age. You will need to rack it and add additional SO₂ every 3 months. Make sure you sanitize all equipment and containers when racking and keep them topped off within ½”. Come visit Musto Wine Grape for bottling advice and supplies.
Want to make a Blend instead? Winemaker Rick Lanza suggests trying a 55% Barbera, 35% Petite Sirah, 10% Cabernet blend. It was one of his most popular Wine Club Cuvee’s!
For more winemaking details check out our Winemaking “How to” Videos
Awards Won:
2020 Sunset International Wine Competition – 2018 Lanza Barbera – GOLD – 93 Points
For a delicious food pairing check out our Brasato al Barbera (Beef Braised Barbera) Recipe!
Want to make your own Barbera? Musto Wine Grape Company is New England’s largest supplier for winemaking products and services. From home winemakers to wineries, we’ve got you covered! Give us a call at 877 – 812 – 1137 to speak with someone to get you started.
Wine Grape Spotlight: Mettler Ranch Zinfandel

Wine Grape Spotlight: Mettler Ranch Zinfandel
When making Mettler Ranch Zinfandel you can create a wine with earthy and smoky aromas. Along with a complex medley of flavors including plum, blackberry jam, tobacco, anise, and sweet oak. The sturdy but softly integrated tannins yield to subtle oak notes (if you make an oak addition) as the wine lingers on the palate. These grapes create a wine full of Zinfandel personality! Winemaker Adam Mettler suggests some light French oak to add a little extra complexity.
If you can hold off drinking your wine right away and lay it down for 1-2 years it will only gain more of that zesty, delicious personality. If you’re interested in trying out a different Zin this year, Mettler Ranch is a great choice. Email sales@juicegrape.com or call the office at 877-812-1137 for more details on how to reserve these grapes.
The Mettler Family has been farming wine grapes since the 1800’s. Recognized in the Agricultural Hall of Fame, they are 8th generation grape growers in Lodi, CA. With over 800 acres farmed in Lodi county, some vineyards being upwards of 100 years old, these vines are meticulously managed and maintained. All of their vineyards are LODI RULES certified and some are Certified Organic through the CCOF (California Certified Organic Farmers).
Lodi has a classic Mediterranean climate with warm, dry summers and cool, moist winters. The dry warm summer days allow Lodi grapes to develop full, ripe fruit flavors while the distinctive breezes maintain the natural acidity for structure and complexity in finished wines.
The Mettler Zinfandel is sourced from their vineyards by the Mokelumne River, referred to as “Old Lodi.” The soil is sandy and this sub appellation is known for being an epicenter for Old Vine Zinfandel. The vines are 50 years old, sustainably farmed, and certified through LODI RULES.
Making Mettler Ranch Zinfandel (5-6 gallons):
Ingredients:
- 2-3 cases (36lbs) of Mettler Ranch Zinfandel grapes
- 1.6 gms of Potassium Metabisulfite
- 3mL of Color Pro
- 1 – 6gal package of Go-Ferm
- 1 – 6gal package of chosen yeast (see yeast suggestions below)
- 1 – 6gal package of Fermaid K
- 1 – 6gal package of Fermaid-O
- 1 – 6gal package of Malolactic Bacteria
- Optional Additives:
- 1 – 6gal package of Tannin FT Rouge
- 1 – 6gal package of Opti-Red
- 1 – 6gal package of Booster Rouge
- .9oz of French Oak Dust
Yeast Suggestions:
Equipment:
- 1- 6 gallon carboy
- 1 – 5 gallon carboy
- 1- 50LTR fermentation pail w/lid
- 1- Crusher Destemmer or utilize Musto’s Crush/Destemm service
- 1- Press
- 2 – Airlocks
- 2- Drilled Bungs to fit Carboys (#7)
- B-Brite
- Potassium Metabisulfite
- Racking equipment
- Hydrometer
- Thermometer
- Ability to test for Total Acidity (TA), pH, and MLF
- Must punch down tool or stainless steel spoon
Winemaking Steps:
- Sanitize and Crush and Destem – Inspect your grapes. Crush and destem into clean and sanitized food grade 50LTR fermenting tub. Always allow an extra 20% of volume for fermentation purposes as the wine will “expand” throughout fermentation. Always rinse your fermentation vessel with a sanitizing strength potassium metabisulfite solution (2oz/gallon or 3tbsp/gallon). Make sure that the sanitizing solution touches all the surfaces of the fermentation vessel and that the vessel is completely emptied out of all sanitizing solution after. Shake free any drops as best you can from the fermentation vessel. Having remaining sulfite liquid in the vessel will prohibit fermentation. Do not rinse the sanitizer off with water after sanitizing as that will reintroduce bacteria to the environment.
- Once all of the grapes are crushed, try to accurately measure your quantity of must. Add ¼ tsp of potassium metabisulfite for every 5 gallons of must that you have. Mix up the must thoroughly.
- ALWAYS record the additions you make to your grape must!
- Wait for 6-8 hours after the sulfite addition and then add color pro to the must. Always mix it with water to create a 10% solution (if you use 5mls of enzyme, mix it with 45mls of water). The water allows it to better circulate throughout the must. Allow the pectic enzyme to work for 12 hours before yeast set.
- Twenty four hours after crushing the grapes, mix the container thoroughly and take and record your measurements. Measure Brix, pH, and TA. If you need to adjust your must at all, this is the time to do it. Ideally your Brix should be between 23-28 degrees, the pH between 3.4-3.7, and the TA between 6-7g/L. Your initial Brix reading, multiplied by .55, will give you a close estimate of your ending alcohol by volume percentage.
- If you would like to use fermentation tannins (FT Rouge, oak dust) or fermentation nutrients such as Opti-Red, add them after measurements and adjustments have been made. Mix any of these ingredients in thoroughly.
- After measurements have been taken and any adjustments have been made, it is time to set yeast if you are using a cultured yeast strain. Follow the yeast set directions on the packet explicitly.
- After you get to temperature and add your yeast, you may cover the vessel lightly with an old sheet or towel or place the lid gently on top of the bucket.
- Obtain a must punch tool, a long stainless steel spoon, or your bare hands, and sanitize your tool or hands with sulfite sanitizer. This is what you will use to “punch down” or mix up the must three times a day. Try to mix everything very well, pushing all of the skins back down to the bottom, getting them very wet, and bringing up the piqued from the bottom. This should be done as often as possible, preferably three times a day. [Before work (7am), after work(5pm), and before bed (10pm)] When punching down every evening, take a sample of the liquid and using your hydrometer, track the Brix depletion. You should notice a drop in Brix daily. Always record your additions to your must, your brix depletion, and punch downs.
- If you are using additional yeast nutrients to assist in fermentation you will add them after fermentation has started. Fermaid O is added at the beginning of fermentation (1 day after yeast set) and Fermaid K will be added at 1/3 depletion of the Brix (2/3 of the beginning amount of Brix). Follow the directions for the individual yeast nutrient, hydrating with water and mixing thoroughly.
- If you are adding malolactic cultures to your wine, you may also chose to do this at 1/3 Brix depletion. Follow all directions on the bacteria and nutrient packets explicitly.
- Punch down and take Brix measurements daily. When your hydrometer reads 0.90, you have fermented to dryness. At this point your malolactic fermentation may still continue, but the primary alcoholic fermentation is complete. You may now press the wine. Wash the press and sanitize using potassium metabisulfite. Again, make sure the press does not have any excessive puddles or lingering amounts of sanitizing solution remaining. Sanitize the receiving container carboy and any pumps or tubing that you may use. Anything that comes into contact with the wine should be rinsed with sulfite sanitizing solution. Place a screen (also sanitized) inside of the press to hold back any extra skins or seeds from getting through. Start scooping up the must and placing it in the press. Some of the liquid will immediately flow through, this is the “free run”. When the press is full, slowly begin pressing. Do not try and press every last drop out of the must as this can lead to seed cracking and bitterness in the wine. Fill each container to within ½” of the top and secure a bung and airlock in place. Malolactic fermentation will exude a small amount of carbon dioxide and there will be trapped gas within the wine that will need to escape the container.
- Allow the wine to sit for 2-3 weeks. You can conduct malolactic chromatography or bring a sample to a winemaker at Musto Wine Grape for analysis to ensure that your secondary fermentation is finished. At this point you should see a nice thick layer of lees in the bottom of the carboy. You will want to place the full vessel onto an elevated surface such as a table and place the new, sanitized, empty vessel on the floor below. Using a sanitized siphon, rack the wine into the new carboy. You may have space at the top which will need to be “topped off” with more wine. You can either use wine from another container, or finished wine to do this. It is very important that there is less than a 1/2” of headspace in each container. At this point you should also add 1/4tsp of potassium metabisulfite per 5 gallons of wine.
- Now it is time to let your wine age. You will need to rack it and add additional SO₂ every 3 months. Make sure you sanitize all equipment and containers when racking and keep them topped off within ½”. Come visit Musto Wine Grape for bottling advice and supplies.
For more winemaking details check out the posts below:
- Adjusting your grape must
- Racking your wine
- Post fermentation tips
- Finning agents and why they help
- Aging your wine
- Finishing your wine
Awards won by Mettler 2017 Lodi “Epicenter” Old Vine Zinfandel:
- 93 Points, Best of Class & Gold Medal – 2019 Los Angeles Wine Competition
- 91 Points – Wine Enthusiast Magazine (February 2020)
- 91 Points & Gold Medal – 2019 Sunset Int’l Wine Competition
- 91 Points – 2019 California State Fair
- Gold Medal – 2018 San Francisco International Wine Competition
If you are interested in purchasing wine grapes or winemaking juices this fall please email sales@juicegrape.com or call 877-812-1137 for pricing and information. We are looking forward to speaking with you about your 2020 vintage!
ONLINE Winemaking Classes!

Musto Wine Grape is Now Offering Online Winemaking Classes!

Musto Wine Grape and Winemaking Professor Frank Renaldi are proud to bring you WinemakingInstructions.com. Take our Winemaker Bootcamp Course or take whichever winemaking instructions classes that interest you the most. With over 45 videos to choose from there is something for everyone! Videos range in price from Free to $19.99 depending on the topic. Check out WinemakingInstructions.com today and get prepped for harvest!
Videos Available at www.WinemakingInstructions.com:
- Introduction to Winemaking
- Cleaning and Sanitizing
- Fermentation Protocol Descriptions
- Storage Vessels
- Washing and Using Used Bottles
- Wines to Blend
- Winemaker’s Bootcamp Bundle
- Corking Wine Bottles
- Degassing Wine
- Electrodes
- Sodium Hydroxide
- Testing for Pectin
- Adding Oak Powder
- Adding Yeast
- Bench Testing
- Blending Wines
- Bottles, Corks, and Foils
- Cold Soaking and Enzymes
- Handling High Brix
- Measuring and Adjusting SO2
- Oaking Your Wine
- pH and TA in Your Wine
Racking Your Wine - Stuck Fermentation
- Wine Faults
- Yeast and Nutrients
- Addressing Sulfur Issues
Back Sweetening - Bentonite
- Bottling Wine
- Filtering Wine
- Making Port
- Malolactic Fermentation
- Measuring Alcohol
- Post Fermentation Adjustments
- How to Make Rose
- Tannins
- Wine Stability
- Working with Barrels
- YAN
- Crushing and Destemming
- Making Wine from Juice
- Measuring and Adjusting Must
- Pressing
Interested in Making Your Own Wine? Give us a call (877-812-1137) or email us (sales@juicegrape.com) and we will help you get started!
How to Set Up Your Home Winery

Setting up your home winery
There are two factors to consider when you decide to build your home winery.
- How much money are you willing to spend to buy more equipment, build rooms, or add air conditioning?
- The second factor is how much room do you have to create your winery?
I converted my entire basement into a winery. But, I did it slowly, one room at a time. Let me walk you through that and see if what I have done could apply to your place for a home winery.

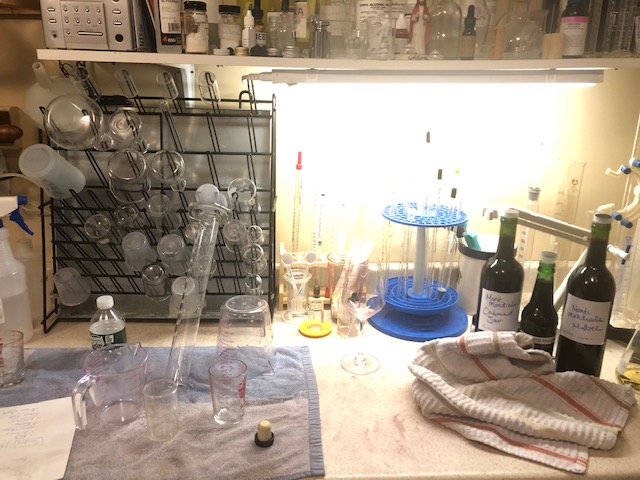
I have a room which holds my variable capacity tanks and carboys. This wine is aging and waiting to be moved into barrels. This room is air conditioned due to poor cellar temperatures at my home. I also have a sink in this room for cleaning and washing. I added a five foot counter to do all my lab work. Wine racks were added to the walls above the tanks to store all my 375ml bottles of port.
The next room I built was a barrel room. I finally took the step to barrel age my reds and have never looked back. The barrel aging makes the wine so soft and complex. I have seven barrels ranging from 15 gallons to 30 gallons. I suggest you stay in this range as a home winemaker. They are easier to handle and clean. You must also remember, you will need wine on “standby” to place into the barrel once you remove the existing wine to bottle. Plan well.

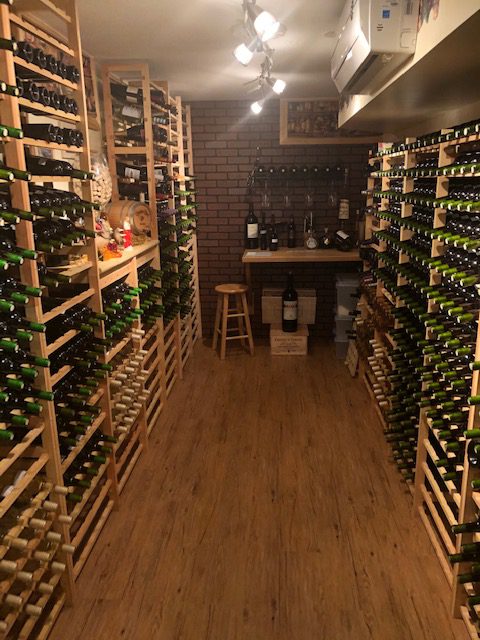
My final room was needed to store all the wine moving out of the other rooms – a bottles storage room. I bought wooden wine rack kits online, and after assembly I bolted them to the walls. I then put down a floor, nice lighting and a bit of decorating to tie it all together. The most critical thing I added was air conditioning, because bottle storage needs four things – cool constant temperature, darkness, proper humidity and no vibration. All the bottles are lying horizontally and peacefully aging.
Besides proper areas to process your wine, you also need the tools to take care of this wine. Some of the “must have” tools are hydrometers, pH meters, pipettes, burrette, stir plate and an SO2 meter. These tools are needed to balance your grapes perfectly before pitching the yeast. They are also needed to adjust and protect your wine as it is aging.
Be sure to have other supplies on hand such as tartaric acid, potassium metabisulfite, fructose, tannins and oak. You will build your supplies and equipment as time goes on. Everything I talked about above will take you a level where you can become a dedicated, creative and proud winemaker!
Written by Winemaker Frank Renaldi
How much wine will my case of California grapes make?

Crates, pounds, liters, gallons, must, finished wine, juice… there’s a lot of terms and volumes floating around in your head during winemaking season. Simplify your life with the following explanation of how much volume you should expect to be getting from your grape order.
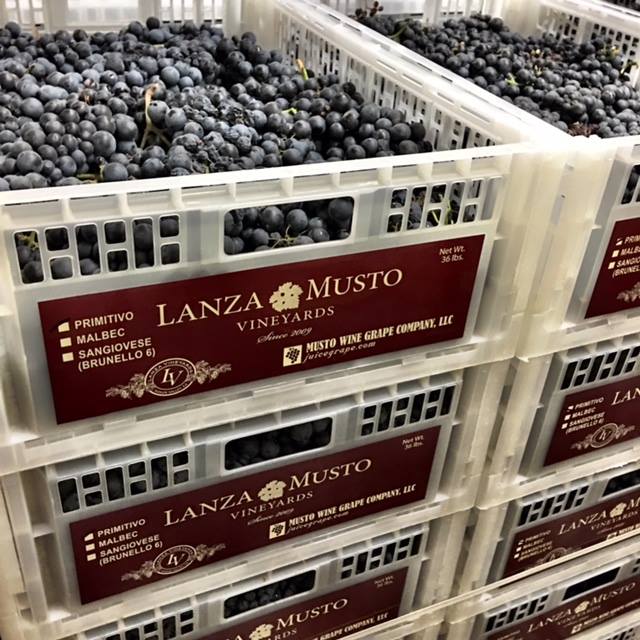
Each case of wine grapes from California and Washington State is 36lbs. Depending on the grape variety, you should yield about 2-2.5 gallons of must per case.
*Keep in mind that all of these are estimates. Some grapes will yield a bit more and some a bit less depending on the variety.*
A good rule of thumb is that 20lbs of grapes will yield roughly 1 gallon of finished wine. So each case should give you about 1.44 gallons of finished wine, equating to about 7 bottles of finished wine generally speaking..
If you want to make 5-6 gallons we suggest using 3 cases of grapes. The extra case will give you room for error when pressing and racking, plus extra wine for topping off during the aging process. If you use only 2 cases of grapes, make sure you have a 5 gallon carboy handy in case you loose a little juice during the winemaking process. You don’t want any headspace in your carboy.
For more information regarding the Fall Harvest please feel free to contact us at sales@juicegrape.com or give us a call at 877-812-1137. We are looking forward to helping you with your next great wine!
Lanza-Musto Vineyards and Suisun Valley Harvest Update {071720}

Lanza-Musto Vineyards and Suisun Valley Harvest Update
as of 07-17-20
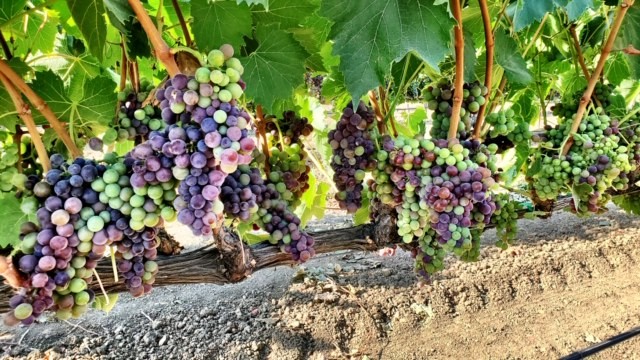
We were able to catch up with Ron Lanza this week. He said, “Harvest in Suisun Valley is looking to be about 1 to 2 weeks earlier than last year. Bud break was 10 days earlier than last year and Mother Nature seems to be keeping up with that trend. We are already seeing color (veraison) in the Brunello Clone Sangiovese vineyards! We have been busy doing a lot of thinning this year and the crop should be the perfect size. The Malbec is looking especially good this season. We are looking forward to sending these great grapes to the East Coast!”

Grape Varieties Available:
- Barbera
- Chardonnay
- Clone 8 (“Valley Cab”) Cabernet Sauvignon
- Clone 15 Cabernet Sauvignon
- Clone 169 Cabernet Sauvignon
- Koch Cabernet Sauvignon
- Malbec
- Muscat Cannelli
- Merlot
- Mouvedre
- Petite Sirah
- Petit Verdot
- Primitivo
- Riesling
- Brunello Clone Sangiovese
- Sauvignon Blanc
- Syrah
- Tempranillo
*All grape varieties are available in 36lb cases or in frozen must by request
Juice Varieties Available:
- Chardonnay
- Napa Gamay (Pink)
- Muscat Cannelli
- Riesling
- Sauvignon Blanc
*All juice varieties are available in 5.25 gallons pails, cold settled, zero additions or balancing done to the juice.
Recent Comments