Musto Crush Crew’s Pumpkin Wine Recipe (6 Gallons)
Create and serve some spooky at your next Halloween party with Musto Crush Crew’s pumpkin wine recipe!
Ingredients:
24 pounds of pumpkin, canned or grated (approx. 2 medium pumpkins or 1 large pumpkin)
6 gallons of Pinot Grigio (Shop here)
12 tablespoons ground cinnamon
6 inches of fresh ginger root
4 tablespoons ground nutmeg
Fructose/Sugar – Depends on the heaviness you are aiming for. 9-18 pounds is standard range. (Shop here)
6 grams of yeast nutrient, Fermaid-K (Shop here)
3 ounces of acid blend (pumpkins are low acid, so you need to add acid to aid in proper fermentation) (Shop here)
6 grams of wine yeast, EC11-18 (Shop here)
Instructions:
If using a fresh pumpkin, wash, peel, and grate/chop the pumpkin. Place pumpkin in your main fermentation vessel. Add your raisins, cinnamon, ginger, nutmeg and water (boiling). Allow to sit overnight.
Next, add the fructose/sugar, acid blend, and yeast nutrient. Stir until sugar is dissolved. Incorporate yeast into the mixture and stir. Stir daily until fermentation reaches zero (specific gravity of 1.040) – which usually takes about 3-5 days. The mixture should begin to bubble and a mild yeast smell should occur. Read more about Brix here (link)
Once the first fermentation is complete, the pumpkin should have turned into must. Strain and collect the rest of the juice from inside the must by squeezing. Use a racking cane auto siphon to siphon into your secondary fermentor and airlock. (Which airlock would be best?)
Rack at 3 weeks, and then every 3 months for a year. At one year, bottle and let age for at least a year.
Want to make more of you own wine? Musto Wine Grape Company is New England’s largest supplier for home winemaking products and services. We’ll get you set up with all of your juice, grape and equipment needs and have you on track to making your own perfect pairing. Visit juicegrape.com or give us a call at (877) 812 – 1137 to learn more. We look forward to hearing from you!
Cold weather fermentation
Brrr… it’s starting to get cold outside! Especially here in New England.
In the Northeast we get the joy of experiencing four distinct seasons. Harvest time is filled with lots of excitement in the air during the warm days and cool nights… but when the warm days start to turn into cool days too, things can get a little more complicated if your wine isn’t done fermenting.
But once the alcoholic fermentation slows down and eventually ends, if the malolactic fermentation (MLF) hasn’t finished and your wine is in a pretty cold (or even cool) location, it can be difficult to get MLF to finish. A half completed MLF can pose some issues in and of itself: delayed SO2 additions, persistent fizz, and stability issues down the road.
So what can you do to ensure you have as smooth a fermentation as possible that isn’t TOO quick, yet doesn’t drag on for too long?
- Choose earlier ripening varieties if you live in cold regions and/or the place you ferment your wine is in a cold place like a basement/cellar.
- Try co-inoculation as your method of malolactic fermentation.
- Use space heaters as needed. These can be placed in small spaces with your barrels to prevent MLF from slowing down or even stopping entirely.
- Choose a fast fermenting yeast strain.
What are the potential results of making wine in cold weather?
- Stuck alcoholic fermentation
- Stuck malolactic fermentation
- Unintentional cold stabilization (this can be positive or negative depending on the wine and style you’re attempting) as it can affect the TA even when you don’t want the TA to move, whether upwards or downwards.
Remember to keep a careful eye on your fermentations as they happen, because you can catch sight of a slow or sluggish fermentation caused by cold weather before it’s too late. Happy fermenting, and remember to keep your aging vessels bundled up and warm enough to keep that fermentation going strong.
Winemaking with Italian juices
Let’s make wine from Italian juice… at home!
Many winemakers wait all year for their annual Italian juice pickup at Musto. Despite the fact that they may be able to find some of these juices from California, they look forward to knowing that they will be able to make wine that hails from Italy itself.
There’s so many juices to choose from:
- Amarone- cooked cherries, dark plums, cherry liqueur
- Barolo- tannic, rose aroma
- Brunello- cherry, blackberry, tannic
- Chianti- red fruit, dried herbs, herbaceous
- Dolcetto- plum, blackberry, cocoa
- Lambrusco- fruity, blackberry, bright red fruits
- Montepulciano- red plum, thyme, baking spices
- Moscato- sweet, fruity, aromatic
- Nebbiolo- rose, cherry, leather
- Nero D’Avola- cherry, plum, licorice, tobacco
- Pinot Grigio- lemon, lime green apple, bright and crisp
- Sangiovese- tart cherry, strawberry, plum
- Trebbiano- peach, lemon, apple
- Valpolicella- cherry, cinnamon, chocolate
For winemakers who don’t have access to a crusher, destemmer, or press, making wine from Italian juices is a great way to get the joy of making your own wine with less steps and less mess.
So how can you start making your own wine from Italian juices? Follow these steps and you’ll be on your way!
- Choose an Italian variety that speaks to you.
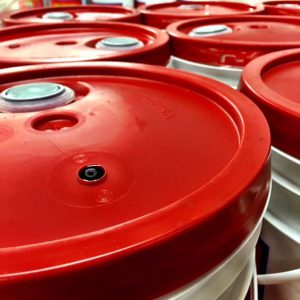
- Come to Musto Wine Grape and pick up your pail of juice.
- Bring it home, pop open that lid, and add 1/4 tsp potassium metabisulfite to it. Add pectic enzyme if you’re going to (5 drops per gallon of juice). Give it a stir.
- Allow it to come up to room temperature – we’re talking 60 degrees or so.
- Choose your fermentation vessel: will you keep it in pails or ferment in a carboy or demijohn? Make sure everything is clean and sanitized. *Be sure there is enough room to account for fermentation foaming*
- If you are going to add fermentation tannins or additives (like oak dust, Booster Rouge, Booster Blanc) you can add that now. *Note: do not add tannins such as FT Rouge within 8 hours of adding enzyme*
- Pitch the yeast once the temperature has reached at least 60F. Yeast strain choices will vary depending on the juice you choose – ask a winemaker at Musto Wine Grape for a strain recommendation for the varietal you’re making. Follow the yeast starter directions explicitly. Be very careful of temperatures, never adding yeast if there is more than a 18 degree difference between the yeast starter liquid and the juice.
- Carefully monitor the fermentation by checking Brix levels daily. Add yeast nutrients as needed if you choose to do so.
- If you are adding malolactic cultures to your wine, you may also chose to do this at 1/3 Brix depletion. If using a malolactic nutrient (Opti-Malo Plus) with the bacterial culture, hydrate the nutrient in a separate container from the bacteria and add to the must directly before the addition of the bacteria. Follow all directions on the bacteria and nutrient packets explicitly.
- When the fermentation is complete, rack off the lees and continue aging. Many Italian wines are aged with oak – if you choose to do this, you can do so in oak barrels or with oak alternatives (such as chips or staves).
And there you have it! Delicious Italian wine that you made in your own home. There’s nothing more rewarding than having a glass of wine you made with juice from a reliable source.
Feeling inspired? Come down to Musto Wine Grape and pick up some Italian juice. But don’t wait too long – we are fast approaching the end of harvest time. Pick up everything you need and and be on your way to kicking back as you sip on a glass of homemade Italian wine. Who knows, maybe you’ll even make Frank’s Chicken Fettuccini Alfredo to accompany it!
Working with Washington State fruit
Washington state is producing some of the best wine grapes around.
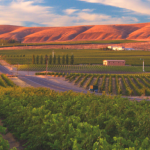
A combination of a long growing season, perfect climate, and know-how on the part of the state’s growers have led this region to grow world class fruit. At Musto Wine Grape we carry some delicious Washington State wine grapes, including Cabernet Sauvignon, Cabernet Franc, Merlot, and Pinot Noir.
What to expect from Washington fruit
Structure, bright red fruit, great tannins, concentrated flavors.
Where is our Washington fruit from?
We source from Rattlesnake Hills (notable for its elevation, which is higher than most other WA AVAs), Wahluke Slope (ripe and full bodied wines full of varietal character hailing from one of the driest and warmed WA locations), and Red Mountain (known for growing some of the state’s most highly acclaimed fruit, known less for its New World ripe fruitiness and moreso for its big, rich, terroir-driven resulting wines).
- D80 – for big, structured reds
- D254 – bring out ripe fruit, jam, and cedar notes
- RP15 – to bring out red fruit and mineral notes
Fermenting recommendations
Consider adding FT Rouge or oak dust to function as your “sacrificial tannins.” Using tannin additives during fermentation can help the grapes themselves to retain their tannin which in turn helps to sustain the resulting wine’s structure and color. Adding fermentation tannins do not add oak flavor – so if you do want to oak your wine, you would do that during the aging process.
Washington fruit is known for being lower in YAN so be sure to make some nutrient adds if need be. Try Fermaid O and/or Fermaid K
Are you excited to work on your Washington state grapes? Reach out with any questions you may have about the grapes you purchased through us at Musto Wine Grape!
pH probes: Basic care and storage
When it comes to setting up your home wine lab, there is a lot to learn. You’ll discover that the proper care of something as basic and simple seeming as your pH probe will make a world of difference when it comes to producing reliable, repeatable numbers. Even if you don’t have access to any other means of wine testing at home, having a pH meter is a necessity.
Do
- Store your pH probe in the proper storage solution
- Calibrate your meter – and use fresh calibration solution each time
- Rinse the electrode before and after use. You may see salt deposits form – this is OK, just rinse them off too.
- Be gentle at all times
Do not
- Store your pH probe in distilled water.
- Mix any of your buffer solutions with one another. This may seem obvious but it’s easy to get a drop of one into the other if you’re not paying attention.
- Hit the pH probe against anything. This is especially important if using a stir plate and magnetic stir bar – don’t let it hit it!
- Pour buffer back into the bottle after use
Tips
Kimtech wipes are delicate tissues that reliably clean up liquid and small particulate from sensitive lab equipment such as pH probes. They’re a great addition to any home lab.
A probe can look clean but be contaminated with various coatings – this is why consistent cleaning and proper storage is very important for continued accurate readings.
You will need to replace your probe over time regardless of how well you take care of it, but the more carefully you clean and store it, the longer it will last.
Muscat: An ancient and beautiful grape variety
Fruity. Floral. Aromatic. Golden. Perfumey. Unique.
Meet Muscat.
What’s so great about this grape? With tons of variations and seemingly even more names, it’s known all over the world for producing an absolutely delicious wine.
It can be made dry, sweet, or even fizzy. With its beautiful floral aromatics (think orange blossom, white flower, honeysuckle) you’re bound to make a wine that impresses!
Muscat Winemaking Recipe
- Crush/destem and press your Muscat into your fermentation vessel
- Add potassium metabisulfite to kill off any native yeast present on the grapes
- Let sit for 12 hours.
- Add Cinn Free and stir well.
- Add Booster Blanc and Opti-White to the juice.
- When the juice reaches about 65 degrees, pitch your yeast. QA23, Vin13 and Alchemy I are good options for keeping the aroma in this wine alive and bright.
- When you see the Brix drop by 2-3, add Fermaid O and mix well.
- Check Brix daily – when Brix drops by 1/3 of the starting number, add Fermaid K
- Rack off gross lees when alcoholic fermentation is complete and add potassium metabisulfite
Helpful tips:
- Don’t lose out on Muscat’s incredible aromatics by exposing it to excessive oxygen. Be sure that as soon as alcoholic fermentation has completed that it’s not sitting out without an airlock.
- Focus on yeasts with the most aromatic potential
- Since this is low acid grape, you’ll want to retain any acidity or semblance of freshness present within the finished wine. Do this by preventing malolactic fermentation from occurring (which can drop the acid) by being sure to add potassium metabisulfite as soon as fermentation ends.
- Consider sweetening your muscat if you’re looking to try making a wine style different than fermenting to dryness.
Musto’s Wine Analysis Services
If you’ve ever found yourself wondering…
- How do I get accurate numbers on my wine samples?
- Can I trust the readings I’m getting?
- How do I even do this test?!
…fear not! Musto Wine Grape Company can happily assist you with all of your wine analysis needs.
What analyses do we offer?
- Brix, pH, TA
- Free and/or total SO2
- Alcohol
- MLF
- YAN
- Sensory analysis
Why is analysis important?
- Knowing the Brix, pH, and TA of your juice sample is the most important first step pre-fermentation. Depending on these numbers you may need to acidulate (add acid) or ameliorate (add water) to your must or juice before initiating fermentation.
- SO2 levels will indicate how well protected your wine is. You may need to add more or less depending upon the reading.
- Alcohol % (ABV) is an important number to confirm, especially if looking to confirm the final number for a wine label.
- The presence of malolactic bacteria will indicate whether or not MLF has completed in your wine.
- YAN numbers will tell you the amount of yeast assimilable nitrogen levels will help you decide how much nitrogen/nutrients you may want to add throughout the alcoholic fermentation.
- Sensory analysis entails our highly knowledgeable and skilled staff conducting a taste test on your samples. This is especially helpful if you are looking to see how to improve upon your current wine, or how to sharpen your winemaking skills for future vintages.
Interested in getting your wines analyzed at our lab?
Great! There’s one of two ways to get your samples to us:
- Drop by to say hello and give them to us directly. You can fill out a lab analysis form from our website to bring in with you.
- Send them in with the above lab analysis form. Be sure to include all of your contact information!
Any other questions? Give us a call at 860-278-7703. We’re always happy to help you make your wine the best it can be!
How to Pick a Press
How to Pick a Press
Which kind is right for you?
One of the most visually iconic and useful tools in winemaking is the wine press. It is the device that will separate the solids and skins from the precious juice or fermented wine. There are a couple different kinds you have to choose from, though they are at their core the same in that they use pressure to push hard against the skins to extract the remaining juice or wine that has not already become separated from the skins.
But upon investing in a wine press, how does one select a size and style? Here are some tips on selecting your first wine press:
Picking a Style
There is more than one way to press a grape! For home winemakers, there are two main styles of wine press that you can choose from: ratchet press or a bladder press.
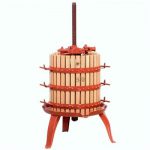
- A ratchet press often has wooden sides and lid that hold in the grape must with a steel center rod and bottom juice tray. The grapes are loaded into the center of the press and large blocks are stacked on top of make up any lost volume. Then the lid is ratcheted down, applying vertical pressure from the top down upon the grapes. This style of press does an excellent job with extraction. The user must be careful not to exert too much pressure on the must as they are liable to crack seeds, which can release bitterness into the wine.
- A bladder press is similar in shape to a ratchet press but operates differently. Bladder presses have metal sides and lids to hold in the grape must along with the traditional metal bottom. They work via water pressure. Simply attach a garden hose to the inlet valve and the water will inflate a center bladder which exerts horizontal pressure against the grape must. This style of press exerts more gentle and even pressure to the grape must. The press must be filled up to the top to avoid “mushrooming” and bursting the center bladder.
Considerations
Choosing a reasonable size
When selecting a new press, the size options can be overwhelming. There are many different sizes of press, often measured in liters. Always take into account the must volume versus your end produced volume. If you anticipate to make 10 gallons of finished wine, you should anticipate on having 12-13 gallons of must, as the skins take up an additional 20% of the volume. You can always fill the press multiple times, but you should average at least an hour per press fill. Rather than do a huge load and then a much smaller one, it is preferable to split up each load so they will be pressed in roughly equal amounts. This will aid in giving the pressed juices/wines more uniformity.
Will your production size increase over time?
Also factor in the possibility of growth when selecting a press size. Winemaking is contagious and you may want to increase your batch size when you begin to drink your delicious results! It’s often wise to purchase a slightly larger ratchet press to accommodate for growth. If you purchase a slightly larger bladder press than what you may currently have for must, you can add rice hulls to the must to increase volume to properly inflate your bladder.
Other considerations
If you’re not a “sanitation is key” winemaker (and hopefully you are!) then a ratchet press may not necessarily be the best of these two choices. Since wood is porous, if you don’t remain cleanly every step of the way, then you may find yourself dealing with some very unwanted spoilage bacteria down the road. Getting a stainless steel bladder press will make it easier for you to be certain that every surface is completely cleaned and sanitized both pre- and post- use.
A wine press is a fundamental tool in home winemaking. It can dramatically increase your yield and quality. Knowledgeable staff at Musto Wine Grape can help you pick out the press that is the right fit for you!
The Joys of Racking Your Wine
The Joys of Racking Your Wine
Racking your wine is a necessary evil.
We know it can be tedious, but in the end it is so worth it.
Things to keep in mind when racking:
- Cleanliness: We cannot express this enough. The cleaner your cellar, the less risk you have of spoilage, the better your wine will be. Aka SANITIZE EVERYTHING!! (however if doing MLF rinse with hot water as not to agitate the ML bacteria)
- Primary Racking: Rack after your primary fermentation is complete. This protects your wine from any initial microbial fermentation issues.
- Secondary Racking: Rack after fermentation has finished. At the second racking you will want to rack your wine into an aging vessel. Whether that is a stainless steel tank or an oak barrel. Don’t forget to sulfite, unless you are doing MLF.
- Third and/or Fourth Racking: Is used more clarification purposes.
- Using a pump makes life so much easier. You can pretty much sit back and relax with a glass of wine while your juice in being transferred. If you don’t have a pump the best way to rack is by using a siphon and the gravity method. Put the primary vessel up some place high and rack into your new vessel.
Christina’s Black Muscat Rosé Recipe
Working with a new grape for the first time can be a little scary. But having a recipe to use a jump off point can help ignite creativity and make the winemaking go a lot smoother. Check out Christina’s Black Muscat Rosé Recipe for some Rosé winemaking inspiration.
Black Muscat Winemaking Recipe:
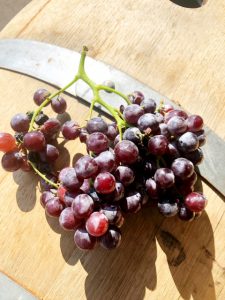
- Crush the Black Muscat into vat
- Add Potassium Meta to kill native yeast, let sit for 12 hours
- Add Cinn Free, stir must, let sit for another 12 hours
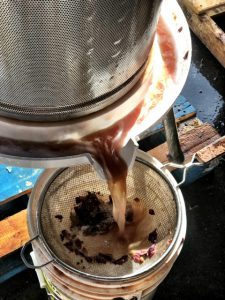
- Press juice after 24 hours on the skins
- Add Booster Blanc and Opti White (dilute in spring water, mix like pancake mix, dump into must, mix up)
- Pitch yeast after 24 hrs on skins, make sure juice is at 65 degrees. If not let it warm up. Use VIN13 yeast.
- Next Day: Add Fermaid O
- Monitor Brix levels daily
- At 1/3 of a drop in Brix (10-8 Brix) add Fermaid K
Please Note:
The color might be light. It darkened up over time. And if it doesn’t darken up enough to your liking I have some “pixie dust” that will help with the color during the aging process. Also, after fermentation I added Noblesse at my first racking. This is because I thought the acid was a little high and it helped soften the mouthfeel. Every year is different, so you might not need to do this. Taste it after fermentation and then decide.
Wine Tasting Notes:
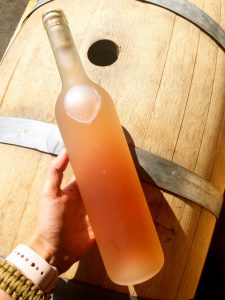
On the nose there is passion fruit, guava, sweet strawberry, sweet cherry, and papaya. The aromatics continue through the palate with a touch of crisp acidity. As a dry wine this light bodied Rose is full of complexity and flavor. If you’re more of a sweet winemaker, adding about 1-2% Residual sugar to this wine would make for a very aromatic and balanced sweet wine.






Recent Comments