What is Cold Soaking?
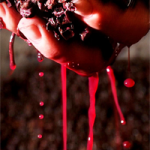
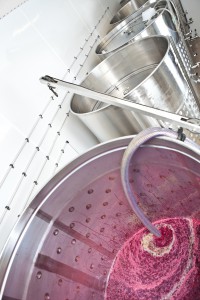
Cold soaking, also known as pre-fermentation maceration, is a winemaking technique that is widely used in the production of red wines. It involves holding crushed red grapes at a low temperature and takes place before fermentation.
Why should I be cold soaking?
Cold soaking red grapes such as Pinot Noir, Cabernet Sauvignon, Merlot, and more has many benefits. The aim of a cold soak is to extract more aromas, aroma intensity, and color from the skins of the grapes. In red wines, it makes for a more intensely fruity and deeper-colored wine; but it also makes for a fuller wine with increased palate weight. For example, in Pinot Noir, cold-soaking extracts the softer, more supple tannins to help produce a silky mouthfeel. It also helps emphasize the lush fruit notes like dark cherry and plum. Yum!
But wait; there’s more: Firstly, time in a cold soak, even a brief one, lets a winemaker get a much better handle on the fruit at hand, enough time to get a tank thoroughly mixed, time for any raisins in the fruit to reveal their sugars, time to get more trustworthy readings on basic wine chemistry than the numbers grabbed in the rush of fruit delivery. And second, extracting some goodies early in the cycle leaves open the option of pressing slightly early and working off the last few Brix in barrel, again minimizing the influence of nasty seed tannin.
How do I do it?
It is important to maintain a chilled temperature because if the must gets too warm it can begin fermenting. To properly cold soak, you need to maintain a temperature of about 35-45 degrees Fahrenheit. This could be difficult for home winemakers without a chiller system. Try using dry ice or ice tubes ser in the wine to the wine as cold as you can. Remember, the point of the low temperature is to be sure the yeast cannot get started.
This is usually done for about 5 days, though the length of time varies according to the winemaker’s goals and the grape variety. You should add enzymes to help the extraction move along, and sulfur dioxide to inhibit unwanted microbial activity. Using inert gas to prevent oxidation is also a great idea. Inert gases, known as carbon dioxide, nitrogen, and argon are necessary for winemaking. They are used to supplant air in places where air could come into contact with the wine.
Need help with cold soaking your grapes?
Musto Wine Grape Company is here to help. Give us a call at (877) 812-1137 to speak with one of Musto’s Crush Crew members. We’re here to provide you with the best quality wine grapes, juices, and equipment, as well as the support to ensure you are successful in making the wine of your dreams!
EC-1118 Wine Yeast: Product Spotlight
What makes EC-1118 so great?
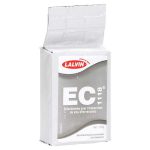
EC-1118. It’s an excellent strain to be used in a wide variety of wines. This includes red and white, including sparkling, fruit wines, late harvest wines and cider. It has a strong competitive character that will inhibit wild yeasts, and restart stuck fermentation due to it’s great alcohol and sulfate tolerance. Being a very neutral yeast, it will have very little effect on the varietal character of the grape. It ferments fully, and flocculates well, producing compact lees. It has extremely low production of foam, volatile acid and hydrogen sulfide (H2S) and it ferments well over a wide range of temperatures (50 to 86 degrees Fahrenheit), making it one of the most favorable and popular wine yeasts.
Considering EC-1118 for your next wine batch? Click here to be directed to our store to purchase online, or call us at (877) 812 – 1137 to place an order with one of our associates. We can also provide a step-by-step instructional for re-hydrating your yeast and adding it to your wine. Whether you’re a newbie home winemaker or a pro, we’re here to help!
A Guide to Malolactic Fermentation
Malolactic Fermentation, also known as Secondary Fermentation or “Malo”, is the process in which Malic Acid in the wine converts to Lactic Acid.

What is Malolactic Fermentation?
As stated above, it is the process in which Malic Acid in the wine converts to Lactic Acid. The primary role of Malolactic Fermentation is to deacidify the wine which affects the sensory aspects of wine, making the mouthfeel smoother and it adds complexity to the flavor and aroma of the wine. The deacidification of the wine happens by converting the harsh diprotic malic acid into the softer monoprotic lactic acid. Nearly all red wines go through Malo while only a few whites, like Chardonnay and Viognier, do. One way to recognize if a wine has gone through Malo is if it has a creamy, buttery mid-palate texture. The buttery flavor comes from diacetyl, a by-product of the reaction.
What is Diacetyl?
Diacetyl is a flavor metabolite produced by lactic acid bacteria known as Oenococcus Oeni. Oenococcus Oeni is the main bacteria responsible for conducting Malo, due to its ability to survive the harsh conditions of wine. It is responsible for the production of the sensory aspects noted above. Malo can happen naturally, though often inoculated with the bacteria culture to jumpstart the process.
When does Malo take place?
Malolactic Fermentation can happen in two different ways, during primary fermentation or after. Amid fermentation, it is Co-Inoculation. After fermentation, it is Post-Fermentation Inoculation. Inoculation that takes place after alcoholic fermentation is the most common practice. When you add bacteria cultures like MBR31 after fermentation is complete, it jumpstarts the Malo process. Co-inoculation takes place at the start of alcoholic fermentation, which allows winemakers to focus on other things such as the improvement of flavor development.
What are the signs that Malo is in progress, and how do I know if it is finished?
The best way to identify malo in progress is bubbles! The malolactic activity can be detected by the presence of tiny carbon-dioxide bubbles. When the bubbles stop, Malolactic Fermentation is complete. This can take anywhere between one and three months.
What are the benefits of each method?
Firstly, the benefits of post-fermentation inoculation include better control of the start time duration of Malo. Lessened biogenic amine production leaves the wine unprotected by sulfite for a limited amount of time. This allows less potential for spoilage by other organisms. It reduces the incidence of excessive volatile acidity and enhances flavor profiles and complexity. The benefits of co-inoculation include lower levels of the inhibitory alcohol that are present at the start of Malo, and no need to apply external heating to the ferment due to the heat generated by the yeast fermentation. This results in faster completion of Malo. This means the wine can have sulfite added earlier and reduces the potential for the growth of spoilage organisms. Finally, a bonus is that bacteria added at the start of the yeast fermentation encounter a nutrient-rich environment.
Need assistance with your winemaking process?
Musto Wine Grape Company is here to help. We offer a wide variety of products and services to help you at any stage in your winemaking journey. Email winemaker@juicegrape.com or call us at (877) 812-1137 to speak with someone who can assist you.
Fermenting Tubs: Product Spotlight
Fermenting Tubs: Product Spotlight
Fermenting tubs: we sell a variety of winemaking products, including tubs specifically made for fermenting. Why is a fermenting tub one of the best investments you can make? Choosing the proper vessel to ferment your wine in is extremely important as it effects the quality of fermentation.
What’s so special about our fermenting tubs?
Our fermenting tubs are made of food grade plastic. Did you know if you used a non-food grade plastic pail or tub to ferment your wine in, you can actually poison yourself? This is due to the plastic actually seeping into your wine while it heats up during fermentation! Wild, right?
What are the benefits of using a fermenting tub aside from not being poisoned?
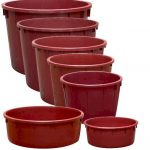
Aside from not being poisoned by your fermenting tub, the way our fermenting tubs are engineered makes a big difference than per say a normal drum or bucket. Our pails gradually get wider going from the base up, giving the must more surface area to breathe. This also helps with any cold spots you may have. More surface area equals better fermentation, better fermentation equals better wine, and we all know what better wine equals!
Do your fermenting tubs come with lids?
Our fermenting tubs do come with lids (sold separately) however; we actually recommend simply using a bed sheet draped over the tub. Why? Let’s revisit the need to let your wine breathe: not providing enough oxygen to your wine can actually give it a rotten egg smell, this is due to volatile sulfur compounds developing in the enclosed space between the wine and the lid. Not only do you want to avoid rotten egg smelling wine, you also don’t want your tub to explode. A closed fermentation tub becomes an incubator, trapping heat with the gasses and BOOM! Now you have must everywhere AND your winemaking room smells like rotten eggs. Yuck. Using the bed sheet instead of the lid will prevent this too.
If you’ve decided to invest in a fermenting tub, visit our store to pick yours up or give us a call at (877) 812 – 1137 to place your order over the phone with one of our sales associates. You can view the sizes and specs of our tubs here.
Post-fermentation tips
Well, you’ve done it – you’ve miraculously turned grape juice into wine.
Brix are at or below 0 when checking on the hydrometer, and it’s time to wrap things up and get your wine on its way to becoming the delicious end result you’ve dreamed of! So what to do first?
Rack your wine off of the gross lees. If you made red wine you’ll be pressing, letting it sit for 1-2 days, and then racking off the heavy gross lees that settle to the bottom. If it’s white wine, there is of course no pressing to be done so you can just rack it right off whatever has settled to the bottom.
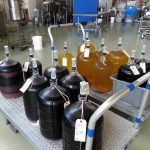
Move your wine into your aging vessel of choice. This could be a carboy, tank, barrel… wherever it will live for the next few months, move it there. Make sure there isn’t head space – oxygen is not your friend here.
Check pH and TA. These numbers will have changed during the fermentation, so your current numbers are different than the ones you logged when your fruit or juice first came in. It’s important to know these numbers, as they will dictate your SO2 adds, aging, and storage conditions.
Taste your wine! Think of this as the wine’s infancy. It’s not going to taste exactly how it will after some aging, but the potential will be there. Get used to how newly made wine tastes.
Is your wine going through MLF? If so, let it complete. You can check its progress using paper chromatography
Add SO2 as soon as MLF has completed. This is imperative and keeps your wine protected.
Filtration. Help clear your wine so it will sparkle in the glass! While this step is not entirely necessary, it will give the wine clarity as well as helping with microbial stability by eliminating any bacteria that may be present.
Setting up your stainless steel tank
Once the home winemaker has mastered the art of getting just the right amount of wine into dozens of different sized carboys, they may be wondering if there is an easier way to ferment and bulk age their wine. Enter the stainless steel tank!
While getting a stainless tank may seem like a big next step, it’s likely one of the best decisions you will make, assuming production levels are high enough. If you’re a home winemaker who has a couple carboys sitting in the cellar, your goal probably isn’t a larger tank. But if you’re making anything more than that, it may just make your life that much easier (and fun!)
A variety of sizes
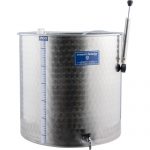
Stainless steel tanks come in many sizes, from 100 liters (26 gallons) to 10,000 liters or more! Unless you’re looking to start their own large scale commercial winery, you’ll likely start your search in the 100L+ range.
Variable capacity or fixed volume
Part of the beauty of stainless tanks is that unlike carboys, demijohns, and barrels, they are oftentimes variable capacity. What does this mean? It means you don’t have to worry about constantly topping up, blending other wines into your batch to allow it to reach the neck of the vessel, the threat of oxidation, or employing inert gas to keep the head space at the top of the vessel blanketed. Some winemakers prefer fixed capacity tanks, but again, the downside is that you really need to stay on top of keeping them full the entire time you’re bulk aging.
Time to set up your stainless steel tank
Setting up your tank is very simple to do. The basic setup will include a stand, valves, tasting valve, and maybe a thermometer and a thermowell. The tank may come with a stand or leveling feet which elevate it from the ground. Even the most simplistic, small tank may come with these, though some will only be basic enough that they get placed directly onto the floor or a pallet. The smallest tanks will not have a manway, since you can easily reach in from the top for cleaning or extracting the juice or must post fermentation. Some will have a valve on the bottom and some will not.
What else might I need to set up on my tank?
-
A manway
-
1 or more valves
-
Sight gauge (plastic tube on side of tank indicating volume in tank)
-
Racking port and drainage port (higher and lower ports, respectively)
-
Gaskets and clamps (most common are 1.5″ / 2″ / 2.5″)
-
Gasket and pump (for variable capacity tank)
Musto Wine Grape is happy to offer a wide range of Marchisio stainless steel tanks, from 100L capacity onward. Come see us and we will be happy to speak with you in detail about what tank is the best for you!
The Winemaker’s Think Tank: Vol 38 – “So my wine is done fermenting, when do I rack it?”
What’s the Winemaker’s Think Tank?
Every Thursday we will post about a few frequently asked questions that our winemaker has answered. If you have a winemaking question you would like to have answered, please email us at support@juicegrape.com and we will try to get into next week’s post. Cheers! 🙂
So my wine is done fermenting, when do I rack it?
After fermentation, the next immediate step is to remove the new wine from its lees, which is the sediment left behind after fermentation. The lees contain dead yeast cells, grape particulates, and maybe even a few fruit flies that could lead to the development of some unpleasant aromas in the wine if not removed. Hydrogen sulfide can be produced from the lees if left in with the new wine. The first racking should be done within a week after fermentation is complete, the sooner the better. The wine should be racked into a sanitized container, with the wine filling the vessel completely, leaving a very little amount of headspace. In a carboy, the wine should go up to the neck of the carboy. After the first racking, the wine should be stored in a cool place. If the wine has been inoculated with Malo-lactic cultures, secondary fermentation will continue after the racking as the bacteria will travel over with the new wine into the new vessel. If the wine is going through MLF, do not add sulfites until this fermentation has been completed. If the wine is not going through MLF, then add a ¼ tsp of potassium metabisulfite per 5 gallons of wine to help preserve the wine. Rack every two months to continue clarifying and purifying the wine. Be sure to add sulfites each time that you rack.
We hope this information helps with your winemaking. If you have any follow up questions or winemaking questions in general, please email us at support@juicegrape.com.
The Winemaker’s Think Tank: Vol 35 – How do I know if fermentation is complete?
What’s the Winemaker’s Think Tank?
Every Thursday we will post about a few frequently asked questions that our winemaker has answered. If you have a winemaking question you would like to have answered, please email us at support@juicegrape.com and we will try to get into next week’s post. Cheers! 🙂
How do I know if fermentation is complete?
It is often easy to see visual signs of fermentation: from activity in the airlock, bubbles, and the formation of a cap to the aromas of yeast and carbon dioxide, the wonders of fermentation are succinct observation. But how does the home winemaker know when the fermentation is complete? The simplest way of seeing if fermentation is complete is to taste the wine and observe if there is any sweetness to it. If there is still sugar that you can taste, the yeast have not yet completed their job. The most accurate and scientific way of seeing if fermentation is complete is to take a measurement of the Brix via a hydrometer. A hydrometer is a glass instrument that reads sugar content via the hydrometers buoyancy in wine juice. The juice sample should always be placed into a sanitary, cylindrical shaped vessel. As the wine ferments, yeast consumer sugar and excrete alcohol, making a thinner, less dense liquid. At the beginning of fermentation, the hydrometer will not sink very far into the wine. The sugars within the juice make it thicker and the hydrometer will float on top of the juice. As fermentation progresses the new wine becomes less dense and sugary, allowing the hydrometer to sink down into the liquid. When the fermentation is complete, the hydrometer will sink down into the liquid to the 0 mark, if not farther. When reading the hydrometer, spin it slightly in the cylinder to dislodge any bubbles that may cling to the sides of the hydrometer. Observe where the meniscus of the wine falls on the gradients of the hydrometer. This will give you your sugar level in degrees Brix of the fermenting wine. When the hydrometer sinks to zero or below, the fermentation is complete and you can rack the wine.
We hope this information helps with your winemaking. If you have any follow up questions or winemaking questions in general, please email us at support@juicegrape.com.
The Winemaker’s Think Tank: Vol 32 – “What do I do if I have a stuck fermentation?”
What’s the Winemaker’s Think Tank?
Every Thursday we will post about a few frequently asked questions that our winemaker has answered. If you have a winemaking question you would like to have answered, please email us at support@juicegrape.com and we will try to get into next week’s post. Cheers! 🙂
What do I do if I have a stuck fermentation?
Sometimes, even though we take great care as winemakers to avoid it, we can get caught with a stuck fermentation. Yeast are incredible creatures, capable of very rapid reproduction, but they do have their limiting factors. It is very important to know the limitations of the certain yeast strain that you are using for your wine. Evaluate your must’s pH to ensure that it is above 3.2, the lower pH environmental threshold for most yeast strains. Take into consideration the alcohol tolerance of the yeast that you selected. If you take the initial Brix level and multiply it by .55, you will have a pretty close estimate of your ending alcohol by volume. Make sure that you haven’t put in a yeast that is unable to handle the rising alcohol levels of the must. Another important factor to consider is the temperature of the must. All yeast strains have a preferred temperature window in which they like to work and reproduce. Because fermentation is an exothermic reaction, check your temperatures (if making reds always take a measurement under the cap) and be sure they haven’t gotten so warm that the yeast may be dying off. The opposite is also true, ensuring that your juice or must have warmed up enough to allow the yeast to begin their processing. Lastly, another important factor to consider in the health of your fermentation is the nutrition of your yeast. Aside from the sugar that they consume, yeast also need proteins, vitamins, and minerals to complete a healthy fermentation. Using a nutrient, such as Fermaid, will give the yeast the other elements needed to properly process the juice.
After the careful evaluation of these factors, you may need to add a small amount of water, nutrients, or heat or cool the must/juice. A winemaker at Musto Wine Grape is happy to help you with the amounts and timing of these additions. If all of these factors have been evaluated and adjusted for, prior to fermentation, and you still have a stuck fermentation, you will need to restart the fermentation. Please contact support@juicegrape.com and a trained winemaker can help you with a restart procedure.
We hope this information helps with your winemaking. If you have any follow up questions or winemaking questions in general, please email us at support@juicegrape.com.






Recent Comments