How to Throw a Blending Party
When throwing a wine blending party think about the style of wine you want to create. Are you looking for a fruit forward blend? Are you wanting a Bordeaux, earthier style blend? Once you decide on the style of blend grab samples of the wines you want to utilize. I’d suggest putting them into unmarked bottles with numbers on them or you can put them into pitchers with numbers on them. With the wines “blind” people will try be more creative and less apt to going for only Cabernet.
Next set up your blending stations.
- Each blending station should have a glass for each wine being used and a glass for the blended wine
- A small pipette
- 100 mL graduated cylinder
- Wine Blending Sheet
- Pen or pencil
Musto’s Wine Blending Sheet
(email cmusto@juicegrape.com for your free download)
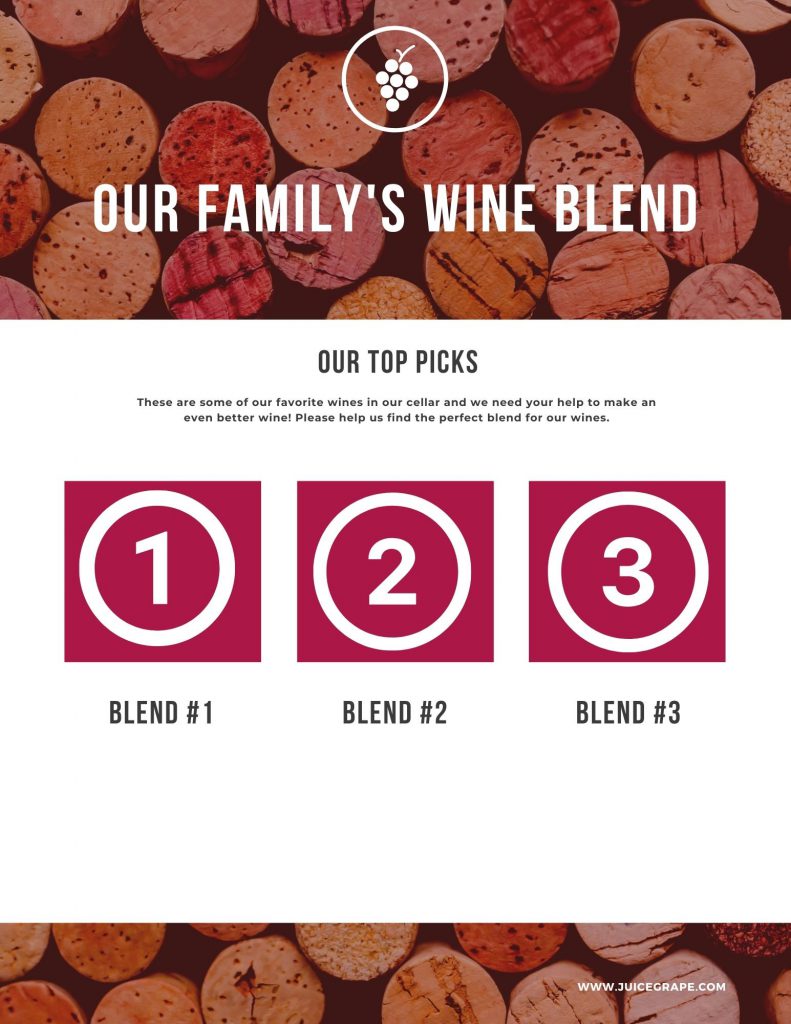
Once you have everything set up it’s time to start blending! Have fun!
Here are a few popular blends to help get you and your family started.
- Bordeaux Blends – Cabernet, Cabernet Franc, Merlot, Petite Sirah, Petite Verdot, Malbec
- Chianti – 75% Sangiovese, usually finished with Barbera
- Super Tuscan – Cab, Sangiovese, Syrah, Cabernet Franc
- Rhone Blends – Grenache, Syrah, Mourvedre, Cinsault, Carignane
- White Rhone blends – Marsanne, Roussanne, Viognier, Grenache Blanc
- White Bordeaux – Sauvignon Blanc, Semillon, Muscadelle
Remember – at the end of the day it’s all about which blend you enjoy the most!
MWG is here to help you make the wine that you love. Below are more blog posts and videos about Blending Wine. Take a look for more wine blending inspiration.
Blog Post: Beginner Blending Wine by Winemaker Chris Pallatto
How to Blend Your Wines Step by Step Video
Photos from a wine blending party with the American Wine Society
Interested in making your own wine? Contact Musto Wine Grape at sales@juicegrape.com or 877-812-1137. Cheers to Winemaking!
7 Tips for How to Prep for the Chilean Wine Harvest
7 Tips for How to Prep for the Chilean Wine Harvest 🍇
1. Clean and organize your winemaking cellar
2. Take inventory of your fermentation supplies and re-stock
3. Check all wines that are aging – top off, make SO2 adjustments
4. Inspect and double check your tools and equipment
5. Decide if you want/need to upgrade or replace any equipment
6. Look over past winemaking notes
7. Bottle any wine you need to in order to free up space for this seasons wines
Have you ordered your Chilean winemaking products yet?
Give us a call at 877-812-1137 or email us at sales@juicegrape.com to get your set up!
Headspace in Your Wine Vessel – What does it mean?
Let’s talk about headspace. Extra headspace in your wine storage vessel leads to oxidation. Oxidation leads to wine faults such as – disappearance of fruit flavors, characteristics like bruised-apple take over, the color starts to brown, and brettanomyces or volatile acidity can start to develop.
However, not all oxidation is bad. If done carefully a little micro-oxidation can give help soften your red wine wine and give it complexity. Also, some wine styles require excessive oxidation like Madera.
But for most wines we want to avoid any excessive oxidation. So how to we do that? Below are a few tips to help avoid oxidation in your wine.
1. Consistently check your aging vessels and make sure they have no headspace and are topped off
2. Limit how much air you wine is exposed to during racking, pump overs, and bottling
3. Keep track of and update your SO2 levels regularly
4. Double check tank gaskets for any leaks before use
5. Use quality corks when bottling wine
We hope these tips help! 🍇🍷🥂 Looking forward to working with you all this Spring Winemaking Season. Have you ordered your Spring Winemaking Supplies yet? Email us at sales@juicegrape.com for more details.
For more on Winemaking Faults visit our sister site WinemakingInstructions.com
Spring Fresco juices
Fresco Juices
Ever bake a cake from a box and it came out delicious? Did you know you could do the same with winemaking?
Mondiale Fresco is proud to be the only product to offer home winemakers their own vineyard in one unique package. Each pail of juice is pre-balanced and adjusted to ensure you have the best winemaking success possible. Just warm up the juice to fermentation temperature and watch it go.
What does “pre-balanced” and “adjusted” mean?
Every season Mother Nature gives us a different wine grape harvest. Some years the acid, pH, and sugars are all in line with each other. Most times they aren’t and there needs to be some slight adjustments made pre-fermentation to ensure top wine quality. The Fresco juices are adjusted so that the acid, pH, and sugar levels are all in balance with each other. This makes for an easier fermentation and, a very pleasing wine.
Depending on the varietal of wine you choose, enzymes and tannins might be added – all pre-measured, and ready-to-go, just open the packet and add to the pail. These add-ons help with wine clarity and mouthfeel, contributing to the “taste like made from scratch”, or in this case, as if fermented on the skins. The Fresco juices are the best juices to work with for busy winemakers. You get the juice warmed up, watch it ferment, age, and bottle.
No muss, no fuss. Just delicious wine.
What varieties are available from Chile?
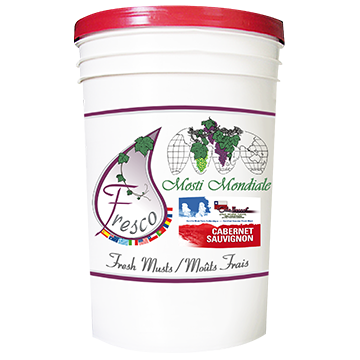
Cabernet Sauvignon:
This Chilean Cabernet Sauvignon offers a beautiful deep ruby colored robe with a predominant bouquet of blackberry and raspberry accompanied by a hint of pepper. Its slightly aggressive attack and long finish on the palate grant this wine the potential for a longer aging period.
Body: Full
Aroma: Fruity, Spicy
Origin: Chile
Winemaker addition: Light Oak
Alcohol: 13.2%
Carmenere:
This variety is considered as the flagship red wine of Chile. This crimson red wine has big character along with soft tannins and spicy undertones all at once. The mouth filling flavors are enhanced by the ever present oak.
Body: Full
Aroma: Fruity, Spicy
Origin: Chile
Winemaker addition: Dark Oak
Alcohol: 13.2%
Chardonnay:
Our golden straw-colored Chardonnay displays a tropical fruit bouquet complete with vanilla undertones. On the palate you’ll find notes of passion fruit and citrus – a well-balanced wine easily enjoyed during a meal or by a cozy warm fireplace.
Body: Full
Aroma: Fruity, Woody
Origin: Chile
Winemaker addition: Light Oak
Alcohol: 13.2%
Chardonnay Semillon
This wonderful blend brings together two halves of a whole into a harmonic union. The Semillon contributes flavors of honey and butterscotch to the Chardonnay’s nuances of tropical fruits and vanilla. A true symphony of flavors.
Body: Full
Aroma: Caramelized, Fruity, Woody
Origin: Chile
Winemaker addition: Dark Oak, Light Oak
Alcohol: 12.6%
Malbec:
Mosti Mondiale’s Chilean Malbec is an unforgettable journey through Chile’s wine country. A beautiful garnet robe, dark red cherry flavors and a nose comprising of cigar tobacco and coffee all combine for a delectable experience.
Body: Full
Aroma: Fruity, Herbaceous, Woody
Origin: Chile
Winemaker addition: Dark Oak
Alcohol: 12.9%
Merlot:
Our Chilean Merlot’s deep burgundy color, violet undertone and almost overwhelming bouquet of ripe red cherries and spices make it a true contender in the Chilean red wines category.
Body: Full
Aroma: Fruity, Spicy
Origin: Chile
Winemaker addition: Dark Oak
Alcohol: 12.9%
Sauvignon Blanc:
Light amber color with a strong citrusy bouquet and herbal undertones. Crisp and clean on the palate, can be enjoyed on its own or with light dishes or appetizers.
Body: Medium Full
Aroma: Fruity, Herbaceous
Origin: Chile
Winemaker addition: Light Oak
Alcohol: 12.4%
Viognier:
A medium-bodied white wine with aromas of freshly picked green apples and apricots that displays a stunningly long and floral aromatic finish. Take a sip of Chile!
Body: Medium Full
Aroma: Floral, Fruity
Origin: Chile
Winemaker addition: Dark Oak, Light Oak
Alcohol: 13%
What varieties are available from South Africa?
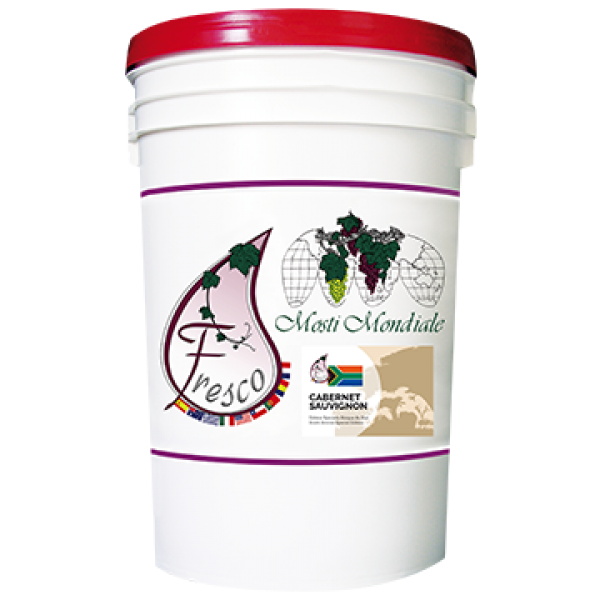
Cabernet Sauvignon
In the world of wines, the Cabernet Sauvignon is one that does not get neglected – and with good reason! The intense mouthfeel coupled with fruity notes of cassis, plums and cherries make this wine an unequivocal master of provoking the senses. Dry, full-bodied and slightly woody arising from the natural overabundance of tannins. If you are courageous enough to set this South African Cabernet Sauvignon aside for 12+ months, it will give new meaning to the phrase “ages like fine wine”!
Body: Full
Aroma: Fruity, Woody
Origin: South Africa
Alcohol: 13.2%
Pinotage
A South African line-up is not complete without a Pinotage. This bold red wine is synonymous with South Africa and it’s no wonder why – its hints of dark and red fruits combine to produce a medley consisting of blackberries, raspberries and licorice on the palate. More subtle flavors include rooibos, tea leaf and flavorful pipe tobacco. The bouquet exudes hints of wood and spices. Relatively high acidity provides a strong finish, making it the perfect pairing for game meats, gourmet burgers and homemade pizza.
Body: Full
Aroma: Fruity, Herbaceous, Spicy, Woody
Origin: South Africa
Alcohol: 13.5%
Sauvignon Blanc
You would be hard-pressed to find a more refreshing wine than a young, crispy South African Sauvignon Blanc. This splendid white wine is made to be enjoyed quite young. The combination of greenish, vegetal and mineral flavors emanating a few weeks after fermentation will make it very difficult to put this one away for a while. Off-dry with a lively acidity and medium finish. Serve slightly cool with light seafood platters.
Body: Medium
Aroma: Herbaceous, Woody
Origin: South Africa
Alcohol: 12.4%
Shiraz
Experience one of South Africa’s most renowned grapes: a dry, full-bodied cherry-red Shiraz with fruity, spicy notes when young. As it ages, subtler flavors like coffee, chocolate begin to take over. The nose slowly develops a hint of charcoal, which adds to the mysteriousness of this classic wine. Enjoy it with company if you really want to share it, but don’t be ashamed of keeping it your own little secret!
Body: Full
Aroma: Caramelized, Fruity, Spicy, Woody
Origin: South Africa
Alcohol: 13.2%
What varieties are available from Australia?
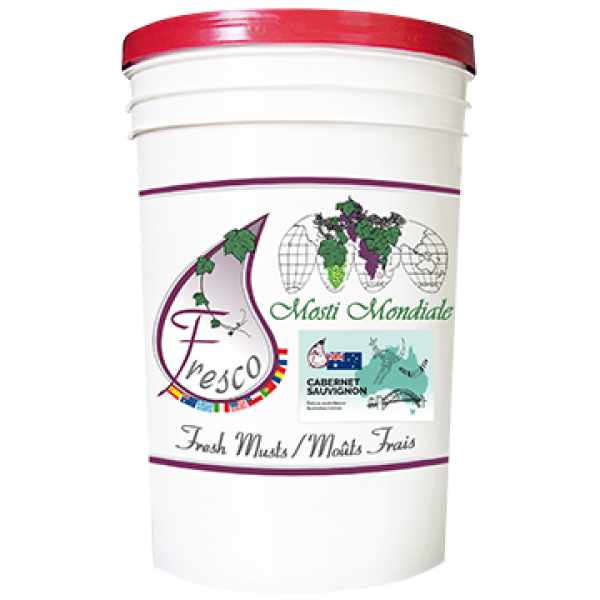
Cabernet Sauvignon
Full bodied deep garnet red. This wine offers up flavors of blackcurrant, blackberries with a slight hint of cedar. The tannin structure of the Cabernet Sauvignon matched with French Oak, create a wonderful symphony of tannins.
Body: Full
Aroma: Fruity, Woody
Alcohol: 13%
Chardonnay
This Australian Chardonnay offers up a complex fruity bouquet, with hints of ripe stone fruit and an underlying citrus note. On the palate it is well balanced with just the right amount of oak enhancing its full bodied flavor.
Body: Full
Aroma: Fruity, Woody
Winemaker addition: Light Oak
Alcohol: 13%
Merlot
Soft and mellow texture right from the start. This Merlot offers hints of cassis with light floral notes.
Body: Medium
Aroma: Floral, Fruity
Winemaker addition: Dark Oak
Alcohol: 12.5%
Orange Muscat
This white wine has citrus and honey notes with a slight sweet finish. On the palate it is fresh and crisp with a lingering clementine flavor.
Body: Light
Aroma: Caramelized, Fruity
Winemaker addition: Sweetener
Alcohol:12%
Petit Verdot
Bold and full bodied, the Australian Petit Verdot offers up flavors of dark fruits; black cherry, plums, with firm tannins and hints of spice.
Body: Full
Aroma: Fruity, Spicy
Winemaker addition: Dark Oak, Light Oak
Alcohol:13.5%
How do I make my own?
Musto Wine Grape Company is here to help you make the wine of your dreams! The Spring winemaking season starts in late April, early May. Secure your winemaking grapes or juices and give us a call at (877) 812-1137 to speak with one of our Musto Crush Crew members. We can get you set up with everything you need and provide customer support along the way to ensure your success!
How to Make Wine from Chilean Winemaking Juice
So how can you start making your own wine from Chilean juices? Follow these 10 Easy Steps (for fresh juice) and you’ll be on your way!
- Choose a Chilean variety that speaks to you.
- Come to Musto Wine Grape and pick up your pail of juice.
- Bring it home, pop open that lid, and add 1/4 tsp potassium metabisulfite to it. Add pectic enzyme if you’re going to (5 drops per gallon of juice). Give it a stir.
- Allow it to come up to room temperature – we’re talking 60 degrees or so.
- Choose your fermentation vessel: will you keep it in pails or ferment in a carboy or demijohn? Make sure everything is clean and sanitized. *Be sure there is enough room to account for fermentation foaming*
- If you are going to add fermentation tannins or additives (like oak dust, Booster Rouge, Booster Blanc) you can add that now. *Note: do not add tannins such as FT Rouge within 8 hours of adding enzyme*
- Pitch the yeast once the temperature has reached at least 60F. Yeast strain choices will vary depending on the juice you choose – ask a winemaker at Musto Wine Grape for a strain recommendation for the varietal you’re making. Follow the yeast starter directions explicitly. Be very careful of temperatures, never adding yeast if there is more than a 18 degree difference between the yeast starter liquid and the juice.
- Carefully monitor the fermentation by checking Brix levels daily. Add yeast nutrients as needed if you choose to do so.
- If you are adding malolactic cultures to your wine, you may also chose to do this at 1/3 Brix depletion. If using a malolactic nutrient (Opti-Malo Plus) with the bacterial culture, hydrate the nutrient in a separate container from the bacteria and add to the must directly before the addition of the bacteria. Follow all directions on the bacteria and nutrient packets explicitly.
- When the fermentation is complete, rack off the lees and continue aging. Many Chilean wines are aged with oak – if you choose to do this, you can do so in oak barrels or with oak alternatives (such as chips or staves).
Want to read more about making wine from Fresh Juice? Check out this blog post.
Can I make my own? Musto Wine Grape Company is here to help you make the wine of your dreams! The Spring Chilean winemaking season starts in late April, early May. Secure your winemaking grapes or juices and give us a call at (877) 812-1137 to speak with one of our Musto Crush Crew members. We can get you set up with everything you need and provide customer support along the way to ensure your success!
The Body of Wine: What is it?
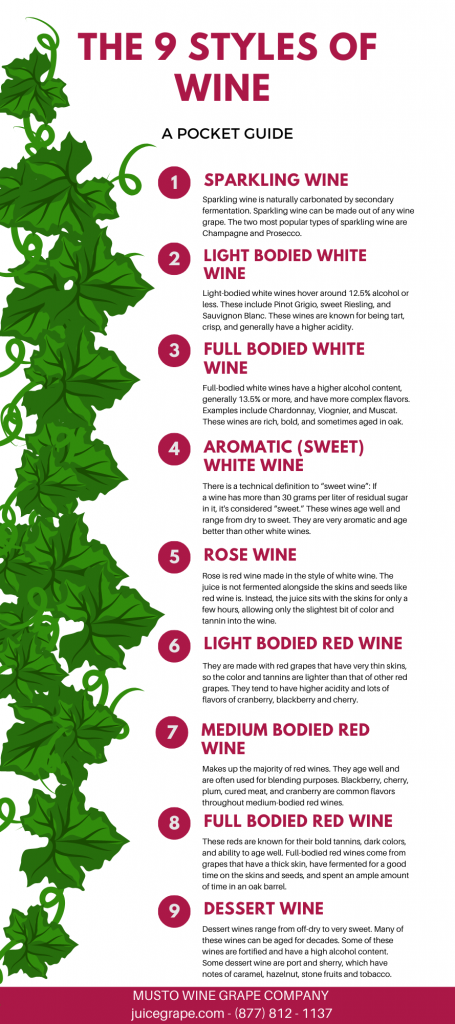
When you are first starting out in the wine-tasting world, you come face to face with the intensity and complexity of certain wines as you taste them. One of the things that your palate will start to recognize is the thickness and texture of the wine in your mouth. We identify this mouthfeel as the body of the wine. It can be difficult to explain a wine’s body because it is not as obvious as sweetness or acidity.
The body of wine can be described in three ways:
When the body of a wine is light, think of drinking a glass of water. It’s thin, goes down easily, and is smooth.
When the body of a wine is medium, think of drinking a glass of skim milk. The consistency is thicker, but not too thick, and sticks around in your mouth a little longer.
Lastly, when the body of a wine is full, think of drinking a glass of whole milk. This would be the thickest, with the longest-lasting finish.
Light-bodied wines
Light-bodied wines are light and delicate on your palate making them popular during the summer because they are crisp and refreshing.
Medium-bodied wines
These wines are known for being “in-between” because there is no true cut off for where they actually sit on the tasting spectrum. Sometimes they can be more light-to-medium bodied, or they can be medium-to-full. These wines are usually the best to pair with food because they have the perfect balance of tannins and acidity.
Full-bodied wines
These robust and powerful natured wines are bold. These would include deep red wines and ports, and these characteristics come from their skins which are packed with tannins. If you taste a full-bodied wine, you’ll notice it leaves a coated finish in your mouth.
What gives a wine its body?
Tannins, sugar, and acids all contribute and determine the overall body of a wine. Something that can help you determine the body of a wine is its alcohol level. Alcohol adds to the intensity and thickness of a wine. The more alcohol that wine has, the heavier it becomes and the bigger mouthfeel it offers. The grape itself determines the body, starting in the skins. Thick-skinned grapes like Cabernet Sauvignon contain a lot more extract than Pinot Noir, which is thin-skinned. Production methods also impact the weight of the wine as well, say if the wine was oaked. White wines tend to be much lighter than red wines, but there can be fuller-bodied white wines – like buttercream chardonnay.
Can I make my own?
Musto Wine Grape Company is here to help you make the wine of your dreams! The Spring Chilean winemaking season starts in late April, early May. Secure your winemaking grapes or juices and give us a call at (877) 812-1137 to speak with one of our Musto Crush Crew members. We can get you set up with everything you need and provide customer support along the way to ensure your success!
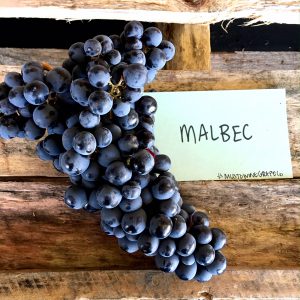
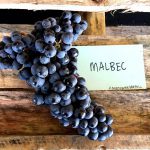
Wine Grape Spotlight – Malbec
Malbec is a grape variety with a deep, inky color, producing dry red wines that boast robust tannins and a long, smooth finish.
Where is Malbec from?
Malbec was almost exclusively grown in France, where it played a primary role as one of the main Bordeaux grapes. The climate and pests in France did not allow for Malbec to perform to its utmost potential. Struggling to thrive, growers saw it as weak, finicky, and susceptible to disease as well as rot. It is mainly associated with Argentina and Chile now because it thrives there. It took well to the climate, excelling in the high elevation and heat, making it one of the most widely planted grapes. In the United States, you can find the majority of wine grape plantings in California, yet Malbec only makes up for 0.5% of those plantings.
Malbec Characteristics
This grape can yield a wide range of fruit aromas that vary widely depending on the climate they are grown in. Cooler climates like France and Washington state yield black cherry, raspberry, and plum aromas. For warmer climates like Chile, you’ll get more blackberry, blueberry, plum, and black cherry. They’re juicy and jammy, with notes of vanilla, tobacco, dark chocolate, and oak. They have medium acid and moderate levels of tannins. Chilean Malbec’s boast with red fruit flavors like cherry, raspberry and have floral and slight earthy notes.
Can I make my own?
Musto Wine Grape Company is here to help you make the wine of your dreams! The Spring Chilean winemaking season starts in late April, early May. Secure your Malbec and give us a call at (877) 812-1137 to speak with one of our Musto Crush Crew members. We can get you set up with everything you need and provide customer support along the way to ensure your success!









Recent Comments